Procom GF RK User Manual
Gf-rk
GF-RK
Reinstallation Kit for GlassFix® Antennas Operating Below
500 MHz
DESCRIPTION
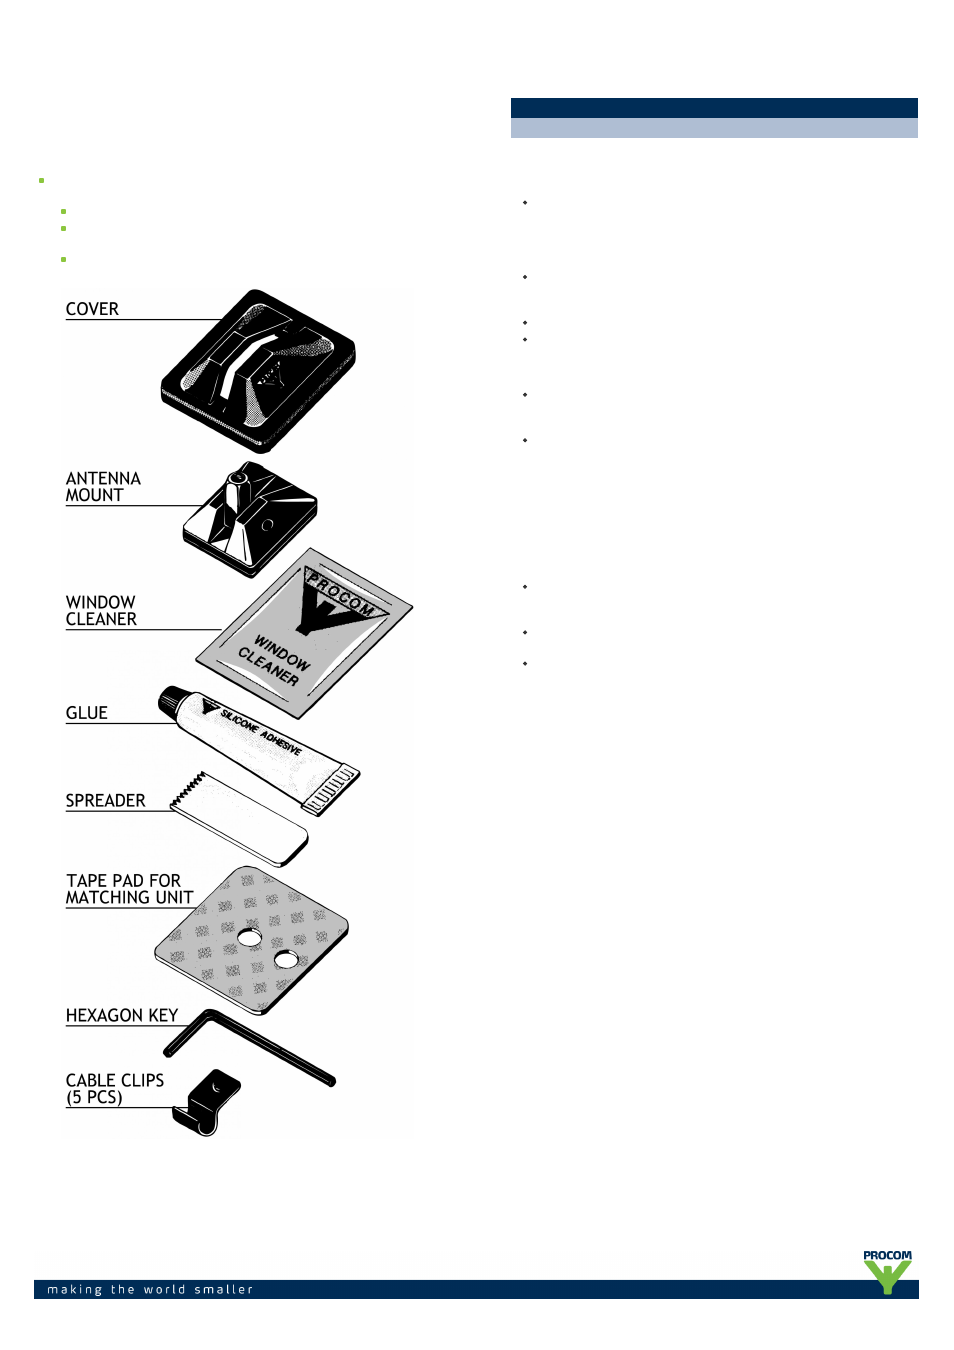
The GF-RK GlassFix® reinstallation kit contains all new parts necessary
to reinstall a GlassFix® antenna. The following tools are necessary:
A knife with a long, bendable blade.
A sharp razor blade with holder (or equivalent) for cleaning/
scraping.
Acetone and a dry cloth.
NOTE
GF antennas are not suitable for car models with windows
that have heat reflective coating.
ORDERING DESIGNATION
TYPE NO.
PRODUCT NO.
GF-RK
1. DISMANTLING AN EXISTING INSTALLATION
The external antenna mount and the internal matching unit are
removed using a knife with a long, bendable blade. While bent, the
knife blade is led in between the glass surface and the unit to be
removed, and with slow, twisting movements the units can be easened
off.
The above process usually leaves a bit of silicone glue on the glass.
These remnants are easily removed using a sharp razor blade,
preferably on a holder.
The old cover and mount are scrapped.
Finish up by cleaning the glass surface with acetone.
2. REGENERATING THE GLASSFIX® ANTENNA
Strip off the double adhesive tape remains on the matching unit. The
old tape may stick very effectively to the printed circuit board surface,
and the tape may have to be scraped off carefully with a knife.
Clean the exposed surface with acetone and mount the new double-
sided tape-pad from the “GF-RK” kit on the unit. Align the tape carefully
while fixing it.
The antenna is now re-established and can be mounted following the normal
GlassFix®mounting procedure.
REINSTALLATION
1. BEFORE INSTALLATION
When selecting mounting location take into consideration: positions of
back view mirror, wiper blade paths and defogger wires (when
mounting on rear window). The driver’s view should not be obstructed.
Max. allowed curvature of the glass surface on the mounting spot is 2
mm deflection per 100 mm length.
Environmental- and car temperature must be above 15° C at
installation, and surfaces to be glued must be dry and clean.
2. INSTALLATION: