Procom MH 1-XR User Manual
Page 2
INSTALLATION
The X and CX antenna types can be mounted anywhere on the car,
however, roof top mounting is always recommended. The oblong X-mount
can be mounted on the often very narrow strip on the rear wing between
the trunk lid and the side of the car. Mounting can take place exclusively
with access from the outside when drilling an 18 mm dia. hole.
Mounting can take place from the inside by drilling a 14 mm dia. hole. When
mounting in a 14 mm dia. hole, remove the bottom plastic ring of the
packing gasket with a sharp cutter. When cleaning the car in car-washing
machines, remove the whip using a spanner, size 9 mm. After wash, refit
the whip and tighten it lightly with the spanner. As the X- and CX-mounts
are internally equipped with a bendable section, the antenna can always be
adjusted to an upright position independent of the tilt angle of the
installation spot (up to 30° tilt). The MiniMag (abbreviated: MM) is a small,
light-weight magnetic mount with a high attaching effect.
A silicone layer applied to the contact surface protects the car roof and
ensures maximum friction. Antennas with magnetic mount should be
mounted in the middle of the vehicle roof to ensure best omnidirectional
coverage.
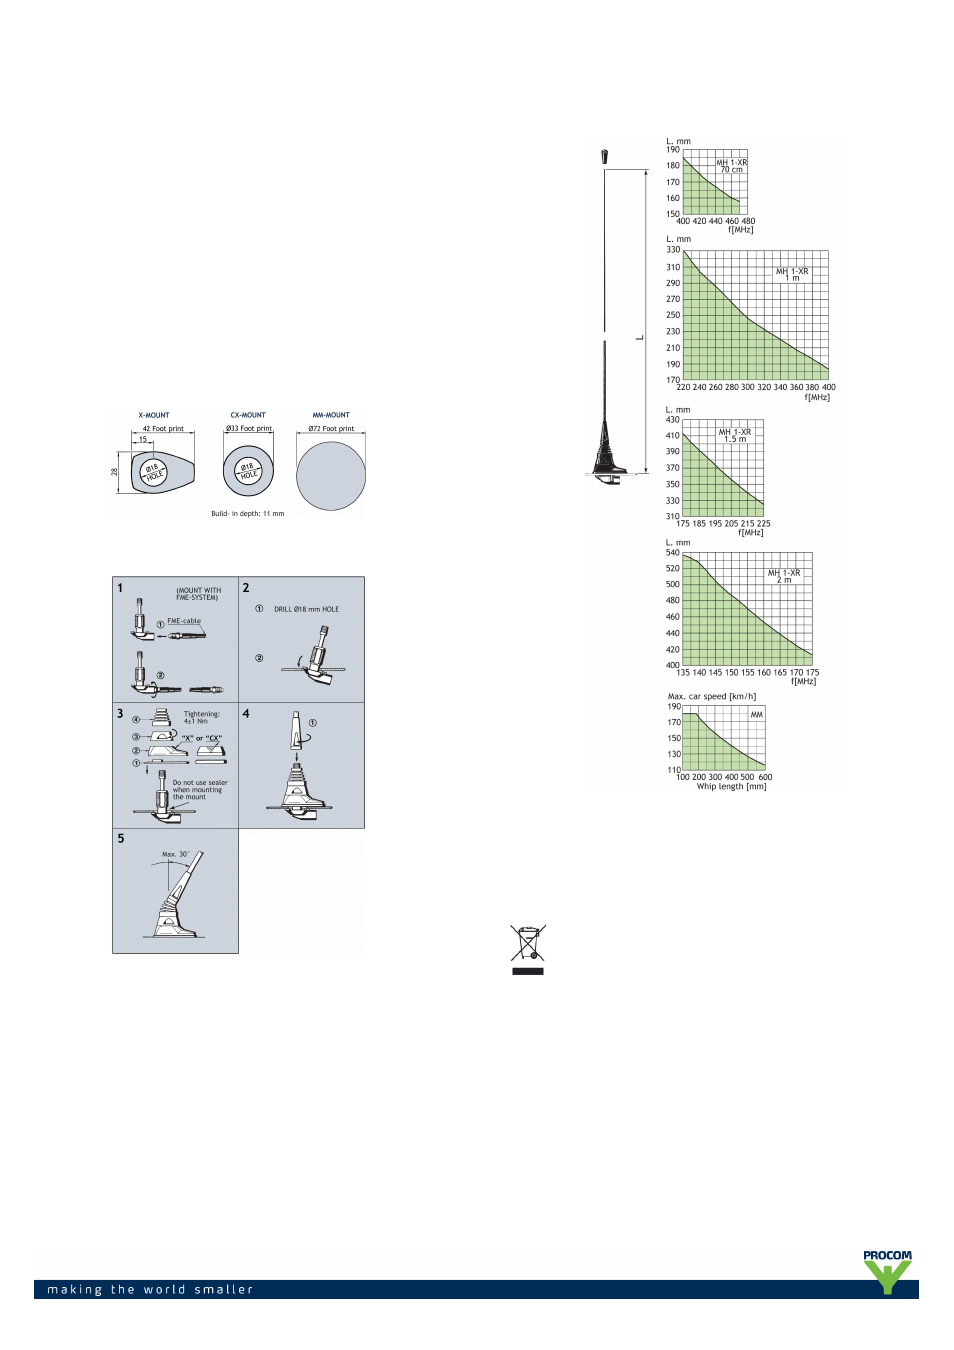
1. INSTALLATION DIMENSIONS
2. INSTALLATION STEPS
Do not use sealer on rubber gasket or other places.
3. TUNING
The antenna should always be tuned using an SWR-meter.
The cutting diagrams below serve as a guide for this procedure.
PLEASE NOTE
For safety reasons: Do not operate the MiniMag with antenna whips longer
than 60 cm. Please respect the maximum car speed limit corresponding to a
particular whip length as appears from the above curve.
PROCOM A/S reserve the right to amend specifications
without prior notice.
28/02/14