6 reset to factory defaults, 7 dipswitch, 8 pairing button – SENA Parani-SD100-200 User Manual
Page 15
15
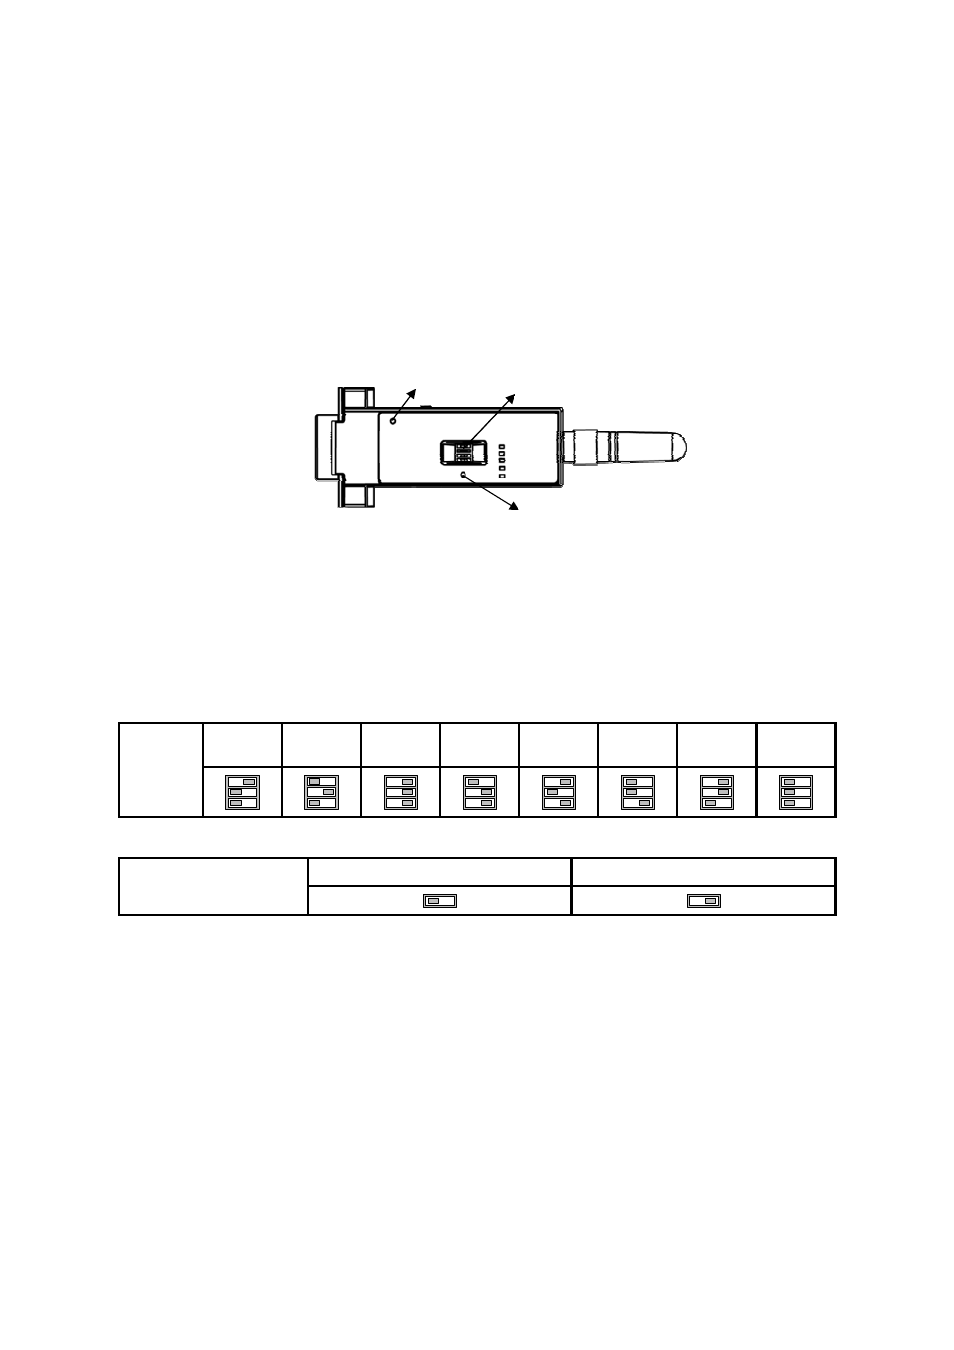
3.6 Reset to Factory Defaults
To set all the configuration settings to its factory default parameters, press the reset button, depicted in
Fig. 1-3. Press and hold (for at least 1 sec) the reset button with a narrow pointed tool like paper clip.
Reset works only when power is on.
3.7 Dipswitch
With the combination of 4 slot dipswitches, baud rate and hardware flow control can be set.
Figure 3-1 The Parani-SD Dipswitch
Upper 3 dipswitches are used for setting the baud rate, and bottom dipswitch is used for setting
hardware flow control option. If the baud rate needs to a baud rate not shown below, ParaniWIN or
terminal program should be used to set these speeds. To set a baud rate not shown below the
dipswitches should be in the S/W Config setting. When in the S/W Config setting the baud rate will go
back to 9600 as default.
Table 3-4 Baud rate Settings by Dipswitches
2400
4800
9600
19.2K
38.4K
57.6K
115.2K
S/W
Config
Baud rate
Table 3-5 Hardware Flow Control Settings by Dipswitches
No Use
Use
Hardware Flow Control
Handshaking
* Note: You cannot set the Parani-SD to a Baud rate of 1200 and 230K by way of the Dipswitch. If you
want to use them, to set these speeds, please configure the dipswitch to S/W Config setting and use
ParaniWIN or AT commands. Please refer to ParaniWIN and Appendix B.3.4
AT+UARTCONFIG,
Baudrate,Paraty,Stopbit.
3.8 Pairing Button
Parani-SD provides Pairing Button for instant configuration without a PC to make an automatic
connection between two Parani-SDs. In this example we will refer to the two Parani-SDs as SD1 and
SD2, respectively. In pairing status, SD changes COD value automatically. (reference S43, S44)
Step 1. Turn on SD1 and SD2 and reset both of them by pressing Reset Button.
Step 2. Press the Pairing Button of SD1 for 2 seconds until Standby LED turns off and Connect LED
Pairing Button
Dip switch
Reset