3B Scientific Fine Beam Tube T User Manual
Page 2
UE307070
3B SCIENTIFIC® PHYSICS EXPERIMENT
2 / 4
LIST OF APPARATUS
1
Fine beam tube on a connector base
U8481420
1
Pair of Helmholtz coils, d = 295 mm
U8481500
1
Tube power supply unit 0-300 V, 0-50 V,
4-12 V
U8521371
1
DC power supply unit, 12 V, 5 A, e.g.
U8521149
1
DC voltmeter, 300 V, e.g.
U17450
1
Set of 15 safety leads
U13802
SAFETY INSTRUCTIONS
The fine beam tube is a thin-walled, evacuated glass bulb.
Handle with care: danger of implosion!
• Do not expose the fine beam tube to any mechanical
stress or strain.
• In order to avoid any mechanical stress or strain, con-
nect only one experiment lead to each contact pin.
Danger: high voltage is applied to the fine beam tube. Avoid
contact with any part of the body.
• Only use safety experiment leads for connections.
• Make the connections only when the power supply unit
is switched off.
• Set up or dismantle the tubes only when the power
supply unit is switched off.
SET-UP
Note:
To get a clearer view of the electron beam, conduct the ex-
periment in a darkened room.
While setting up the experiment, make sure that all power
supply units are switched off and all voltage controls are
turned fully to the left.
Connecting the fine beam tube to the tube power supply
unit:
•
Connect the 50-V output and 12-V output ground sockets
(black) together.
•
Connect the positive terminal of the 300-V output to the
anode (red sockets) and the negative terminal to the
cathode (black sockets).
•
Connect the voltmeter in parallel to the 300-V output.
•
Connect the negative terminal of the 50-V output to the
Wehnelt cylinder (blue sockets).
•
Connect the positive terminal of the 12-V output to the
cathode heater (green sockets).
•
Connect the PE socket of the tube power supply unit to
the PE socket of the fine beam tube.
Connecting the pair of Helmholtz coils:
•
Connect the coils in series to the 12-V DC power supply
unit, as shown in Fig. 3, so that equal current passes
through both coils.
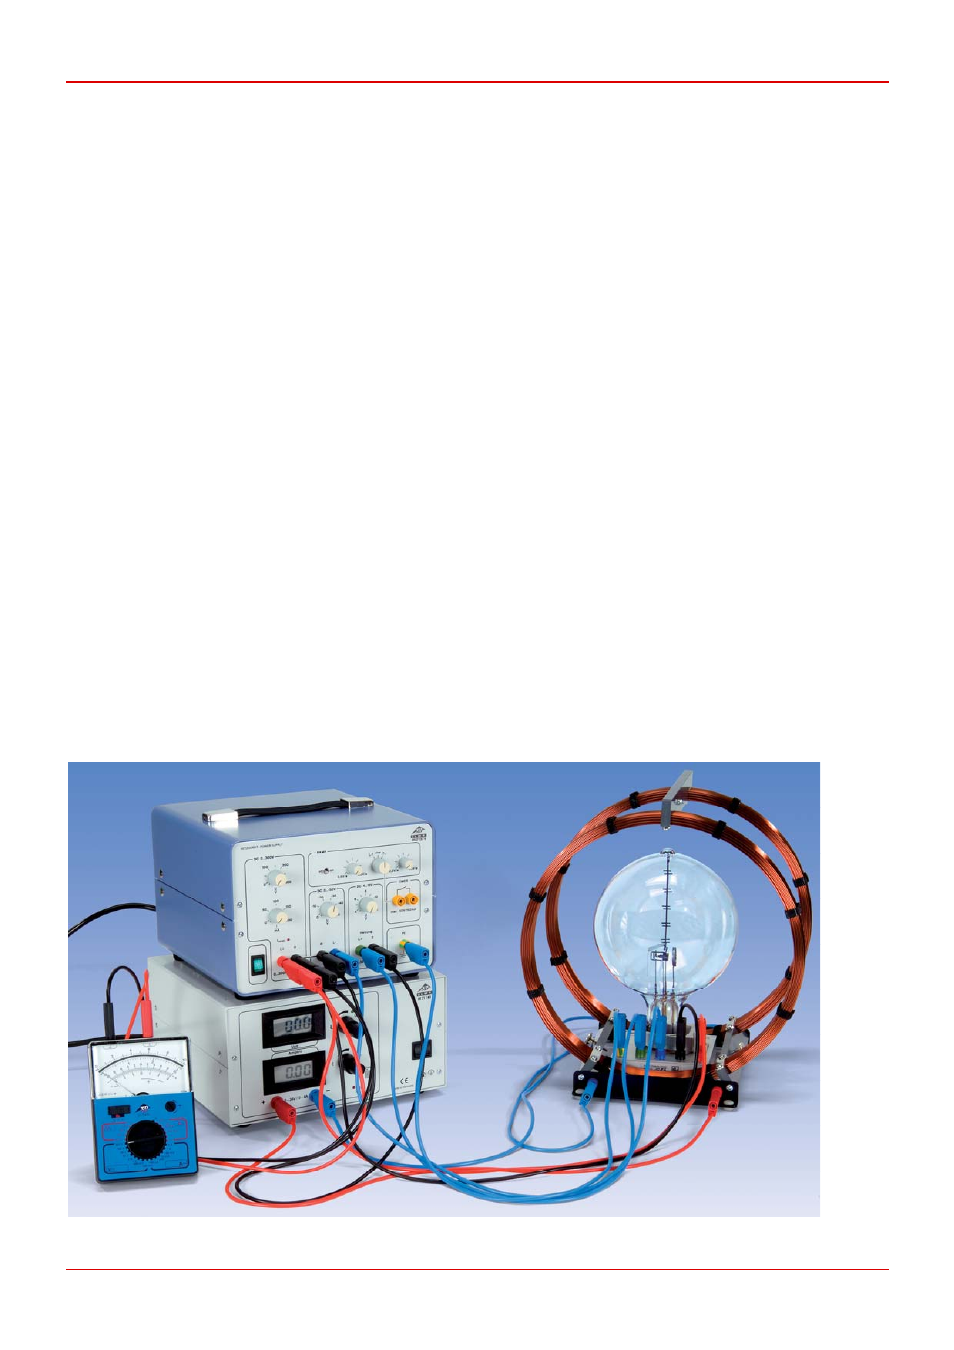
Fig. 2: Experiment set-up for determining the specific charge of an electron