The rear panel – TC Electronic M3000 User Manual
Page 10
88
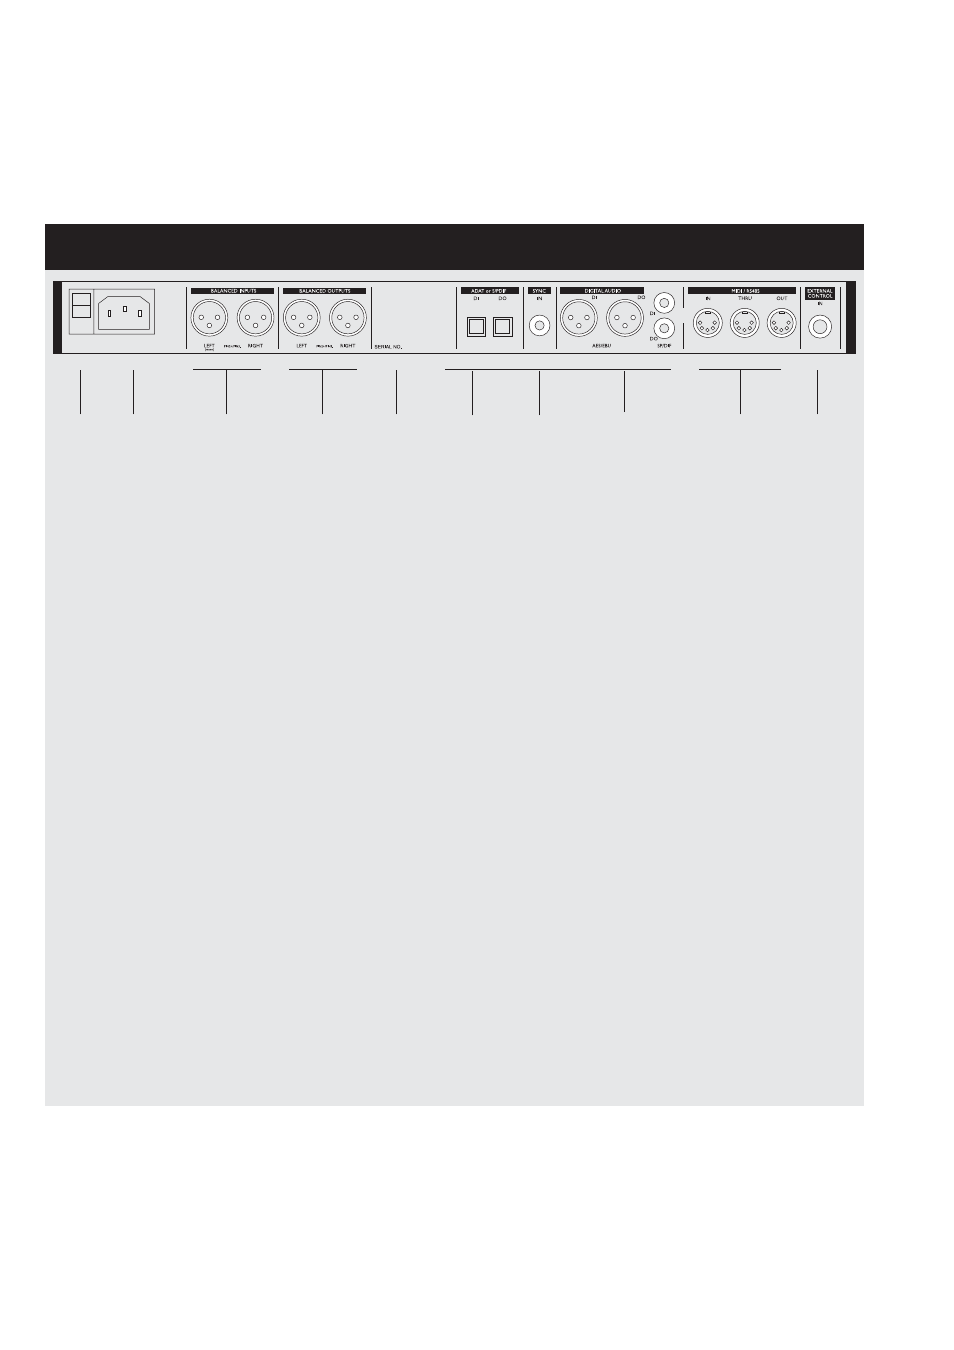
THE REAR PANEL
Notes:
To accommodate international regulations, we have also added a back panel power switch.
You do not need to use the POWER switch on the rear panel. Leave this POWER switch on and use our
Easy-Touch POWER switch on the front.
Be sure to select Channel Input in the I/O display when only one Input is used.
Pin 2 is »hot« on all XLR’s (AES Regulations).
If you are connecting the M3000 to unbalanced equipment, you must tie pins 1 and 3 together in the cable
ends away from the M3000. (Please see Soldering Instructions on page 61).
By connecting a momentary pedal to the External Control Input, you can control any one of four different
features: Engine 1 bypass, Engine 2 bypass, Engine 1+2 bypass or Tap Tempo.
Main
Power
Switch
Power
Input
Balanced
XLR
Analog
Inputs
Balanced
XLR
Analog
Outputs
Serial
no.
Digital
In/Out
AES/EBU
S/PDIF
Wordclock
RCA
MIDI
In,Thru,Out
External
Control
Input
Digital
In/Out
ADAT
Tos-link