Banks Power Ford Trucks: (Diesel ’03 - 07 6.0L Power Stroke) Power Systems- PowerPack & Stinger '03-07 Compatible w_ Optional Banks iQ User Manual
Page 29
96824 v.3.0
29
If not installing the optional Banks iQ,
skip to Section 6.
WARNING: Below 32
o
F (0
o
C) or
above 140
o
F (60
o
C), the Banks iQ
may be susceptible to damage
as a result of extended direct
exposure to sunlight, heat
or extreme cold. It is highly
recommended that the Banks iQ
be removed from its mounting
location if the vehicle will be
subjected to high concentrations
of sunlight, heat or cold for
an extended period of time.
Gale Banks Engineering is not
responsible for damage to Banks
iQ resulting from exposure
conditions
.
CAuTION: Do not use force
when working on plastic parts.
Permanent damage to the part
might result.
1.
Locate the Window Mount
Assembly in your kit.
2.
Assemble the Banks iQ docking
station to the Universal mount by
inserting and sliding the Universal
mount tab into the docking station
groove. Hand tighten the nut behind
the docking station to hold the
docking station in place.
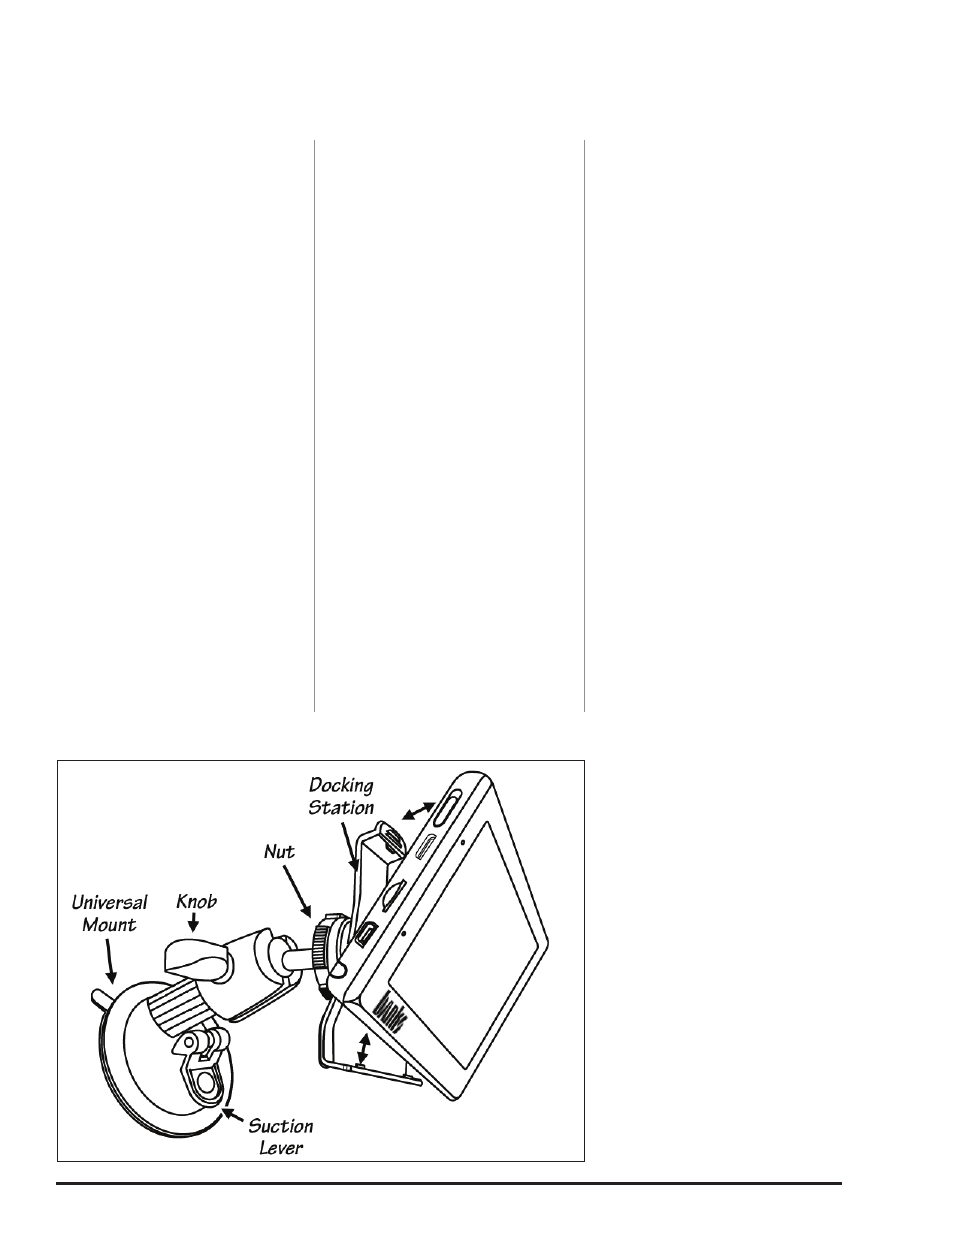
3.
Attach the window mount to your
Banks iQ. See Figure 39. Align and
place the two (2) lower tabs on the
window mount to the corresponding
slots on the bottom of Banks iQ first
then snap the top of Banks iQ into
place.
Note: There may be a snug fit when
installing the Banks iQ into the window
mount. Take care not to force this
process.
4.
Find a suitable place on the
windshield for ease of access and
viewing of Banks iQ. Use location
shown in Figure 40 as a reference
for mounting Banks iQ in your
vehicle. Loosen the knob and move
the swivel suction plate to achieve
desired viewing angle of the Banks
iQ screen. Do a test fit and note
the angle necessary to achieve the
correct viewing angle.
5.
Make sure the suction cup and
the mounting area on the windshield
are clean and dry. With the suction
lever in the up position, ensure
the suction cup is flat against the
windshield, and then push the
suction lever down to secure in
place.
6.
Next, remove and set the fuse
access panel aside. See Figure 42.
Note: For 03-04 models the fuse
access panel is held in place by four
1/4-turn plastic screws.
If applicable, remove the side access
panel to help route wiring to the top
of the dash. See Figure 41.
7.
Locate the Banks OBD II Interface
cable in your kit. This cable has
three connection points. connect
the RED OBD II connector on the
Banks interface cable to the vehicle
OBD II connector. Use a cable tie as
shown in Figure 43 to secure the
Banks interface cable to the vehicle
OBD II connector. Next, connect the
6-pin connector on the Banks OBD II
interface cable to the 6-pin connector
on the EconoMind Tuner harness.
8.
Locate the RJ12 cable (similar to
telephone connector) on your Banks
OBDII interface cable
. See Figure 44.
9.
Locate Banks iQ Bridge Module and
connect the RJ12 connector into the
Bridge Module. See Figure 45.
10.
Route the Banks iQ USB
interface cable from the Banks iQ
Bridge Module under the dash and
out through the fuse access panel
opening. The cable can be slid under
the door frame’s seal and run up
to the top of the dash. Pull enough
cable to reach the Banks iQ and
connect it to the USB receptacle on
the left side of Banks iQ. See Figure
40. Snap the fuse access panel back
in place making sure not to pinch the
wire.
Section 5
MOuNTING AND CONNECTING THE BANkS iQ
Figure 39 Attaching Banks iQ to window mount