Operation, Display, Quick menu bar – Velleman CCTVPROM17 User Manual
Page 7: Recording
CCTVPROM17
V. 02 – 28/08/2013
7
©Velleman nv
7.
Operation
Display
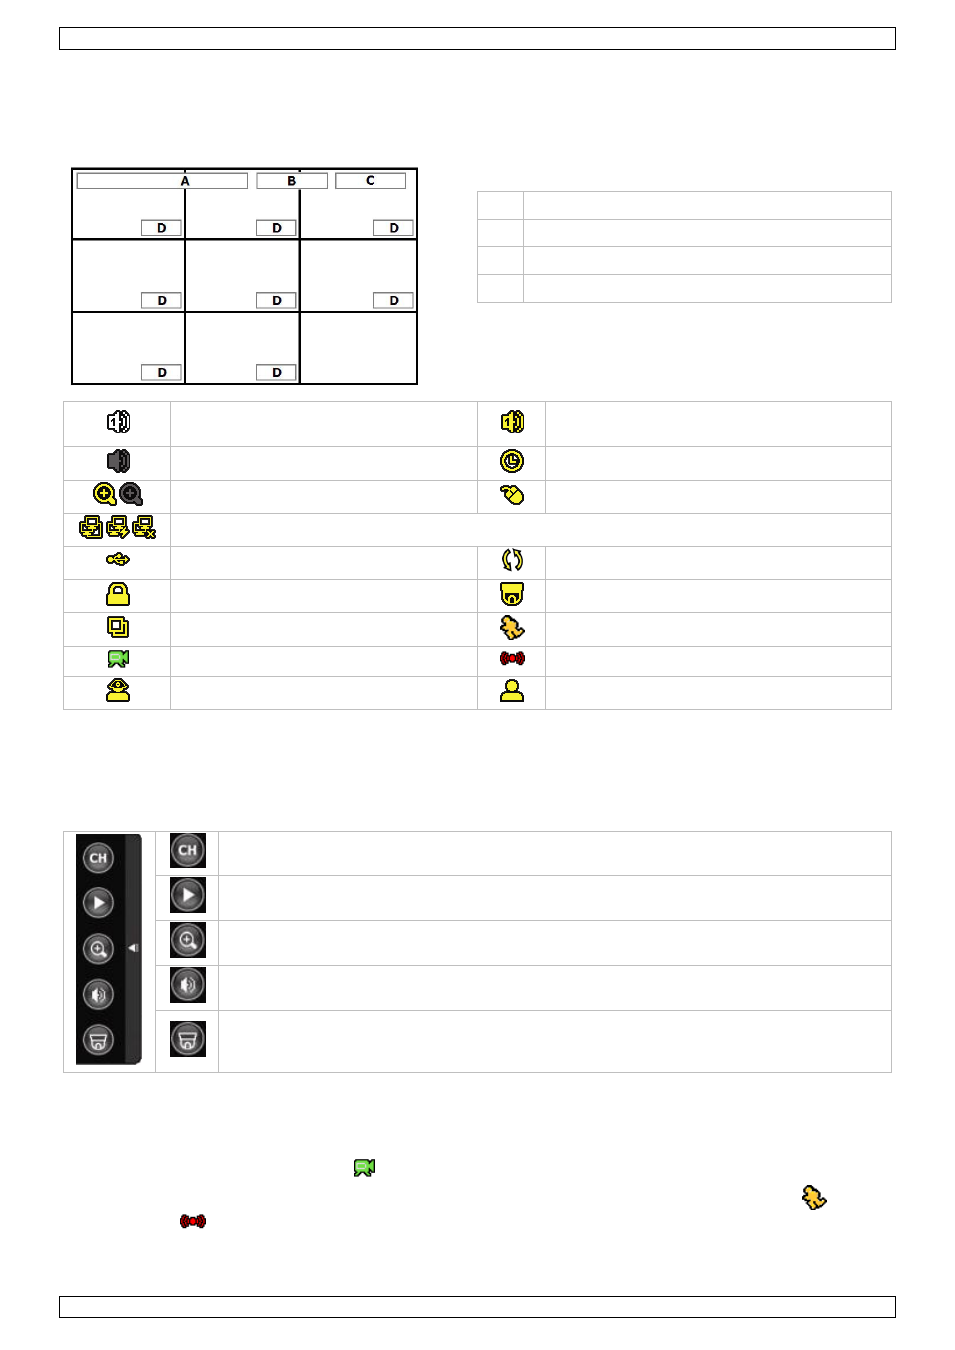
The following image shows the screen layout.
A system date and time
B general system status
C available HDD capacity
D channel status
live audio from audio channel 1-4
(indicated in white)
playback audio from audio channel 1-4
(indicated in yellow)
audio channel unselected
timer recording on
digital zoom on (yellow) / off
USB mouse connected
LAN connected / internet connected / no network connection
USB flash drive connected
overwrite on (default)
key lock on
PTZ mode
sequence mode
motion mode
recording mode
alarm mode
administrator logged on
operator logged on
Note that actual screen icons might differ slightly from the ones shown above.
Quick Menu Bar
Note: Only available when USB mouse is connected.
Move the mouse pointer to the left of the screen to extend the quick menu bar and show the functions:
Open channel switch panel.
Show playback control panel.
Zoom-in mode (select desired channel first before entering zoom mode).
Select audio channel (live mode only live channels can be selected).
Enter PTZ mode and show PTZ control panel.
Recording
1. Check whether the camera(s) is (are) properly connected and a HDD is present inside the device.
2. If the auto-recording and pre-alarm functions are enabled, the device will start recording images.
o
By default, the recording icon (
) is displayed.
o
If the motion or alarm detection is activated and a motion or alarm is detected, the motion (
) resp.
alarm (
) icon is displayed.