Overview – Velleman CCTVPROM17 User Manual
Page 4
CCTVPROM17
V. 02 – 28/08/2013
4
©Velleman nv
Keep this manual for future reference.
DO NOT use this product to violate privacy laws or perform other illegal activities.
4.
Overview
Refer to the illustrations on page 2 of this manual.
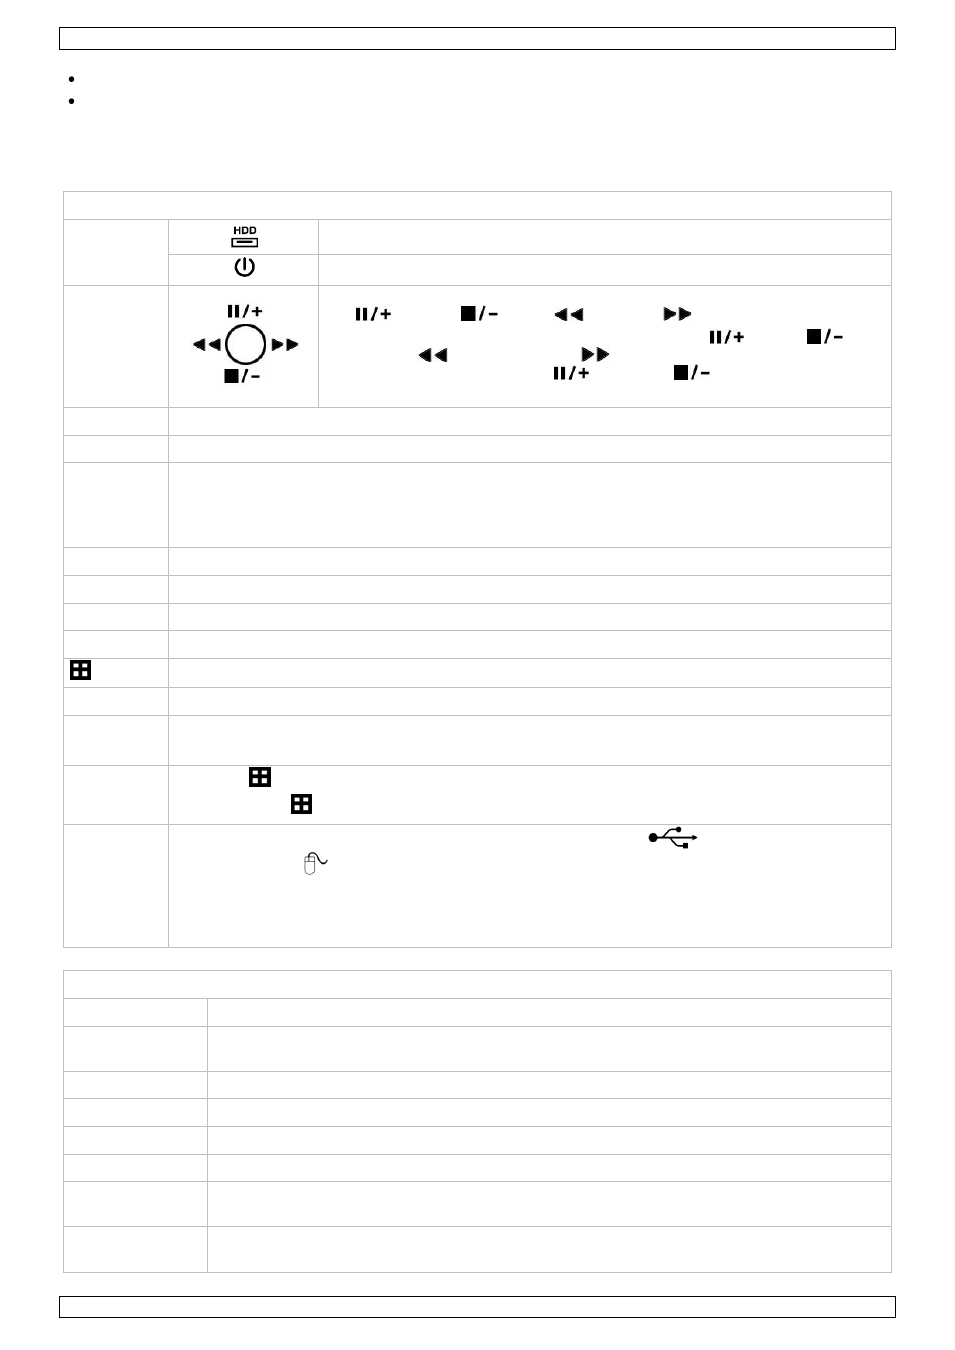
Front panel
LED
indicators
HDD is reading or recording.
DVR is powered on.
NAVIGATE
Press one of the four positions on the navigate button to move the cursor
up (
), down (
), left (
) or right (
).
In playback mode, press the buttons to play/pause (
), stop (
),
fast rewind (
) or fast forward (
).
In setting mode, press the up (
) or down (
) button to change the
setting in the menu.
MENU
Press MENU to enter the main menu.
ENTER
Press ENTER to confirm the setting.
LIST
Press to quickly search the recorded files by event lists: RECORD / MOTION / ALARM / TIME, or
select FULL to show all the event logs.
To quickly search the time you want, select QUICK SEARCH. For more details, refer to the full
user manual.
PLAY
Press to play the recorded video.
SLOW
In playback mode, press to play the recorded file slowly.
ZOOM
In live or playback mode, press to enlarge the image of the selected channel.
SEQ
Press to show all screens sequentially in full screen mode. Press again to quit.
Press to show the multiple channel display mode.
1 – 8
Press a button to select the corresponding channel.
AUDIO
= SLOW + ZOOM
Press SLOW and ZOOM simultaneously to select live or playback audio.
P.T.Z.
= SEQ. +
Press SEQ. and
simultaneously to enter or exit PTZ control mode.
USB port
(2x)
Connect a USB flash drive for video backup to the left USB port (
); connect a USB mouse
to the right port (
).
Note: Do not connect two USB mice or two USB flash drives simultaneously.
Note: For a list of compatible USB flash drives, please refer to the appendices in the full user
manual.
Rear panel
VIDEO IN
8 video input channels to connect 8 external video sources e.g. cameras
MONITOR
1 video output channel to connect the DVR to the main monitor (composite)
Note: You can use the MONITOR, HDMI, and VGA output ports simultaneously.
CALL
connector for monitor specific for sequence display
AUDIO IN
4 audio input channels to connect four external audio sources, e.g. from cameras with audio
AUDIO OUT
1 audio output to connect to an audio device, e.g. a speaker (mono)
LAN port
Connect the DVR to a local network by plugging a network cable into this port.
HDMI
Connect to the HDMI port of a monitor that supports HDMI video output.
Note: You can use the MONITOR, HDMI, and VGA output ports simultaneously.
VGA
Connect to the VGA port of a monitor that supports HDMI video output.
Note: You can use the MONITOR, HDMI, and VGA output ports simultaneously.