Replacing the lamp, Technical specifications – Velleman VTLAMP7 User Manual
Page 4
VTLAMP7
V. 03 – 30/04/2013
4
©Velleman nv
5.
Replacing the Lamp
Refer to the illustrations on page 2 of this manual.
1. Unplug the device and let the circular fluorescent lamp cool down before replacing it.
2. The lamp is located behind a plastic diffuser and is held in place by six plastic clamps.
Remove the 10 screws [x] that hold the plastic diffuser in place and gently remove the diffuser.
3. Carefully take the defective lamp from the clamps and the connector, and remove it.
4. Install a new lamp (order code LAMP22/7) by connecting it and securing it in the plastic clamps.
5. Put the diffuser back and fasten its screws.
Caution: If the plastic diffuser is damaged, disconnect the lamp immediately from the mains. The diffuser is
not replaceable. Do not use the lamp with a cracked or broken diffuser.
6.
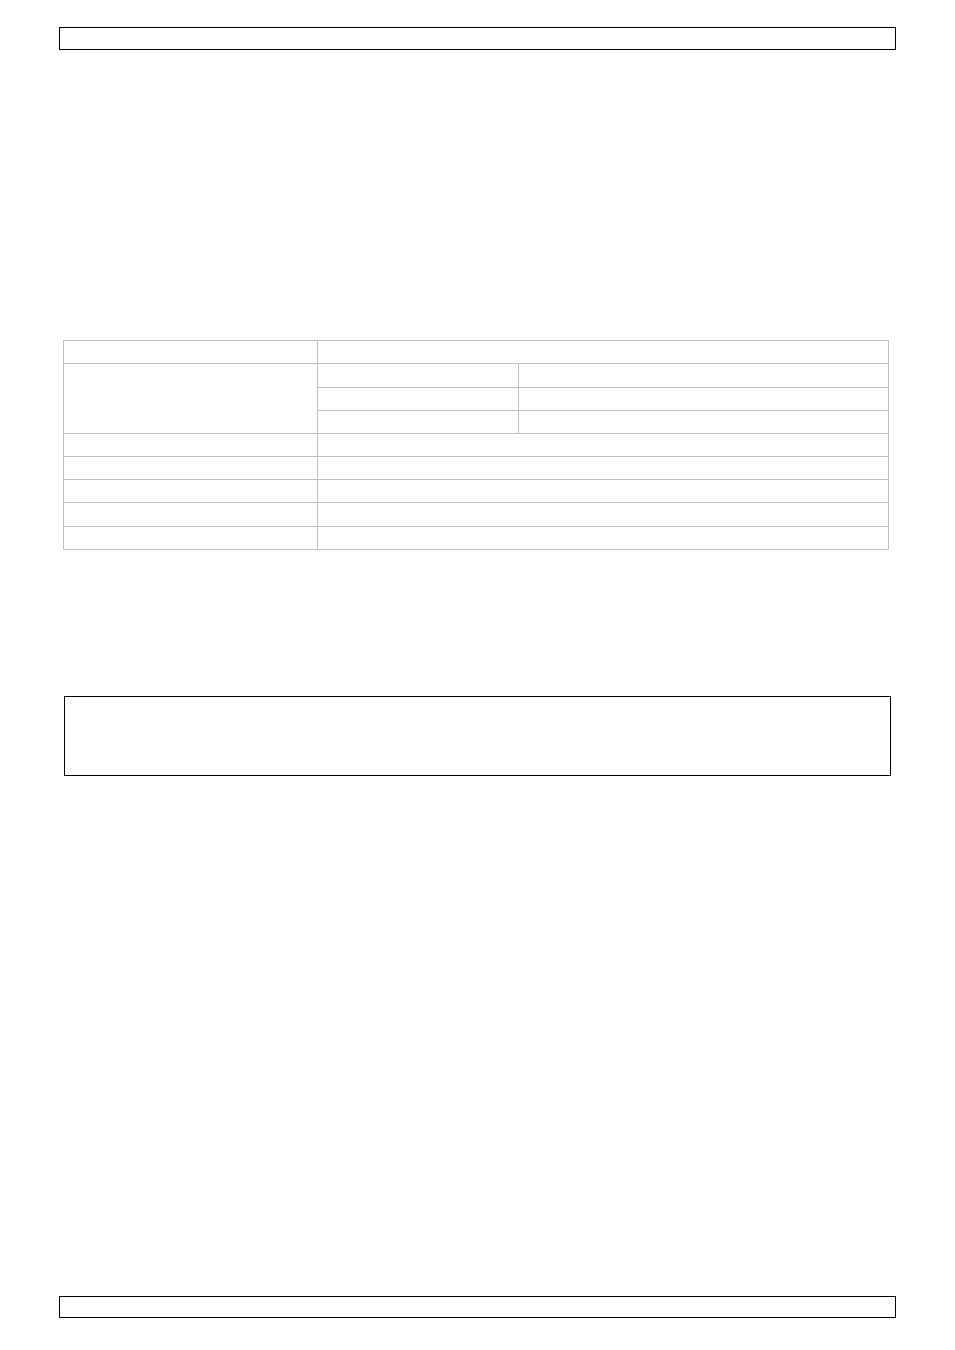
Technical Specifications
dioptre
3
dimensions
arm length
30 cm
width
28 cm
height
40 cm
colour
white
power supply
230 Vac
spare lamp
order code LAMP22/7
spare magnifying glass cover
order code VTLAMP7/SP1
ideal ambient temperature
0 °C – 35 °C
Use this device with original accessories only. Velleman nv cannot be held responsible in the event
of damage or injury resulting from (incorrect) use of this device.
For more info concerning this product and the latest version of this manual, please visit our website
www.velleman.eu.
The information in this manual is subject to change without prior notice.
© COPYRIGHT NOTICE
The copyright to this manual is owned by Velleman nv. All worldwide rights reserved. No part of this
manual may be copied, reproduced, translated or reduced to any electronic medium or otherwise without the
prior written consent of the copyright holder.