Features, Overview, Initial test – Velleman VDLRL28x User Manual
Page 3: Assembling rope lights, 1 connecting the power connector
Rope lights - Lichtslangen - Lumineux - Mangueras luminosas - Lichtschlange
V. 08 – 18/07/2013
3
©Velleman nv
4.
Features
All rope lights and LED rope lights:
come with pre-assembled power cable and end cap
can be cut at certain intervals.
5.
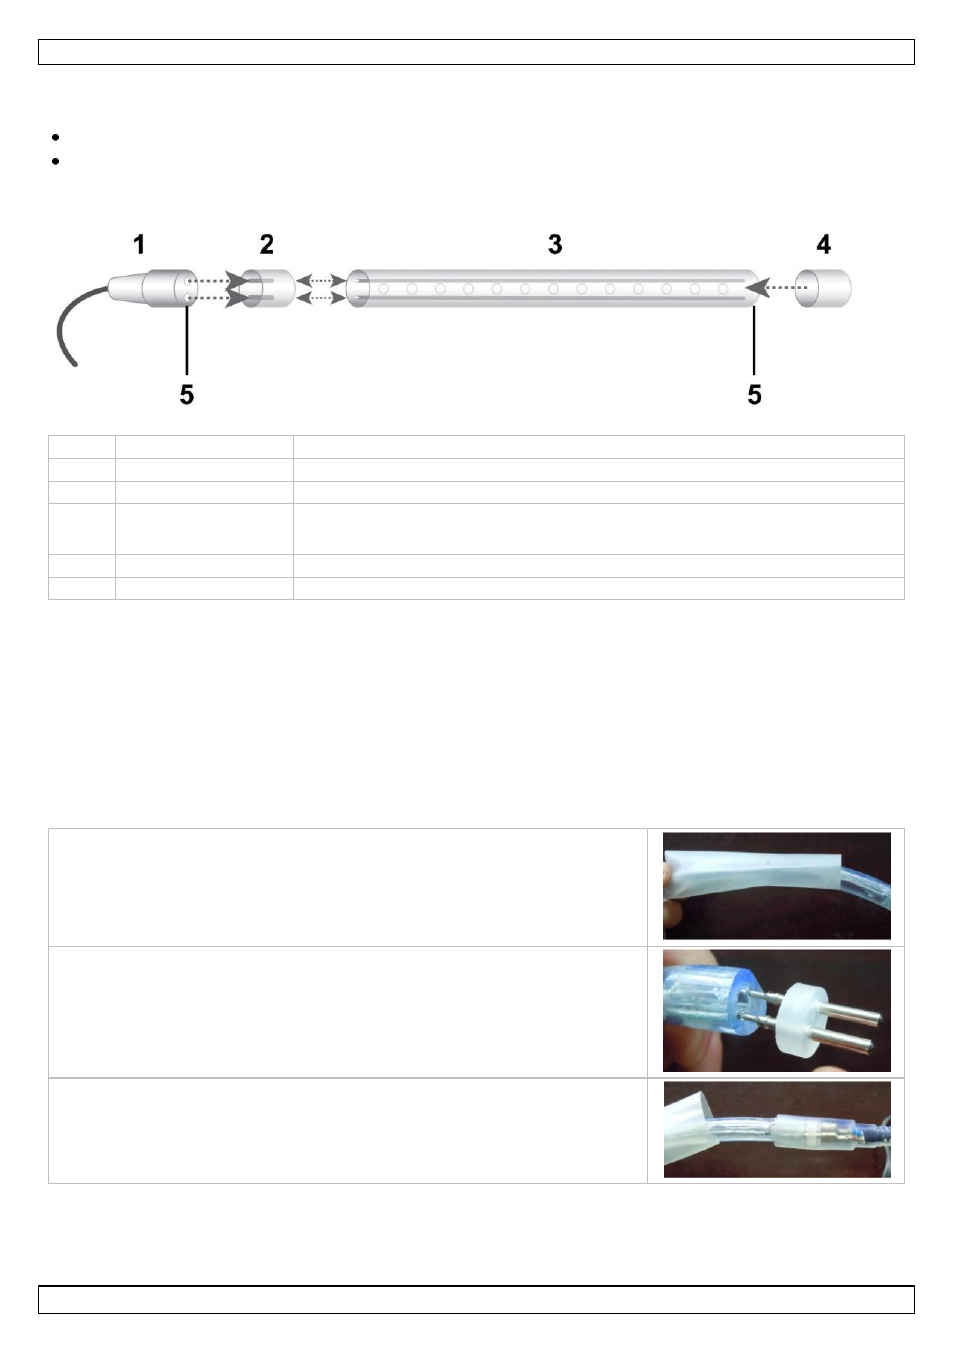
Overview
Part
Description
1
power cord
2
power connector
connects the power cord to the rope light
3
rope light
inner wires run the length of the rope light; can be cut at certain intervals
(cut marks are indicated on sheath
)
4
end cap
protects the exposed ends of the rope light
5
glue
Apply glue only on the plastic parts – not on the conductive parts.
6.
Initial Test
Always refer to the safety instructions above.
Before installing or using the rope light, test the rope light and keep it plugged in to warm up the plastic.
This makes it more pliable when installing.
7.
Assembling Rope Lights
This device shall be installed by qualified personnel only.
Switch off the mains power before you continue.
7.1
Connecting the Power Connector
1. Slide the heatshrink over the rope light.
2. Firmly push the sharp prongs of the power connector into the rope
light. Make sure the prongs are pushed in all the way and make
contact with the tube light leads.
3. Push the power connector firmly into the connector sleeve.