Home location, Quetrip/changing preferences, Saving locations – Garmin iQue M5 User Manual
Page 2: Navigating with quemap
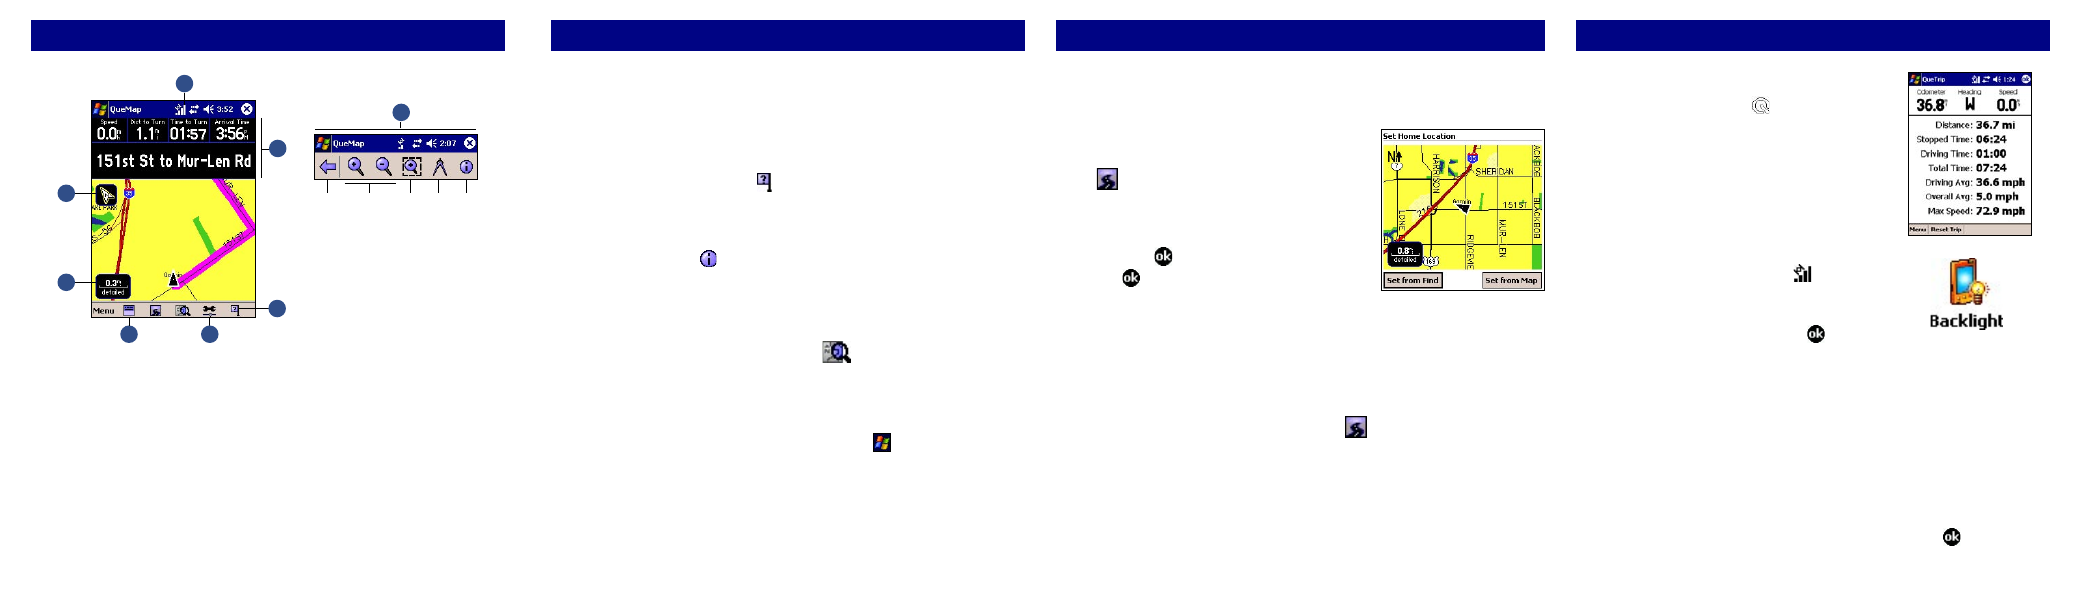
Home Location
You can set a special Location called a Home Location, which can be your
residence or a place you return to frequently.
To set a Home Location:
1. From QueMap, tap the
QueRoutes icon
. Then tap
Set Home Location.
2. Tap
Set from Find and then search for
your home address, or tap
Set from
Map and find your home on the map.
Then tap .
3. Tap again to save.
To change your Home Location:
1. From QueMap, tap
Menu and then QuePreferences.
2. Tap the
Routing tab. Then tap Home.
3. Change your Home Location as described in steps 2 and 3 above.
To route to Home:
From QueMap, tap the
QueRoutes icon
. Then tap
Route to Home.
QueTrip/Changing Preferences
To use QueTrip:
1. Press the
Que button repeatedly until
QueTrip appears.
2. From within QueTrip, tap
Reset Trip to
reset distance and time fields.
3. To reset other fields, tap
Menu and then
Reset Odometer, Reset Max Speed Only,
or
Reset All.
To adjust the backlight:
1. Tap the
System Status icon and then
tap
Backlight.
2. Adjust the brightness of the backlight. Make other
changes as necessary and tap .
To change how routes are calculated:
1. From QueMap, tap
Menu and then QuePreferences. Then tap the
Routing tab.
2. Under
Route Preference, select the method you want to use to
calculate routes. Select
Custom to choose your own road
combinations or to calculate routes based on your driving habits.
To change map settings:
1. From QueMap, tap
Menu and then QuePreferences.
2. Make adjustments to map settings as necessary. Tap to save.
Saving Locations
A Location is a point on the map that you store in memory. You can use
Locations in routes or associate them with contacts and appointments. See
the Que Applications Guide for more information.
To save a Location:
• Tap the
Where Am I? icon to save your current position as
a Location.
• Tap anywhere on the map to activate the Pan Toolbar. Place the map
pointer on the point you want to save as a Location. Then tap the
Information icon on the Pan Toolbar.
• Search for a point with QueFind. Tap and hold on the point you want to
save as a Location and select
Add to My Locations.
To find a Location:
From QueMap, tap the
QueFind icon
and then tap
My
Locations. Search for a Location just as you would search for any
other type of point. You can route to a Location or view it on QueMap.
To create a Location for a Contact or appointment:
1. Open
Contacts or Calendar by tapping Start or by pressing the
Calendar or Contacts buttons on your iQue M5.
2. Tap and hold on the Contact or appointment you want to create a
Location for. Select
Que and then Add to My Locations or Set
Location Point.
3. Select an address for the Location. To route to this Contact or appoint-
ment, tap and hold on the item, tap
Que, and select Route to It.
Navigating with QueMap
7
4
3
5
1
2
6
8
a. Exit
b. Zoom In/Out
c. Zoom Area/Pan Map
d. Measure Distance
e. Information
a.
b.
c.
d.
e.
1. Tap the
System Status icon to view GPS Satellite status.
2. Tap to change map orientation from
Track Up (shown) to North Up
(North is at the top of the map).
3. Tap
Zoom Scale to zoom in or out.
4. Tap to
Show/Hide Data Fields.
5. Tap the
Map Detail icon to adjust how much map detail appears.
6. Tap the
Where Am I? icon to view information about current position.
7. Tap and hold on
Data Fields to customize how they appear.
8. Tap anywhere on the map to open the
Pan Toolbar.