Keypad usage, Data entry, Marking waypoints – Garmin GPSMAP 192C User Manual
Page 2: Navigation backlight
Keypad Usage
POWER/BACKLIGHT—turns the unit on and off and controls the
screen backlighting.
MENU—shows available options for the current page. Press twice
to open the Main Menu.
ENTER—activates highlighted fields and confirms menu options
and data entry.
MARK—captures your present location and show the Mark
Position window when pressed and held for two seconds.
OUT—increases the zoom range of the Map and Highway Pages.
IN—decreases the zoom range of the Map and Highway Pages.
ROCKER—controls the movement of the cursor or pointer and is
used to select options and locations, and to enter data.
Data Entry
To enter data:
1. Highlight a field using the
ROCKER.
2. Press
ENTER to access the field.
3. Use the
ROCKER to select alphanumeric characters.
4. Press
ENTER to confirm.
5. You can also change the data in fields such as symbol, name, coordinates, and depth
when marking a waypoint.
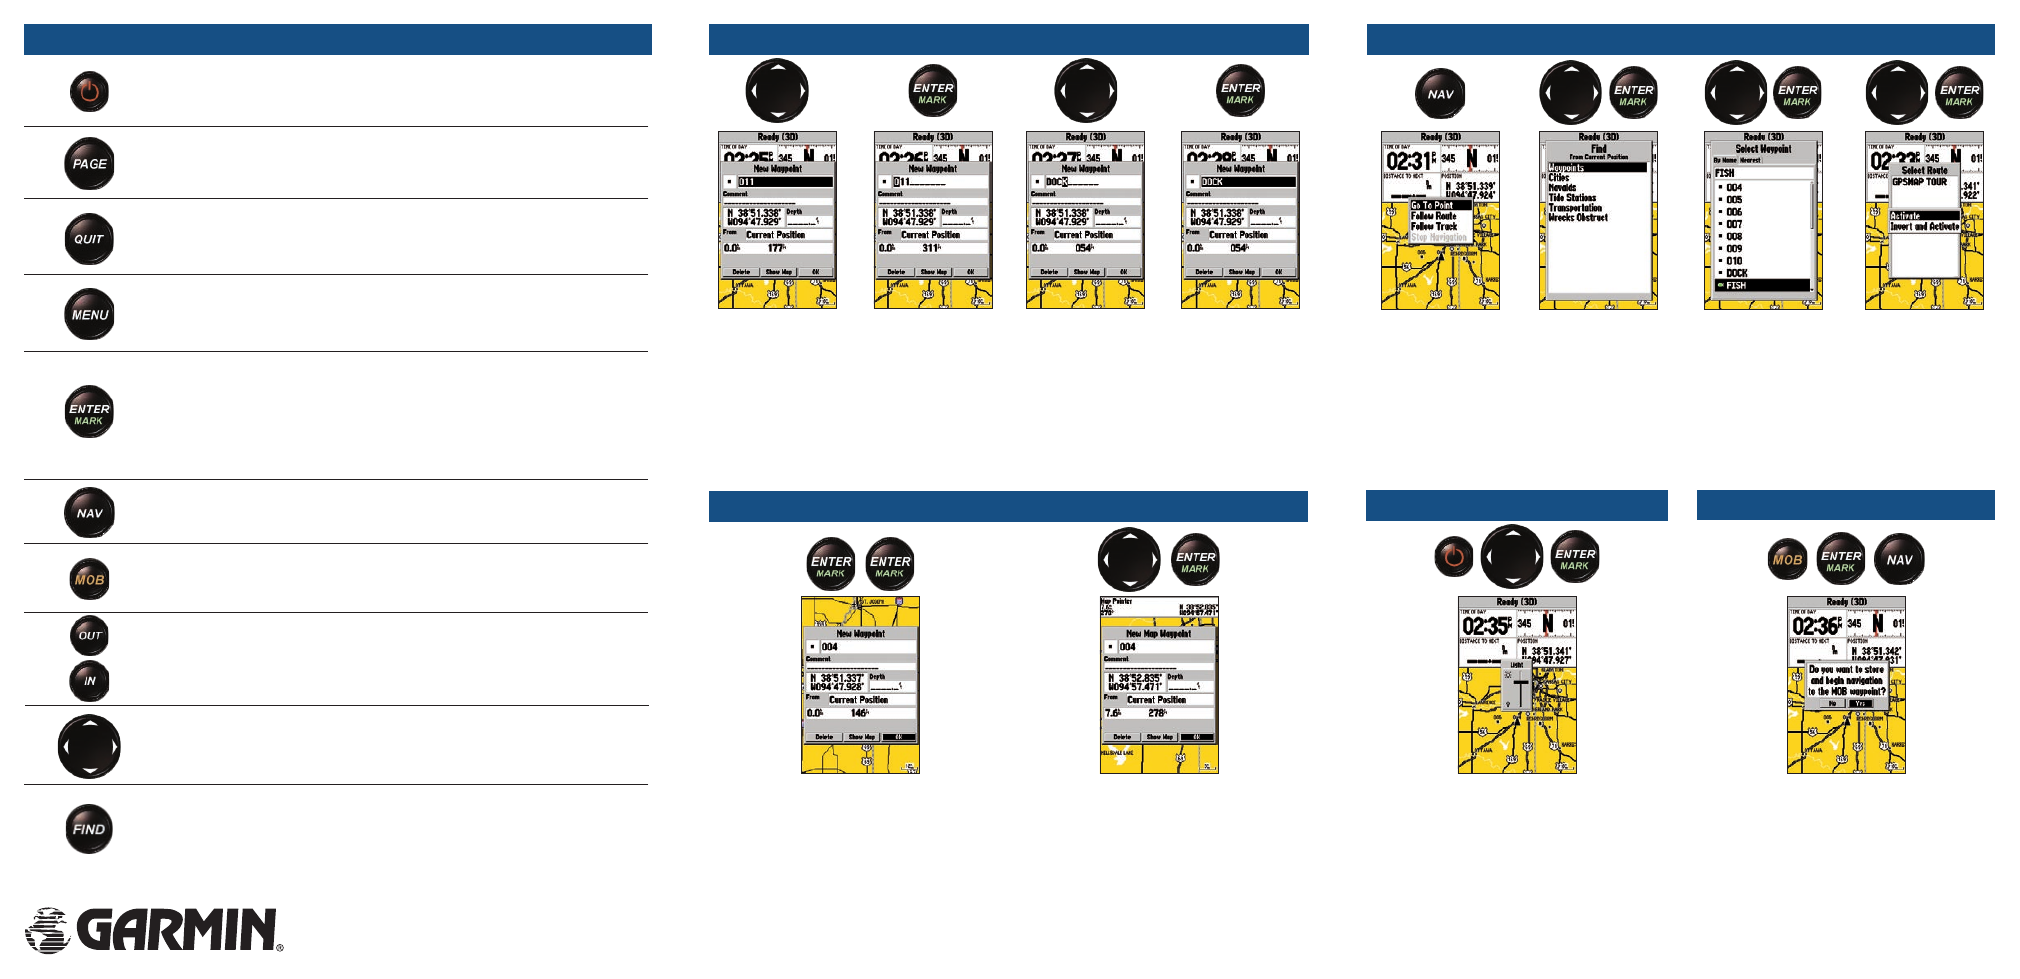
Marking Waypoints
To mark a waypoint:
1. To capture your present location, press
and hold
ENTER/MARK until the
New Waypoint window appears.
2. Press
ENTER/MARK to save the
waypoint.
To graphically mark a waypoint:
1. Move the pointer to the map location.
2. Briefly press
ENTER/MARK to open
the New Map Waypoint window.
3. Press
ENTER/MARK to save the new
waypoint.
Navigation
Backlight
To use the NAV key:
1. Press
NAV to start the navigation selections.
2. Using the
ROCKER, select Go To Point, Follow Route, or Follow Track, and press ENTER.
3. Select the point, track, or route from the list, and then press
ENTER.
4. If you selected a point, press
ENTER again while Go To is highlighted. If you selected
a route or saved track, choose from the start selections, and press
ENTER to begin
navigation.
MOB
To adjust the backlight:
1. Briefly press the
POWER key to start the
Backlight adjustment slider.
2. Press up or down on the
ROCKER to
adjust the backlight level.
3. Press
ENTER to confirm and return to
the previous screen.
To navigate to a MOB:
1. Press
MOB to start the MOB function.
2. To store the MOB waypoint and begin
immediate navigation to that point,
press
ENTER.
3. To stop MOB navigation, press
NAV,
and choose
Stop Navigation.
Part Number 190-00540-01 Rev B.
Printed in Taiwan
FIND—starts the Find options, allowing you to search for user
points, map items, and any optional data card information.
MOB (Man OverBoard)—marks your present location and instantly
sets a return course to that point.
PAGE—scrolls the main pages in sequence and returns the screen
from a menu to a main page.
QUIT—returns display to a previous page, restores a data field’s
previous value, and exits out of menus.
NAV—starts the navigation options, allowing you to navigate using a
waypoint, route, or track.