Step 1: configure your c320, Step 2: install software and load maps, Step 3: mount your c320 – Garmin StreetPilot c320 User Manual
Page 2
WARNING: See the product information sheet in the product box for product warnings
and other important information.
Step 1: Configure Your c320
Press and hold the Power button on the side of the unit to turn it on. Follow the on-screen
instructions to set up your c320; you only have to do this once.
Step 2: Install Software and Load Maps
Before using your c320, install software on your computer using the DVD-ROM, and then
load maps on your c320. Refer to the setup guide for complete instructions.
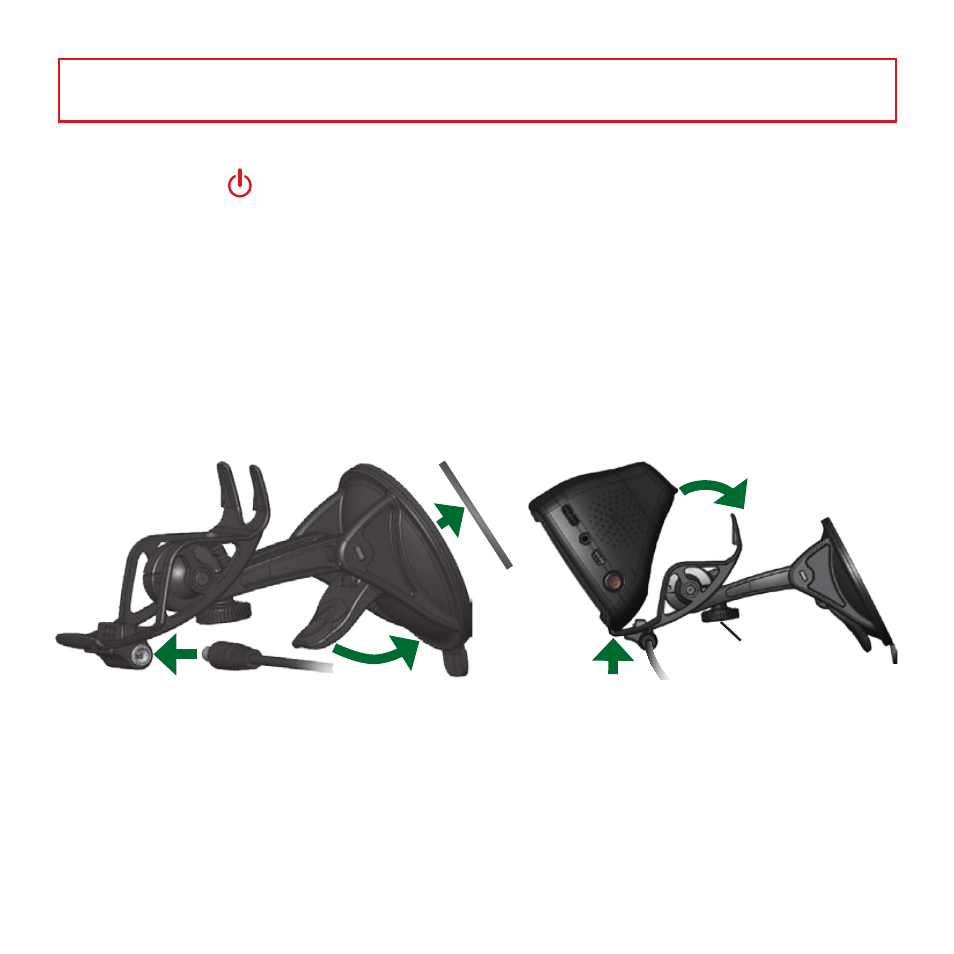
Step 3: Mount Your c320
To ensure a tight grip, clean and dry the windshield before mounting the suction cup.
4
4. Fit the bottom of your c320 into the
cradle of the suction cup mount.
5. Tilt your c320 back until it snaps in
place.
Tension knob
5
1. Plug the small end of the cable into the
mount and the other end in a 12-Volt
receptacle in your vehicle.
2. Place the suction cup on the windshield.
3. Flip the lever back, toward the windshield.
2
3
1
If necessary, use the tension knob to improve your viewing angle.