AcuRite 00582 Clock User Manual
Page 3
•
Battery life: approximately 1/2 year.
•
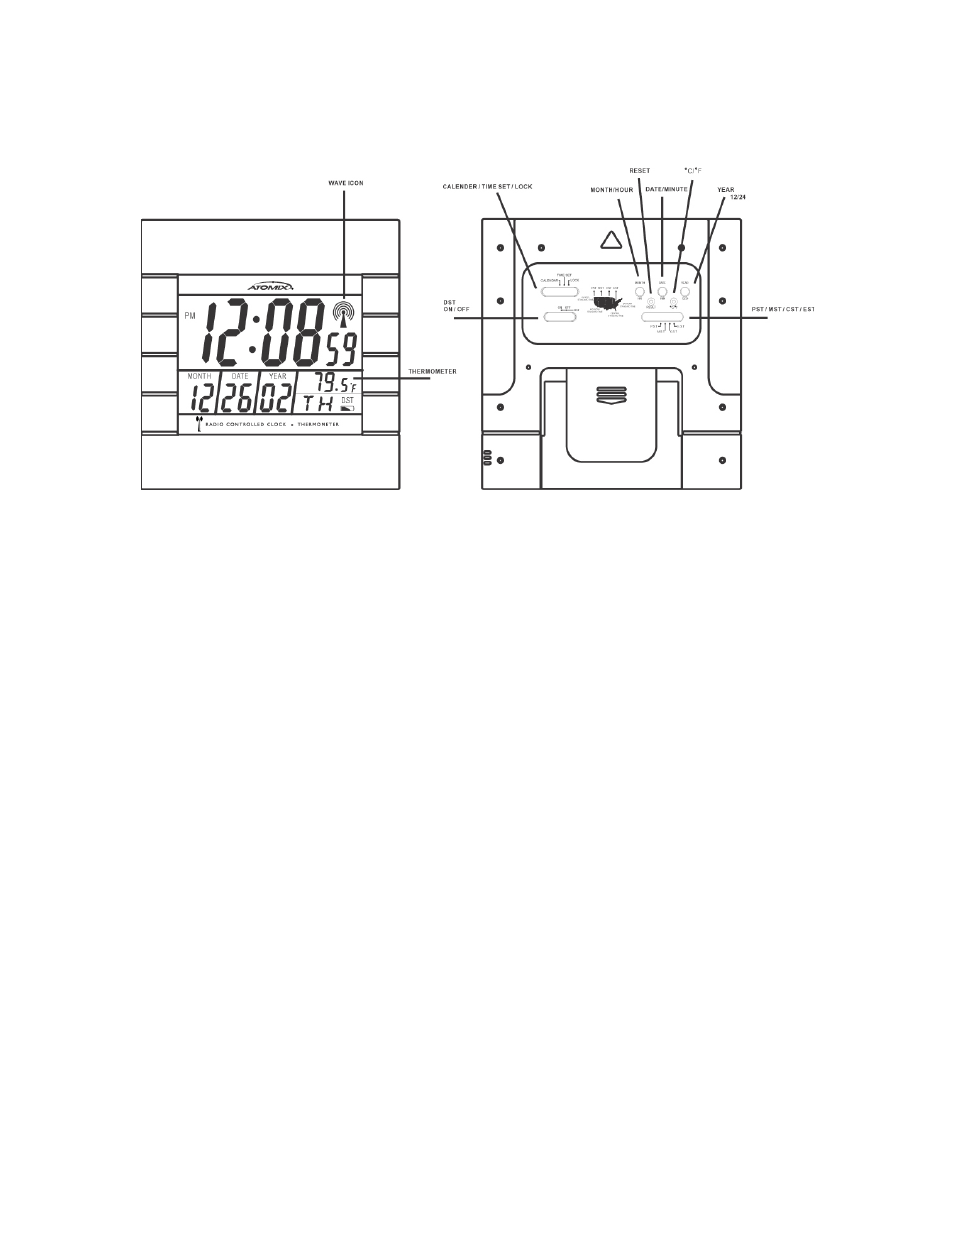
Press °C/°F button to choose your desired temperature reading.
Getting Started
Installing the Batteries
•
Lift the tab on the battery door located at the back of the clock. Put in the "AA" alkaline batteries
with proper polarity (+) and (-) as indicated. Now manually set the clock to the correct time. Be sure the
proper time zone for your location is selected on the back of the clock.
Setting the Time Zone
•
Slide "TIME ZONE" switch to display the time in the desired time zone. Always slide "DST"
switch to ON position except the clock is used in an area without Daylight Saving Time (i.e. part of
Arizona and Indiana)
To Set the Time
•
Slide switch to TIME SET, press HR or MIN button to set, your desired time. Return the switch to
the lock position.
**Special attention to usage in Arizona and Indiana**
Part of Arizona and Indiana do not have Daylight saving Time (DST). Please adjust the "DST" switch to
the OFF position if the clock is used in an area without Daylight Saving Time.
To Set Calendar
•
Slide switch to CALENDAR, Press MONTH, DATE or YEAR buttons to set your desired
calendar setings. Return the switch to the lock position.
First reception after power-up
•
The Radio Controlled clock will start to search for the WWVB signal for 10 minutes after
installing the batteries.
•
In an optimal condition, the correct time can be displayed within 3 to 5 minutes.
•
The tower and wave icon will keep scrolling after you start the clock. This is normal since this
indicates the radio control circuitry is working.
•
The 4 "Wave" icons stop scrolling and indicated successful reception, it indicates successful
reception.
Auto mode setting
•
After installation of batteries or after being reset, it will receive the RC signal
automatically.