Appendix b- bulb replacement procedure, Appendix c- product components – ACR&Artex RCL-50B User Manual
Page 15
Y1-03-0141F
14
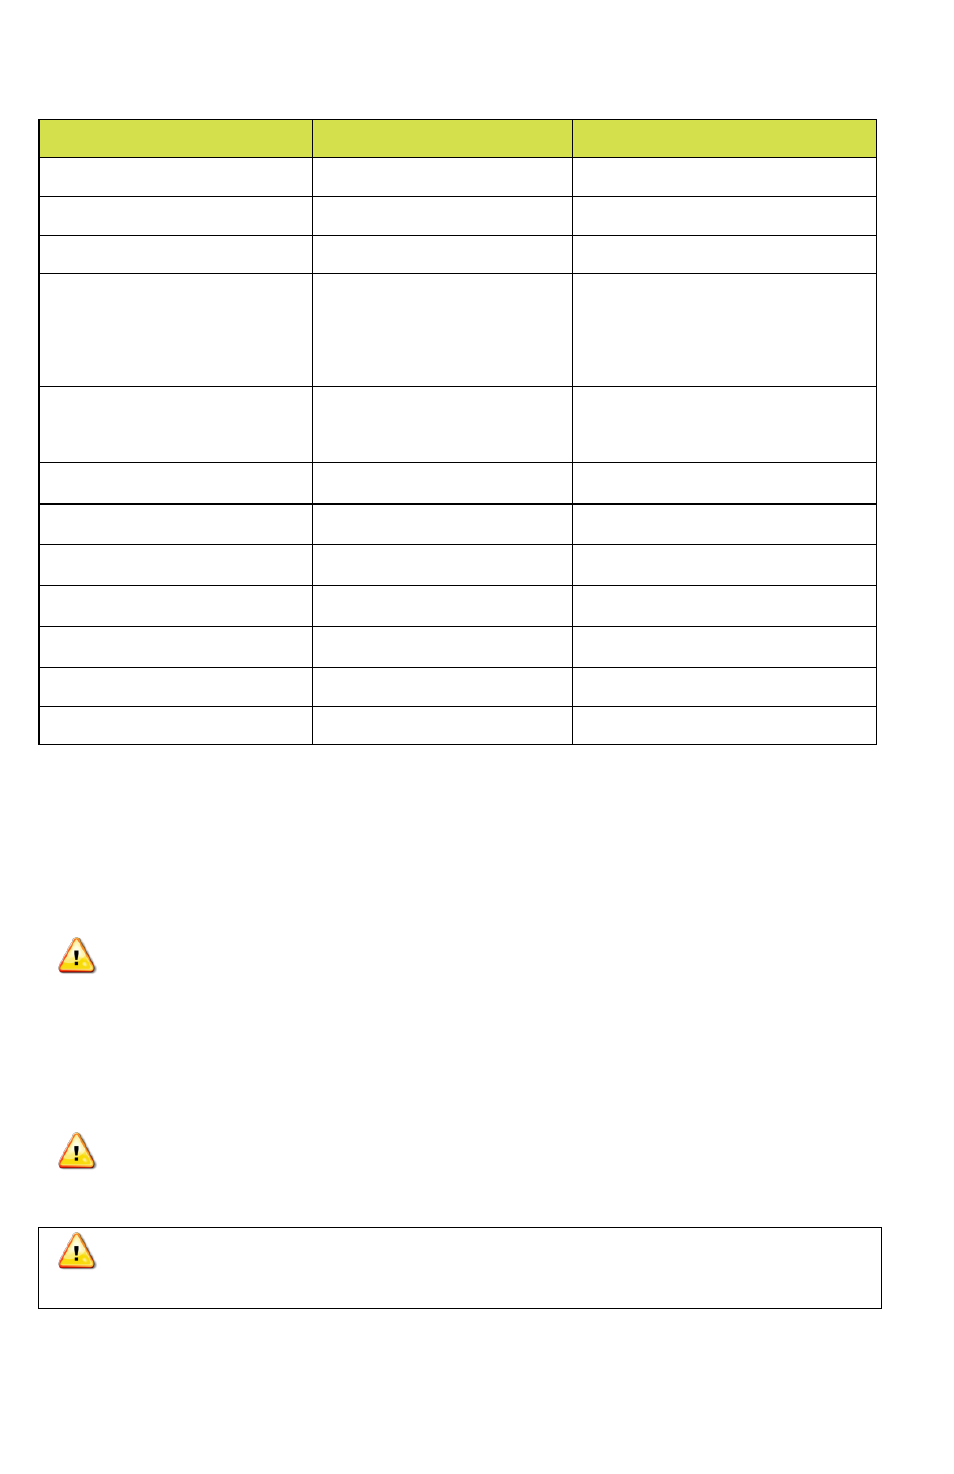
APPENDIX A- RCL-50B SPECIFICATIONS (with URC-102
Controller)
Specification
12V Unit
24V Unit
Mirror diameter
4in (10.16cm)
4in (10.16cm)
Rated voltage (Volt)
12- 16 VDC
24- 31 VDC
Rated current (A)
5
3
Applicable lamp
55W halogen
(base
–x511)
H212V-55W
70W halogen
(base
–x511)
H2-37R-00624
Peak beam candle power
(candela)
80,000
80,000
Beam spread (degrees)
7
°
7
°
Elevation angle (degrees)
Up 20
°, Down 20°
Up 20
°, Down 20°
Turning angle (degrees)
360
°
360
°
Elevation speed
6
° per second
6
° per second
Turning speed
15
° per second
15
° per second
Weight
6.16lbs (2.79 kg)
6.16lbs (2.79 kg)
Interconnect cable
12ft (3.66 m)
12ft (3.66 m)
*All specifications are nominal values
APPENDIX B- BULB REPLACEMENT PROCEDURE
A quartz-halogen bulb is provided with your RCL-50B. If the bulb should need
replacement, it can be ordered through an ACR dealer or through ACR Electronics. The
part numbers are P/N 6002 for 12V units and P/N 6010 for 24V units.
CAUTION: Failure to follow replacement instructions carefully can result in damage
to bulb and/or light. All part sales are final.
To replace the lamps:
1. Disconnect unit from power source and allow bulb to cool.
2. Remove three screws holding the front flange and glass in place.
3. To remove the old lamp bulb, grasp base of the lamp and pull straight out.
WARNING: do not touch glass parabolic reflector or bulb with fingers or tools!
4. Install the new lamp bulb using a soft clean cloth to avoid touching the bulb with your
fingers. insert the lamp bulb pins into socket and press firmly in place.
CAUTION: if the lamp bulb or reflector is accidentally touched, carefully
clean with a soft rag and alcohol (isopropanol) before continuing.
5. Replace the front flange and glass and install the three retaining screws. be sure the
neoprene gasket is securely in place.
6. Reconnect the unit to the power source.