Installation steps, Kvm session – Acnodes KDI 8198 User Manual
Page 20
User Manual
11. KVM Session
Installation Steps
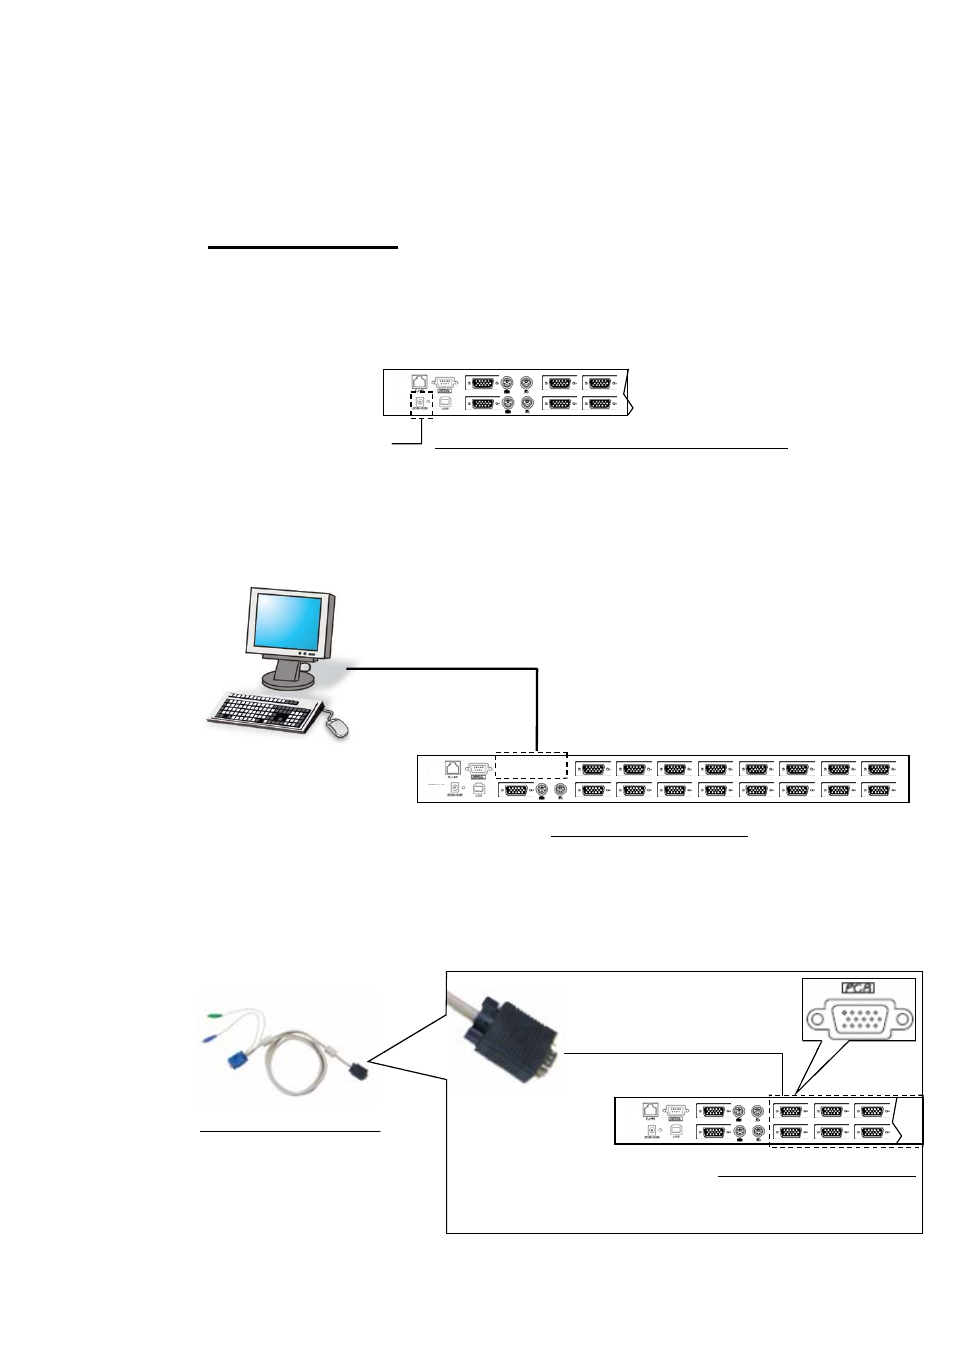
Step 1. Connect the included power adapter to IP KVM and switch on. A beep sounds
and “BANK No.” LED indicated the current bank status.
DC Power Input
Figure 11-2. Identifying IP KVM rear panel components
Step 2. Connect the Local Console of KVM to Input device and Display Unit.
Local Console Device (Monitor, Keyboard & Mouse)
Figure 11-3. IP KVM Rear View
Step 3. Connect the IP KVM to your servers up to 16 servers (for RKP11X-IP1602 only,
RKP11X-IP802 serve up to 8 ports )(Fig. 1)
HDDB 15-pin KVM connector on
KVM cable (Black)
Figure 1-1. PS/2 KVM Cable
Figure 11-4. IP KVM Rear View
Rev. : 1.0
P.19
This manual is related to the following products: