Cz`<<`.hc `vhe Page 17: 2 installation with feet, 3 power supply
Page 17: 2 installation with feet, 3 power supply
qqqĪZ`. <é<`VHCĪHB
CZ %
ĜŌ
C
&<
.Z
+
.CZ`<<`.HC
`VHe
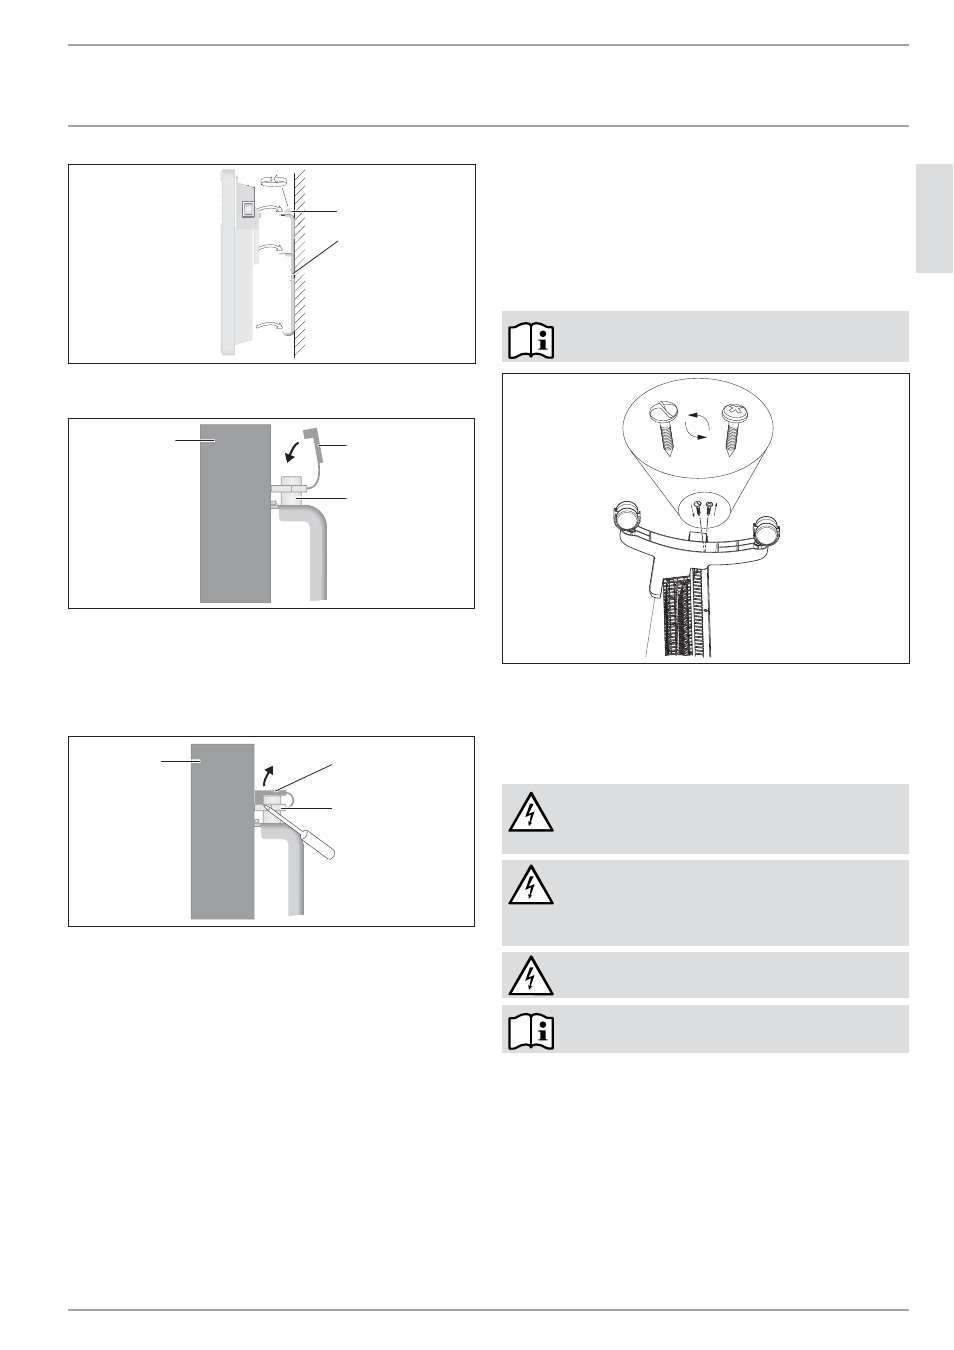
2 6 _0 7 _3 1 _0 0 3 5 1 2 1 Locking bolt 26 _0 7 _3 1 _0 1 2 7 1 2 3 1 Appliance 9.1.3 Dismounting the appliance » Remove the safety cap from the locking bolt. 2 6 _0 7 _3 1 _0 1 2 8 1 2 3 1 Appliance » Undo the locking bolt on the wall mounting bracket. » Lift the appliance up slightly and pull it forwards and away from 9.2 Installation with feet » Unhook the wall mounting bracket. » Only remove both external left and right screws at the bottom » Fit the feet to the bottom of the appliance in such a way that Secure the feet with the One-way Screws supplied. 2 6 _0 7 _3 1 _0 1 2 5 9.3 Power supply » Ensure the on-site supply cable has an adequate cross-section. » Ensure that a socket is installed at a distance of at least 10 cm DANGER Electrocution! DANGER Electrocution! DANGER Electrocution! Observe the type plate. The specified voltage must 10. Troubleshooting The power cable must only be replaced by a contractor using our 11. Appliance handover Explain the functions of the appliance to the user. Draw special
2 Wall mounting bracket
2 Safety cap
3 Locking bolt
2 Safety cap
3 Locking bolt
the wall mounting bracket.
of the appliance.
they are inserted into the recess at the back of the appliance.
from the side of the appliance.
Carry out all electrical connection and installation
work in accordance with relevant regulations.
The appliance must be able to be separated from the
mains power supply by an isolator that disconnects all
poles with at least 3 mm contact separation.
Do not install the appliance with a fixed power cable.
match the mains voltage.
original spare parts.
attention to the safety information. Hand the operating and
installation instructions to the user.