Settings, 7settings, Warning – Festool PSBC 420 EB User Manual
Page 17: Caution
C A R V E X
17
GB
6.4
Charger wall mount
The charger TRC 3 has two elongated holes on its
back. It can be mounted on a wall using two screws
(e.g. round head or flat head screw with shank di-
ameter of 5 mm) (see Fig. [3]).
7
Settings
7.1
Changing tools
Selecting saw blade
Only use saw blades with a T-shank. The
saw blade should not be longer than that re-
quired for the intended cut. To ensure safe
guidance, during the cut the saw blade should
emerge at the bottom of the workpiece at every
point.
Only use cross-set saw blades when using the
angle and adapter table. We recommend Fes-
tool saw blade S 105/4 FSG.
Inserting saw blade
Always disconnect the battery pack from the
machine before every tool change!
If necessary, lift up the chip guard [4-1].
Slide the saw blade [4-4] into the opening [4-2]
as far as the stop with its teeth in the cutting di-
rection.
Turn the saw blade [4-4] clockwise approx. 30°.
Check that the saw blade is secure. A loose
saw blade can fall out and cause an injury.
If the saw blade is very small, it is advis-
able to remove the saw base (see chapter 7.4)
before inserting the saw blade.
Adjust the saw blade guide after every saw blade
change:
The saw blade guide was designed to improve guid-
ance of the saw blade.
Remove the saw base (see chapter 7.4).
Tighten the screw [4-6] using the Allen key [4-
5] until the jaws are almost touching the saw
blade.
Ejecting saw blade
When ejecting the saw blade, hold the electric
power tool such that no persons or animals can
be injured.
Push the saw blade ejection [4-3] forwards as
far as the stop.
A tool change is only possible when the tool
holder is located in the upper position!
If the saw blade is stuck and cannot be changed:
Operate the jigsaw at high speed for 3 - 10 seconds.
Actuate the saw blade ejection [4-3]again.
7.2
Using the chip guard
The chip guard [4-1] prevents chips flying away and
improves the efficiency of the chip extraction sys-
tem.
Using minimal pressure, push the chip guard
[4-1] downwards.
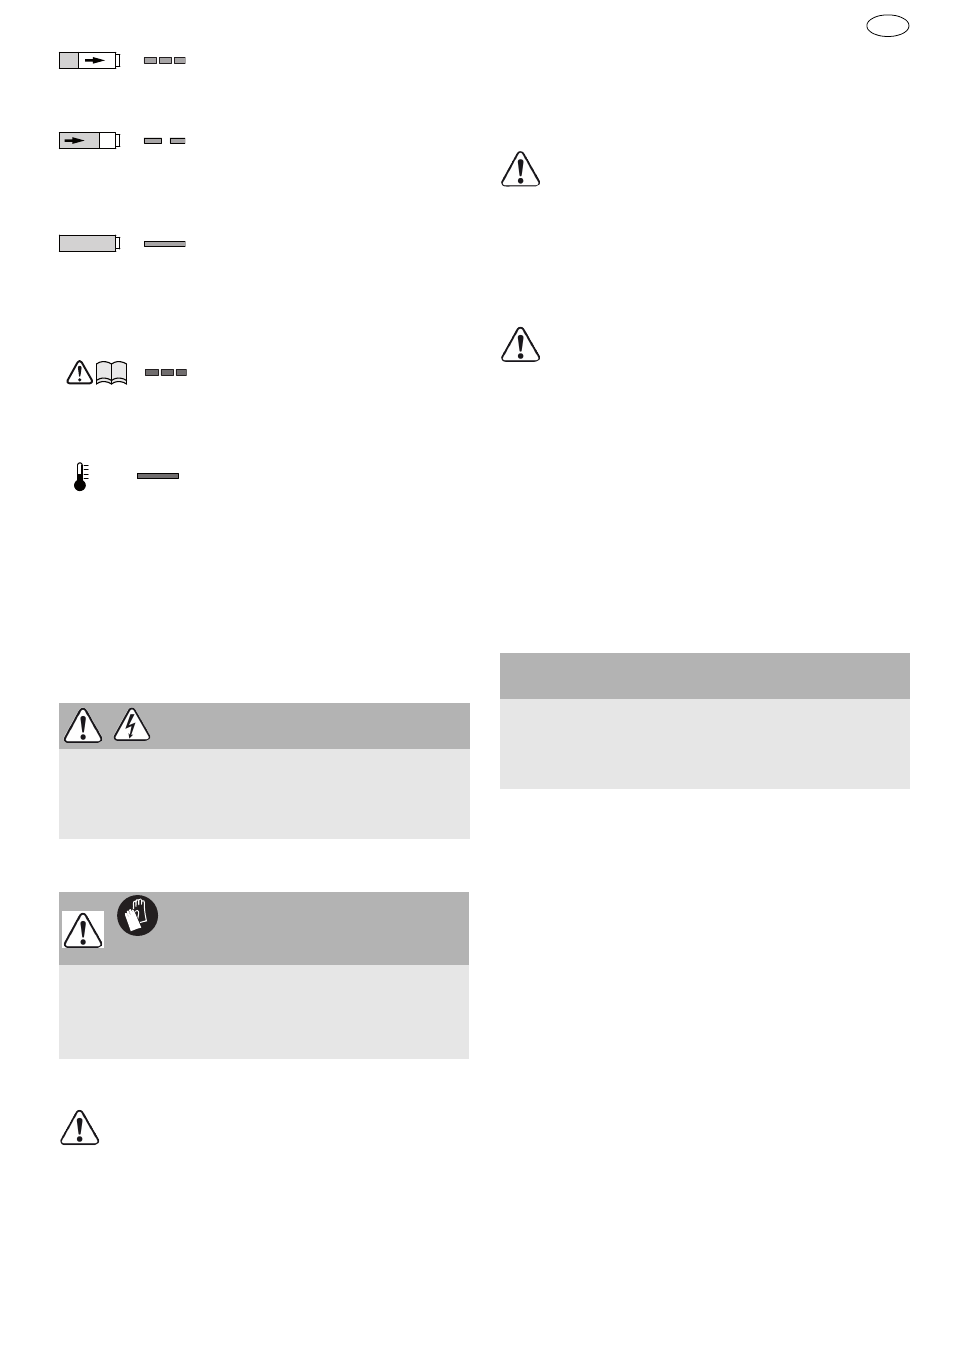
LED green - flashing quickly
Battery pack is charged to maxi-
mum capacity.
LED green - flashing slowly
Battery pack is charged with
reduced current. Li-ion is
charged to 80 %.
LED green - lit continuously
Charging process has finished or
will not resume because the cur-
rent charging state is more than
80%.
LED red - flashing
General fault indicator, e.g.
incomplete contact, short circuit,
defective battery pack, etc.
LED red - lit continuously
Battery temperature is outside
the permitted range.
WARNING
Risk of injury, electric shock
Always disconnect the battery pack before any
type of work on the machine!
CAUTION
Hot and sharp tools
Risk of injury
Wear protective gloves.
NOTE
Damage to the machine or saw blade
Do not tighten the screw [4-6] too firmly! It must
be possible to move the saw blade slightly.