Zanussi ZOB550WL User Manual
Page 12
A
C
3
After cleaning, install
the glass panel in opposite
order. Make sure you put
the glass panel in the rub-
ber distance holders.
Catalytic panels
The catalytic panels are self-cleaning. The catalytic panels
absorb fat which collects when the appliance operates.
To support the self-cleaning process remove the acces-
sories from the appliance and run an empty oven at max-
imum temperature for approximately one hour.
• Discolouration of the catalytic surface has no ef-
fect on the catalytic properties.
• To prevent damage to the catalytic surface, do not to
clean the catalytic panels with oven sprays, abrasive
cleaners, soap or other cleaning agents.
Removable shelf rails and catalytic panels
To clean the oven cavity remove the shelf rails and cata-
lytic panels.
Caution! Be careful when you remove the shelf rails.
The catalytic panels are not attached to the oven
cavity and can fall out when you remove the shelf rails.
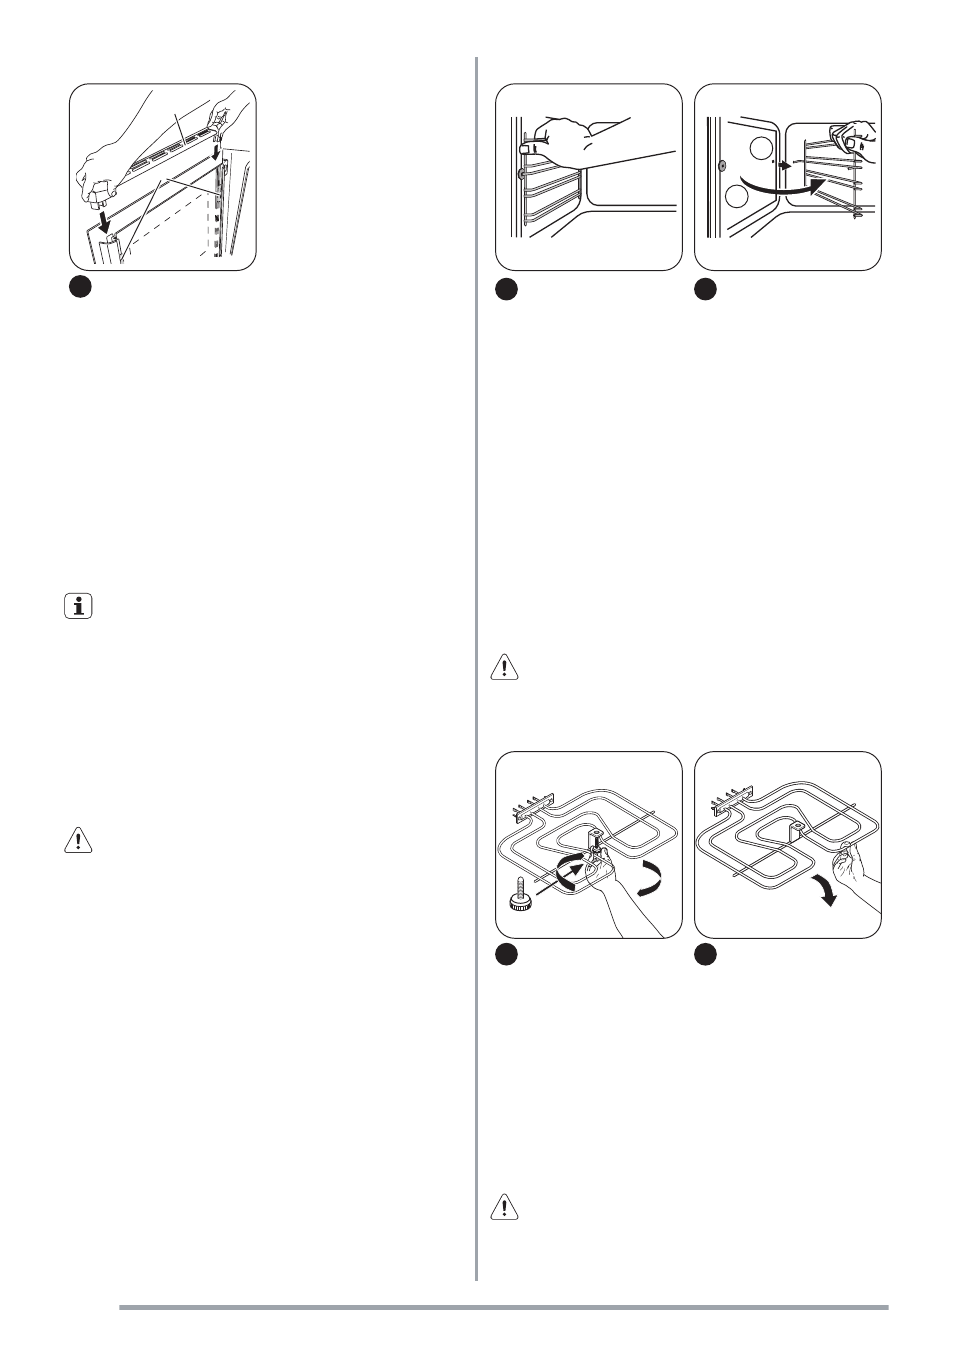
1
Pull the front of the
shelf rail away from the
side wall.
Hold the rear shelf rails
and catalytic panel with
the other hand.
1
2
2
Pull the rear shelf rail
away from the side wall
and remove it
Installing the shelf rails
Install the shelf rails in opposite sequence.
Make sure that the rounded ends of the shelf rails point
to the front.
Oven ceiling
You can remove the heating element on the oven ceiling
to clean the oven ceiling easily.
Warning! Before you remove the heating element
switch off the appliance. Make sure that the
appliance is cold. There is a risk of burns!
1
Unscrew the screw
which holds the heating
element. For the first time,
use a screwdriver.
2
Carefully pull the heat-
ing element downwards.
The oven ceiling is ready
to clean.
Clean the oven ceiling with a soft cloth with warm water
and cleaning agent and let it dry.
Installing the heating element
1. Install the heating element in opposite sequence.
Warning! Make sure that the heating element is
correctly installed and it does not fall down.
12