Checking the front and rear brake pads, Adjusting the rear brake light, Switch -26 – Yamaha YZFR6V(C) User Manual
Page 76: Checking the front and rear brake, Pads -26, Periodic maintenance and minor repair
PERIODIC MAINTENANCE AND MINOR REPAIR
6-26
6
NOTE:
If the specified clutch lever free play
cannot be obtained as described
above, proceed as follows.
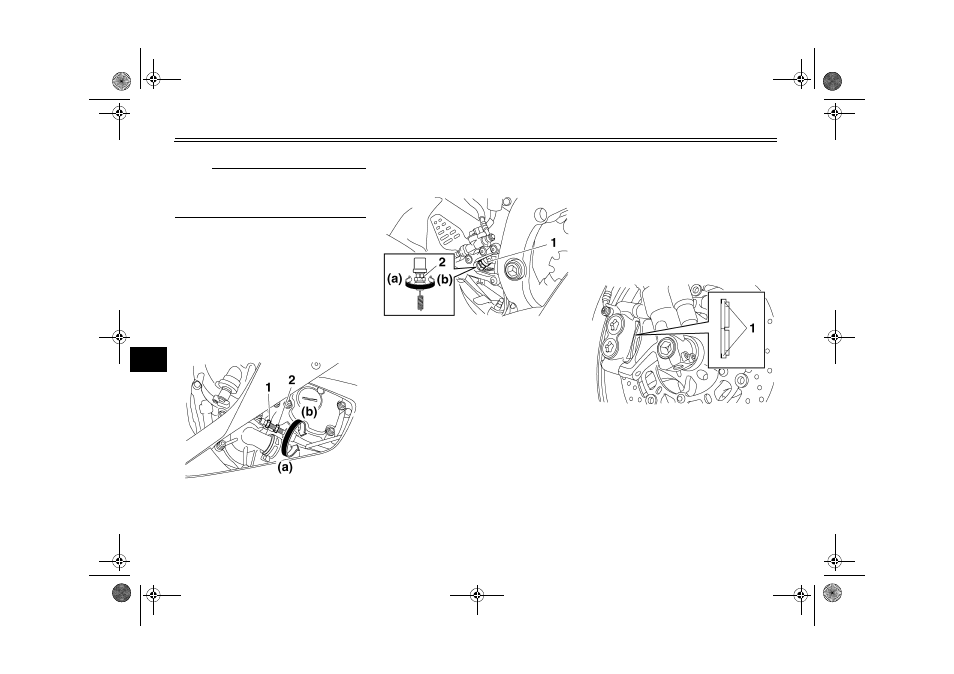
1. Fully turn the adjusting bolt at the
clutch lever in direction (a) to loos-
en the clutch cable.
2. Loosen the locknut at the crank-
case.
3. To increase the clutch lever free
play, turn the adjusting nut in direc-
tion (a). To decrease the clutch le-
ver free play, turn the adjusting nut
in direction (b).
4. Tighten the locknut.
EAU22270
Adjusting the rear brake light
switch
The rear brake light switch, which is ac-
tivated by the brake pedal, is properly
adjusted when the brake light comes
on just before braking takes effect. If
necessary, adjust the brake light switch
as follows.
Turn the adjusting nut while holding the
rear brake light switch in place. To
make the brake light come on earlier,
turn the adjusting nut in direction (a). To
make the brake light come on later, turn
the adjusting nut in direction (b).
EAU22390
Checking the front and rear
brake pads
The front and rear brake pads must be
checked for wear at the intervals spec-
ified in the periodic maintenance and
lubrication chart.
EAU36890
Front brake pads
Each front brake pad is provided with
wear indicators, which allows you to
check the brake pad wear without hav-
ing to disassemble the brake. To check
the brake pad wear, check the position
of the wear indicators while applying
the brake. If a brake pad has worn to
1. Locknut
2. Clutch lever free play adjusting nut (crank-
case)
1. Rear brake light switch
2. Rear brake light switch adjusting nut
1. Brake pad wear indicator
U2C010E0.book Page 26 Wednesday, October 26, 2005 10:19 AM