Yamaha CRW4001t User Manual
Page 14
Chapter 2 - Installing the Yamaha CRW4001t Drive
8
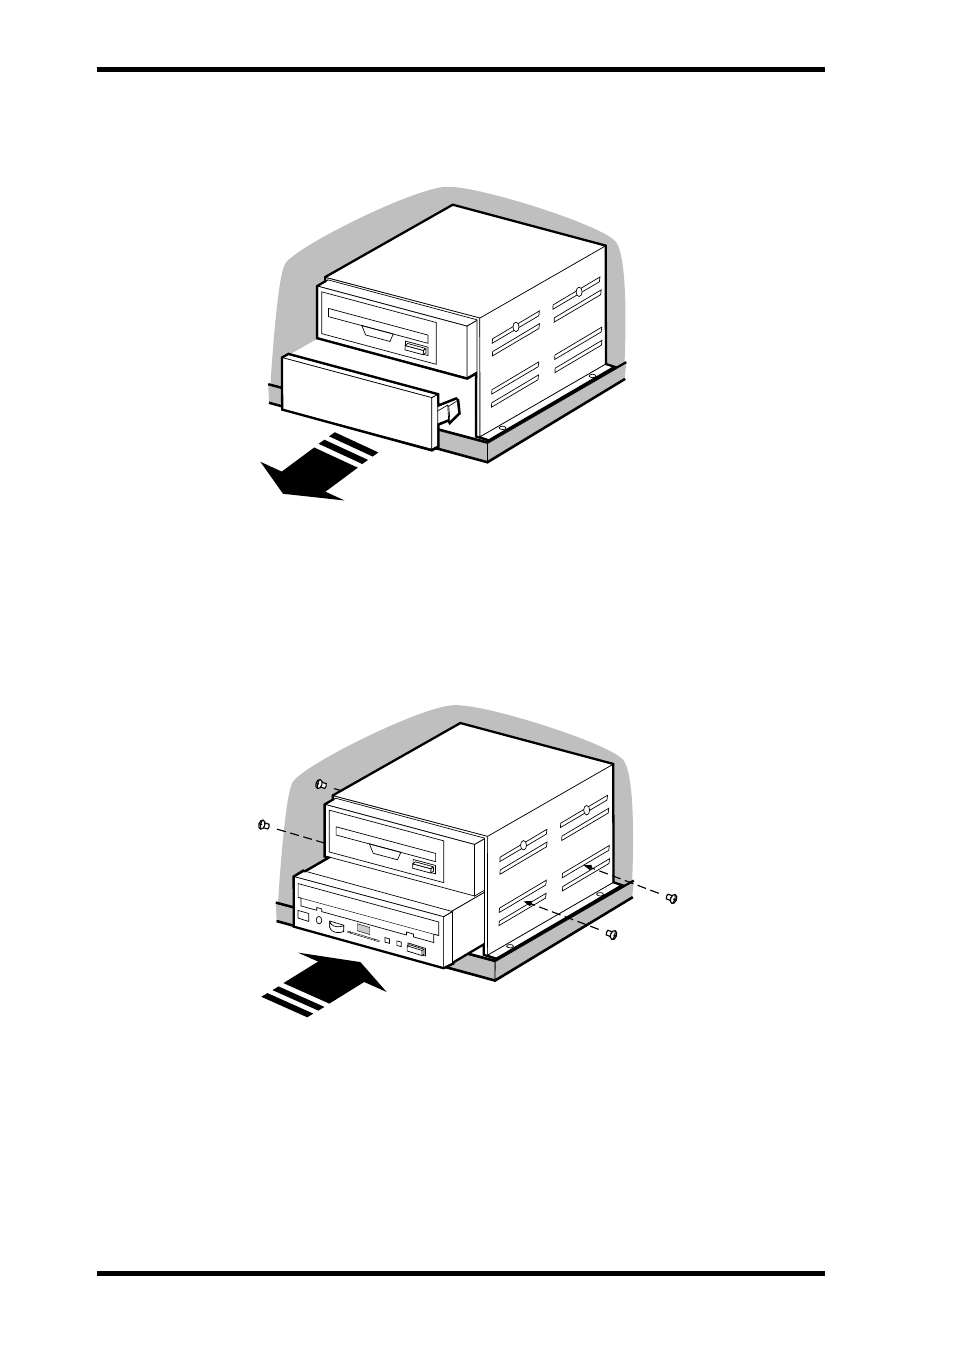
4. Remove the front cover of a vacant half-height drive bay.
For details refer to the manual of your computer.
5. Slide the CRW4001t drive into the drive bay from the front.
At this time, be careful not to apply excessive force to the drive itself.
Finger-tighten the four fastening screws, and check that there is enough
room to connect the power supply cable, IDE interface connector, and
AUDIO cables.
6. Connect the IDE interface connector.
Connect the 40-pin IDE interface connector to the IDE interface located
on the rear panel of the CRW4001t drive.
Position the connector so that the colored line is at pin 1 (your lower right).
See also other documents in the category Yamaha CD-players:
- CDC-685 (28 pages)
- CD-S300 (108 pages)
- CDX-397 (228 pages)
- CDX-397MK2 (228 pages)
- CD Recordable/Rewritable Drive CRW3200NB (50 pages)
- CRW2200SX (47 pages)
- CDC-906 (28 pages)
- MDX-9 (28 pages)
- CD Recordable/Rewritable Drive CRW2200NB (51 pages)
- CDX-393MKII (23 pages)
- 501 (24 pages)
- CRX-E500 (31 pages)
- YHT-470 (18 pages)
- 580 (22 pages)
- CDC-625 (15 pages)
- CD Recordable/Rewritable Drive CRW-F1 (54 pages)
- DVD-S1700B (47 pages)
- CD Recordable/Rewritable Drive CRW8824E (45 pages)
- CD REWRITABLE DRIVE CRW8824S (51 pages)
- EMX120CD (53 pages)
- M170 (40 pages)
- VCD-102K (23 pages)
- VCD-120K (23 pages)
- MDX-E300 (28 pages)
- CDX-890 (23 pages)
- CDC-655 (24 pages)
- CD-S2000 (29 pages)
- EMX100RDS (53 pages)
- EM-203VCD (58 pages)
- CDR400At (26 pages)
- CRX-E300 (28 pages)
- CDX-993 (23 pages)
- CDV-W901 (28 pages)
- CDR200t (22 pages)
- RX-E100 (30 pages)
- 502 (24 pages)
- CRX-M5 (35 pages)
- VCD-100K (21 pages)
- CDR200tx (23 pages)
- CDC-95 (15 pages)
- EM-202VCD (51 pages)
- CRW4261t (25 pages)
- CRW8824SX Series (46 pages)
- CRW4260t-B (26 pages)
- CRW4416SX (24 pages)