Set up – Zenoah BCZ4000DL User Manual
Page 10
GB-10
BCZ4000DL / BCZ4000DW / BCZ4200CL
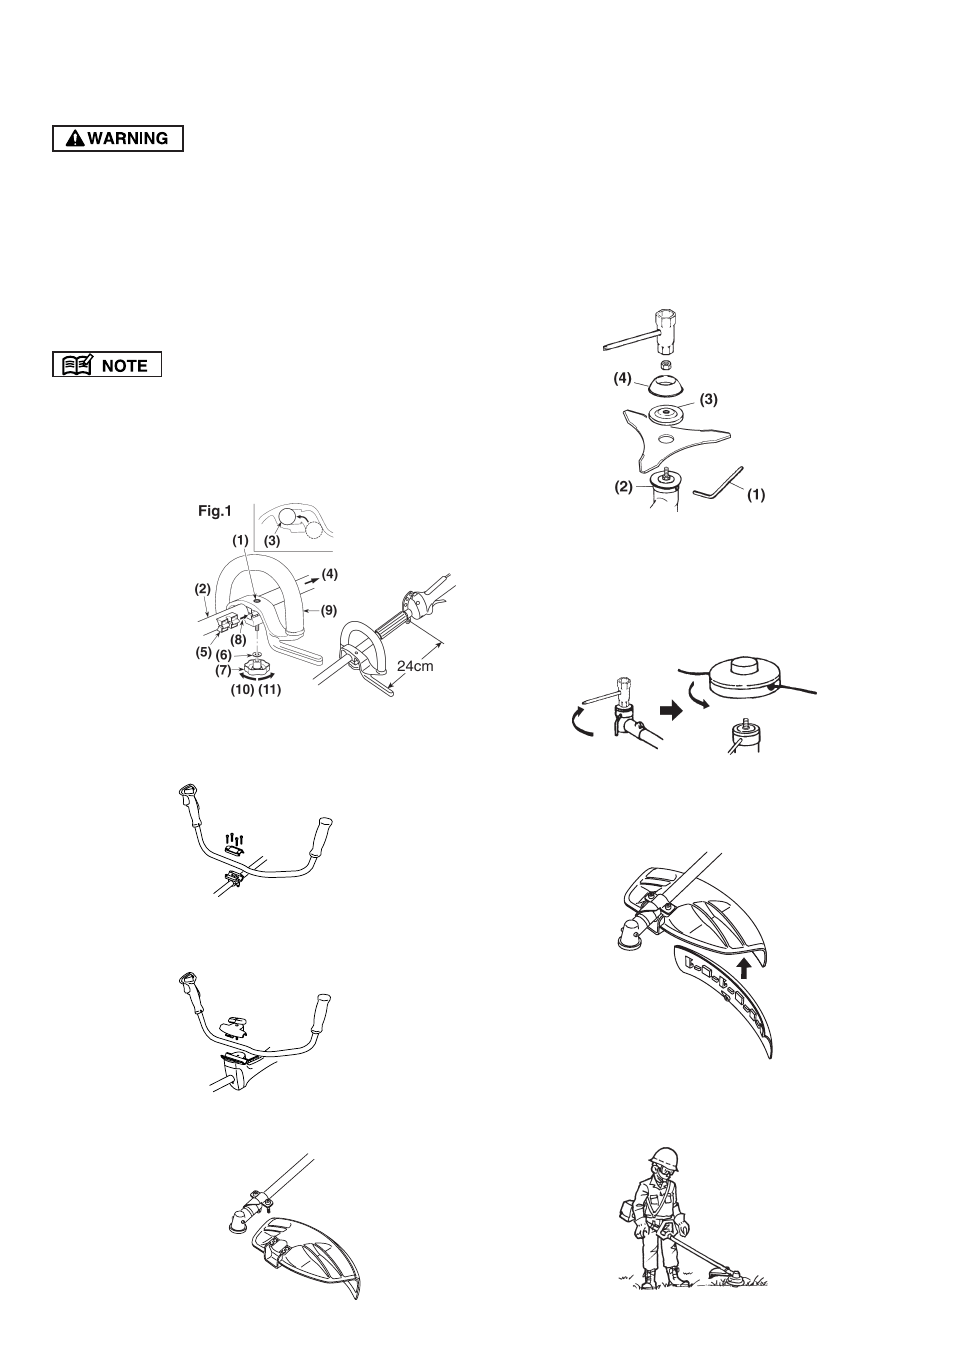
INSTALLING HANDLE (BCZ4000DL)
• Tighten the grip firmly. If the grip becomes loose, it
might move while you are working, causing danger.
• Do not loosen or twist the grip while you are working.
• Always stop the engine and make sure the blade has
stopped before adjusting the position of the loop
handle.
1. Remove the grip of the loop handle, washer and
mounting bolt associated with this product, and
remove the stopper.
2. Push the loop handle onto the main pipe as shown in
Fig. 1.
Be careful not to mount the loop handle in the wrong
direction.
3. Push the stopper in the direction of the arrow as shown
in Fig. 1 and insert the mounting bolt. Then, position
the washer around the mounting bolt, and turn the
grip to tighten securely.
INSTALLING HANDLE (BCZ4000DW)
• Loosen the 4bolts on the upper cap and insert the
handle. Retighten the bolts securely.
INSTALLING HANDLE (BCZ4200CL)
• Loosen the handle knob to open the bracket and in-
sert the handle. Retighten the knob securely.
INSTALLING CUTTING ATTACHMENT GUARD
• Attach the cutting attachment guard with the bolts
combined to the shaft tube.
6. Set up
INSTALLING BLADE
1. Put the angled bar(1) into the side holes of the inner
holder and the angle transmission.
2. Remove the nut (Lefthanded) and the outer holder(3)
from the gearshaft.
3. Put the blade onto the inner holder(2). Make the
marked side face the holder.
4. Put the outer holder(3) onto the gearshaft making the
recessed side face the blade.
5. Fasten the blade by the nut and the cover(4).
INSTALLING TRIMMER HEAD
1. While locking the gear shaft by inserting the supplied
bar into the upper holder on the angle transmission,
loosen and remove the nut (left-handed).
2. Fit the trimmer head assembly to the gear shaft. Hand
tighten it securely.
CUTTING ATTACHMENT GUARD SKIRT FOR
TRIMMER HEAD
• When using trimmer head, make sure to attach the
guard skirt.
BALANCE UNIT
1. Put on harness and attach unit to harness.
2. Slide clamp up or down until unit balances with head
aparting from the ground when using it.
(1) Mounting bolt
(2)(3) Main pipe
(4) Engine side
(5) Stopper
(6) Washer
(7) Grip
(8) Insert
(9) Loop handle
(10) Loosen
(11) Tighten