Connect inlet hoses, Secure drain hose – Whirlpool GVW9959KL2 User Manual
Page 8
8
Connect Inlet Hoses
1. Insert a new flat washer (supplied) into each end of the inlet
hoses. Firmly seat the washers in the couplings.
Connect the inlet hoses to the water faucets
Make sure the washer basket is empty.
2. Attach the hose with the red coupling to the hot water faucet.
Screw on coupling by hand until it is seated on the washer.
3. Attach the hose with the blue coupling to the cold water
faucet. Screw on coupling by hand until it is seated on the
washer.
4. Using pliers, tighten the couplings with an additional
two-thirds turn.
NOTE: Do not overtighten. Damage to the valves can result.
Clear the water lines
5. Run water through both faucets and inlet hoses, into a bucket
or laundry tub, to get rid of particles in the water lines that
might clog the inlet valve screens.
Connect the inlet hoses to the washer
6. Attach the hose with the blue coupling to the COLD (left) inlet
valve. Screw on coupling by hand until it is seated on the
washer. Using pliers, tighten the couplings with an additional
two-thirds turn.
NOTE: Do not overtighten. Damage to the valves can result.
7. Attach the hose with the red coupling to the HOT water (right)
inlet valve. Screw on coupling by hand until it is seated on the
washer. Using pliers, tighten the couplings with an additional
two-thirds turn.
NOTE: Do not overtighten. Damage to the valves can result.
Check for leaks
8. Turn on the water faucets and check for leaks. A small
amount of water might enter the washer. You will drain this
later.
NOTE: Replace inlet hoses after 5 years of use to reduce the
risk of hose failure. Record hose installation or replacement
dates for future reference.
Periodically inspect and replace hoses if bulges, kinks, cuts,
wear, or leaks are found.
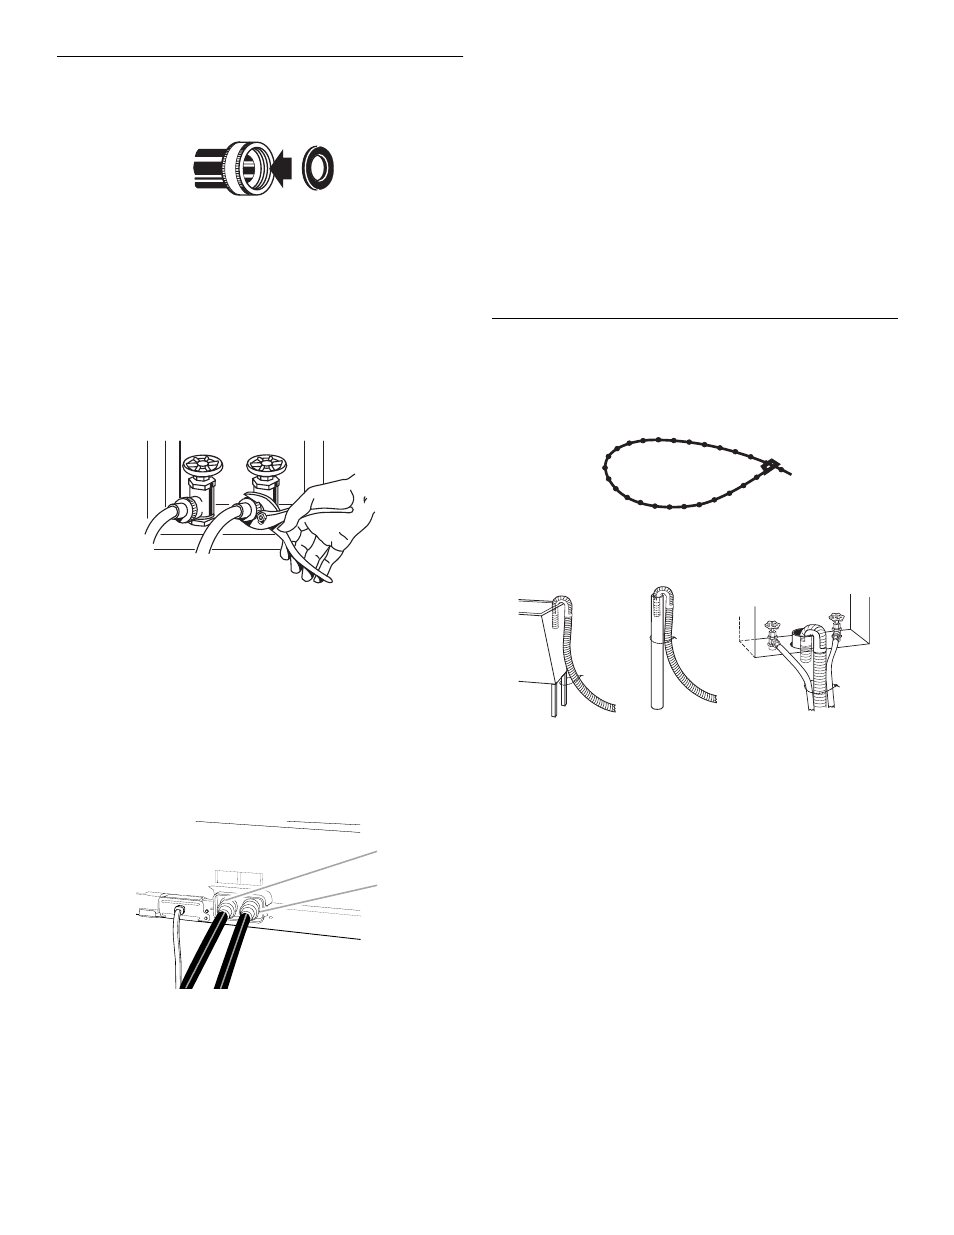
Secure Drain Hose
1. Drape the power cord over the console.
2. Move the washer to its final location and remove any
cardboard used to move washer.
3. Locate the beaded tie strap (supplied).
Beaded tie strap
4. Wrap the drain hose to the laundry tub leg or standpipe with
the tie strap. See illustrations A and B.
If the washer faucets and the drain standpipe are recessed,
put the formed end of the drain hose in the standpipe. Tightly
wrap the tie strap around the water inlet hoses and the drain
hose. See illustration C.
Do not force excess drain hose back into the rear of the washer.
A. Coupling
B. Washer
A. Cold water inlet valve (blue)
B. Hot water inlet valve (red)
A
B
Hot
Hot
Caliente
Caliente
Chaude
Chaude
Cold
Cold
Frio
Froide
roide
A
B
B
C
A