Service and adjustments, Warning – Weed Eater 545186748 User Manual
Page 7
7
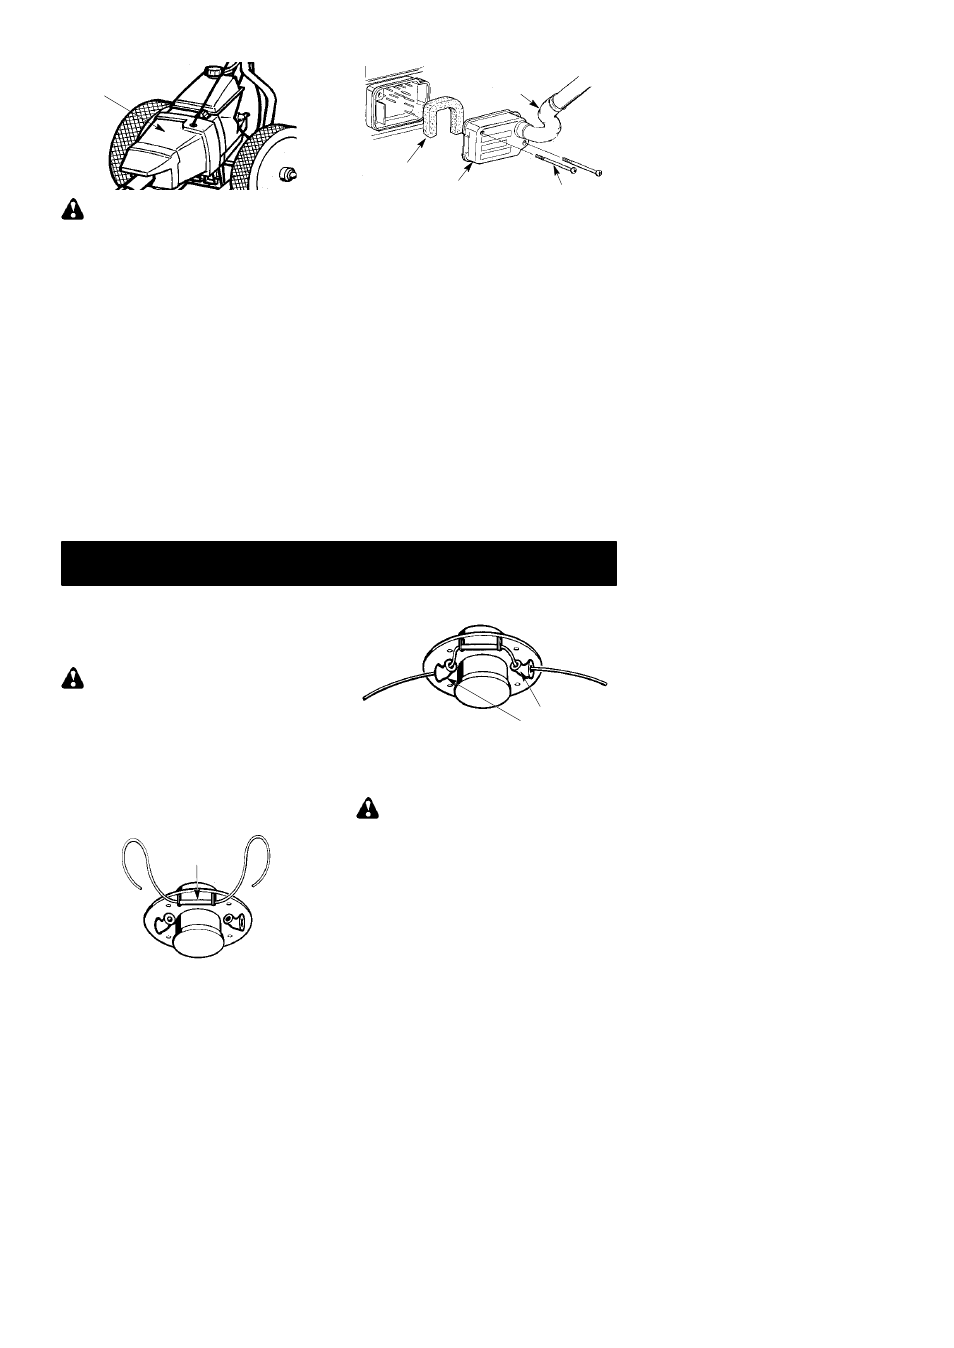
Air intake screen
WARNING:
S
top your unit before at-
tempting to clean the intake screen. DO NOT
USE GARDEN HOSE OR PRESSURE
WASHER TO CLEAN THIS UNIT!
S
Clean the intake screen periodically with a
nylon brush.
CLEAN THE AIR FILTER
A dirty air filter decreases engine perfor-
mance and increases fuel consumption and
harmful emissions. Always clean with engine
stopped. Clean filter after every 5 hours of op-
eration.
1. Clean the air filter cover and the area
around the cover to prevent dirt from falling
into the carburetor chamber when the cov-
er is removed.
2. Remove parts as illustrated. It is not nec-
essary to remove the air filter hose from
the air filter cover.
NOTE:
If the air filter hose becomes unat-
tached from the cover or lower handle during
cleaning, reattach before attempting to restart
the engine or operate the unit.
Air Filter Cover
Air
Filter
Screws
Air Filter
Hose
NOTE:
Do not clean filter in gasoline or oth-
er flammable solvent to avoid creating a fire
hazard or producing harmful evaporative
emissions.
3. Wash the filter in soap and water.
4. Allow filter to dry.
5. Add 10 -- 15 drops of oil to the filter;
squeeze the filter to distribute oil.
NOTE:
FILTER MUST BE OILED!
6. Replace parts.
REPLACE SPARK PLUG
Replace the spark plug each year to ensure
the engine starts easier and runs better. Set
spark plug gap at 0.025 inch. Ignition timing is
fixed and nonadjustable.
1. Twist, then pull off spark plug boot.
2. Remove spark plug from cylinder and dis-
card.
3. Replace with Champion RCJ-6Y spark plug
and tighten securely with a 3/4 inch socket
wrench.
4. Reinstall the spark plug boot.
SERVICE AND ADJUSTMENTS
REPLACING THE LINE
For unit to operate properly, the cutting line
should be replaced when line becomes worn to
less than 3 inches in length from the edge of the
line exit tunnels on each side of the cutting head.
WARNING:
Only replace cutting line
with engine switch in the OFF position.
1. Remove and discard worn line before
installing new line.
2. Use only 0.115″ (3 mm) diameter WEED
EATER brand cut length line.
3. Insert one end of the line through the posi-
tioning tunnel.
4. Continue to feed line through tunnel until
line is centered (leaving equal amounts on
each side). See illustration below.
Positioning
tunnel
5. Insert ends of line one at a time through the
line exit tunnels.
6. Pull the line and make sure the line is ex-
tended fully through the tunnels.
Line exit
tunnels
7. Correctly installed line will be the same
length on both ends.
CARBURETOR ADJUSTMENTS
WARNING:
Keep others away when
making idle speed adjustments. The trimmer
head will be spinning during most of this pro-
cedure. Wear your protective equipment and
observe all safety precautions. After making
adjustments, the trimmer head must not
move/spin at idle speed.
The carburetor has been carefully set at the
factory. Adjustments may be necessary if you
notice any of the following conditions:
S
Engine will not idle when the throttle is re-
leased.
S
The trimmer head moves/spins at idle.