Weider WEBE63990 User Manual
Page 10
10
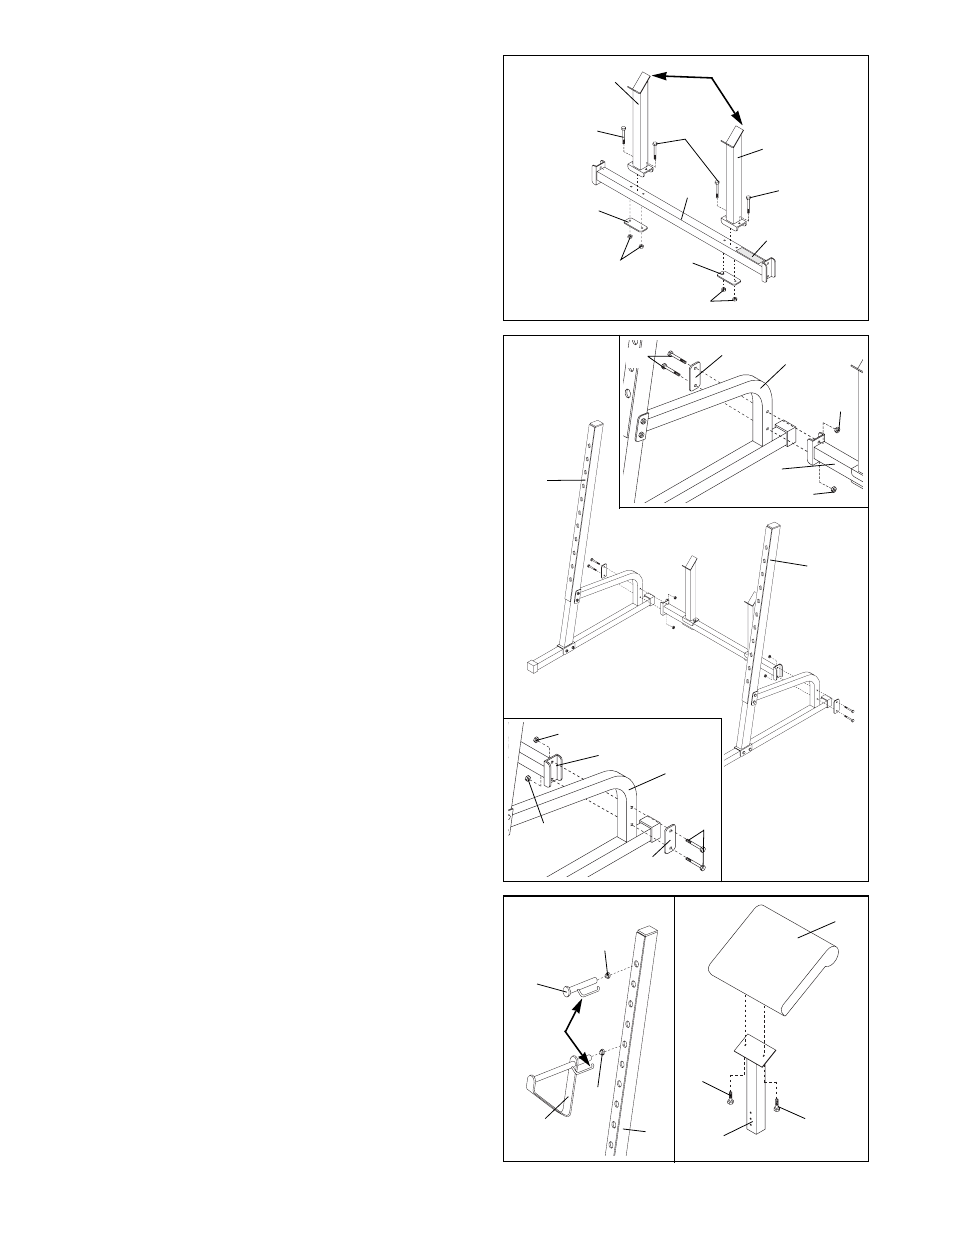
12. Orient the Crossbar (20) with the warning decal fac-
ing up as shown. Attach a Barbell Post (35) to the
Crossbar with two M10 x 68mm Bolts (33), a Support
Plate (16) and two M10 Nylon Locknuts (11).
Attach the second Barbell Post (35) to the Crossbar
(20) in the same manner. Note: Make sure both
Barbell Posts are oriented with the high side of
the bracket pointing in the same direction.
13. Note: Make sure the two upright assemblies have
the Nylon Locknuts on the side facing the center
of the bench, as described in steps 10 and 11.
Attach the Crossbar (20) to the right upright assembly
(A) with two M10 x 68mm Bolts (33), a Support Plate
(16) and two M10 Nylon Locknuts (11). Make sure
the Bolts are inserted from the side shown in the
upper inset drawing.
Attach the Crossbar (20) to the left upright assembly
(B) with two M10 x 68mm Bolts (33), a Support Plate
(16) and two M10 Nylon Locknuts (11). Make sure
the Bolts are inserted from the side shown in the
lower inset drawing.
Tighten the M10 Nylon Locknuts (11) used in
steps 10 and 11.
High Side of Bracket
35
20
33
33
B
A
Right
Side
Left
Side
35
33
11
Decal
16
16
11
12
14. Press a 1Ó Inner Cap (32) into the open end of each
Weight Rest (21, 52) and each Safety Spotter (26,
53). Insert each Weight Rest and Safety Spotter into
one of the adjustment holes in the Uprights (1). Note:
There is a Left Weight Rest (21) and a Right
Weight Rest (52) because the locking clip should
be on the outside of the Upright. The same is true
for the Left and Right Safety Spotter (26, 53).
Warning: Always insert both Weight Rests at the
same height. Always insert both Safety Spotters
at the same height. Make sure the locking clips
snap into place around the Uprights.
15. Attach the Curl Pad (29) to the Curl Post (42) with
two M6 x 16mm Screws (3).
1
21
26
32
32
14
13
33
11
11
20
16
33
11
11
20
B
16
Locking
Clip
15
3
29
3
42
A