Multi-function cooktop installation, Install the cooktop – Wolf Appliance Company IM15 User Manual
Page 11
Multi-Function Cooktop Installation
11
wolfappliance.com/specs
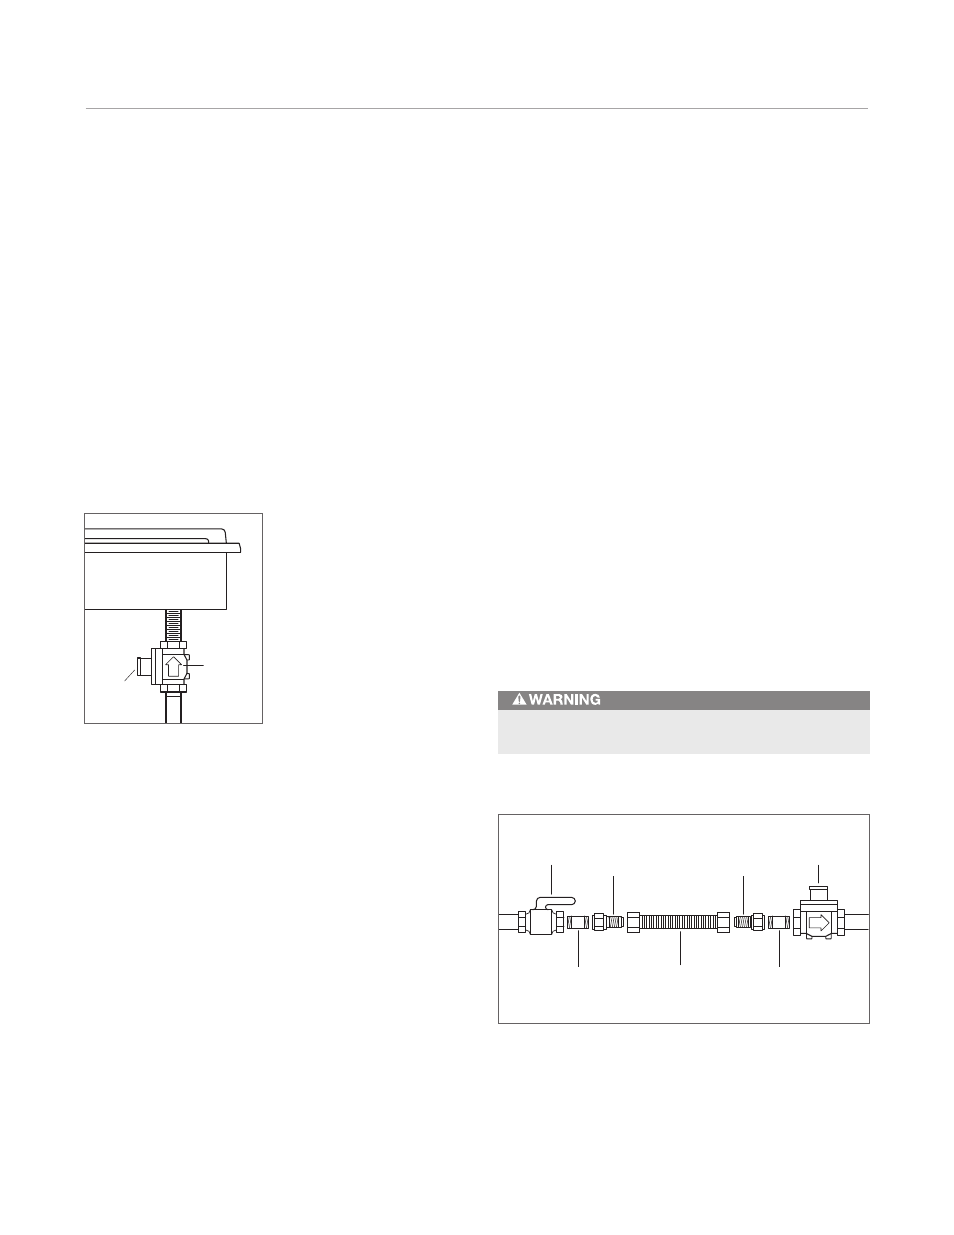
Install the Cooktop
GAS PRESSURE REGULATOR
Install the gas pressure regulator with the arrow on the
regulator pointing up toward the unit and in a position
where you can reach the access cap. Refer to the illustra-
tion below.
IMPORTANT NOTE:
All connections must be wrench-tight-
ened. Do not make connections to the regulator too tight,
as this may crack the regulator and cause a gas leak. Do
not allow the regulator to turn on the pipe when tightening
fittings.
COOKTOP
ACCESS
CAP
ARROW
POINTS UP
Gas pressure regulator.
GAS SUPPLY CONNECTION
Assemble the flexible metal connector from the gas supply
pipe to the gas pressure regulator. You will need to deter-
mine the fittings required, depending on the size of your
gas supply line, flexible metal connector and shut-off
valve. Refer to the illustration below.
Use a pipe joint compound made for use with natural and
LP gas. If a flexible metal connector is used, be sure the
tubing is not kinked.
Open the gas shut-off valve in the gas supply line. Wait a
few minutes for the gas to move through the line. Refer to
the illustration on page 6.
GAS LEAK TESTING
Use a brush and liquid detergent to test all gas connec-
tions for leaks. Bubbles around connections will indicate a
leak. If a leak appears, shut off the gas supply and adjust
connections. Then check connections again. Clean the
detergent solution from the cooktop.
Never test for a gas leak with a match or other flame.
FLEXIBLE
METAL CONNECTOR
GAS PRESSURE
REGULATOR
SHUT-OFF
VALVE
NIPPLE
ADAPTER
ADAPTER
NIPPLE