Sharpening or replacing chipper blades, Changing the friction wheel rubber – White Outdoor Yard Boss 950 User Manual
Page 12
12
NOTE: Be certain to reassemble the flail screen with
the curved side down.
•
Reattach the discharge chute assembly with the
hardware previously removed and connect the bag
to unit.
Sharpening Or Replacing Chipper Blades
NOTE: When tipping the unit, empty the fuel tank and
keep spark plug side up.
•
Disconnect the spark plug wire and ground it
against the engine.
•
Remove the flail screen as instructed in the
previous section.
•
Remove the plastic belt cover on the front of the
engine by removing the two self-tapping screws.
See Figure 14.
Figure 14
•
Remove the access plate by removing two hex lock
nuts. See Figure 14.
•
Locate one of the chipper blades in the access
opening by rotating the impeller assembly by hand.
Remove the chipper blade using a 3/16” allen
wrench and a 1/2” wrench.
•
Remove other blade in the same manner to replace
or sharpen.
WARNING: Use caution when replacing
the blade, wear heavy gloves to avoid a
contact injury with the weld bolts or the
housing while loosening or tightening the
blade.
•
When sharpening blade, follow the original angle of
grind. Also, make sure to remove an equal amount
from each blade and torque hardware 250 - 300 in.
lbs.
NOTE: Make certain blades are reassembled with the
sharp edge facing upward.
Changing The Friction Wheel Rubber
The rubber on the friction wheel is subject to wear and it
should be checked or replaced after 50 hours of
operation. Replace friction wheel rubber if any signs of
wear or cracking are found.
•
Drain the gasoline and oil from the chipper
shredder vacuum.
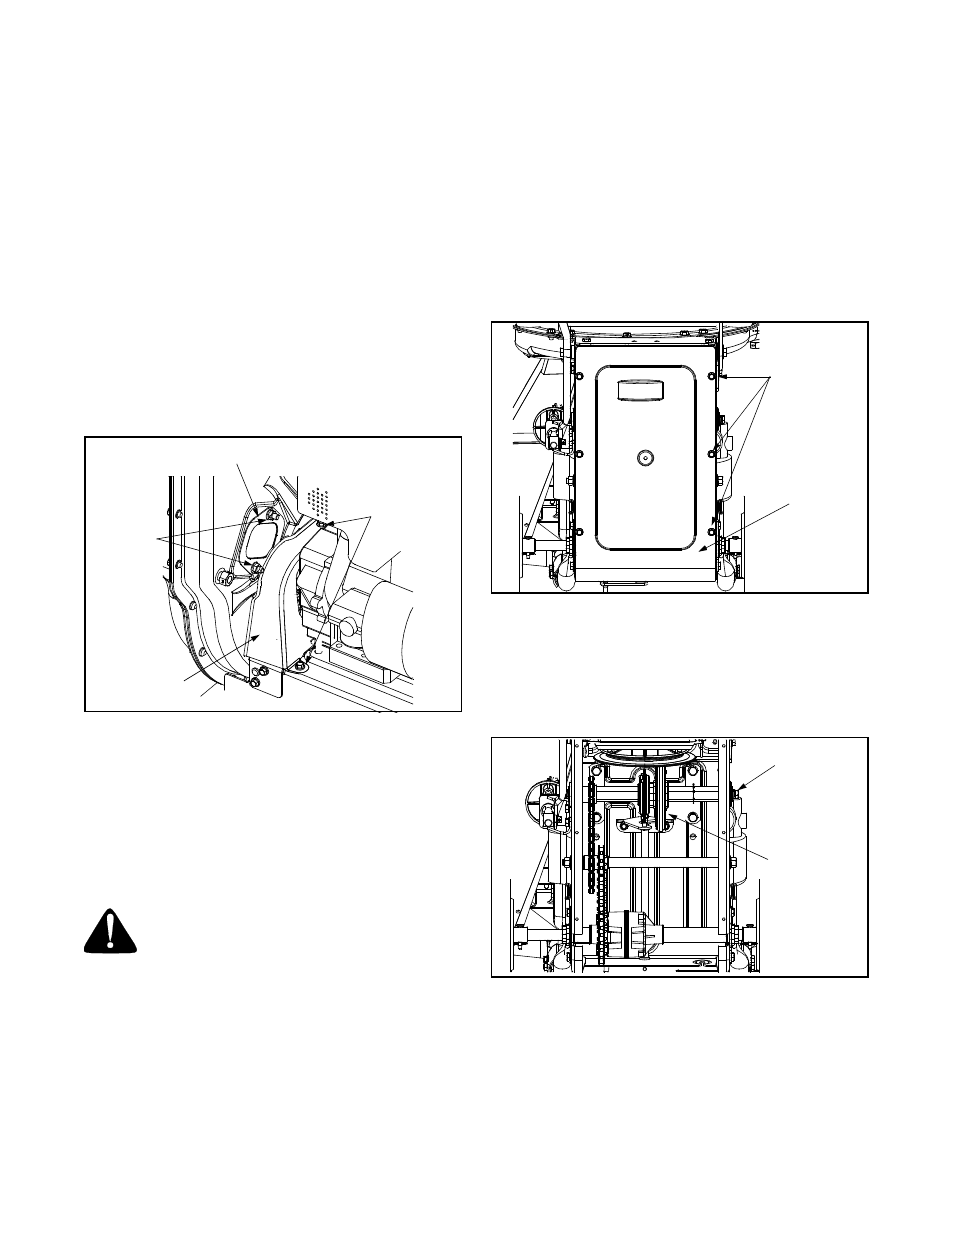
•
Tip the unit backward so it rests on the handles.
•
Remove the frame cover by removing eight self-
tapping screws from underneath the chipper
shredder vacuum. See Figure 15.
Figure 15
•
Remove the hex shaft from the unit by removing the
hex bolts, lock washers, and flat washers from each
side of the frame. See Figure 16.
•
Hold the friction wheel assembly and slide the hex
shaft out of the unit toward the right side.
Figure 16
•
Remove the six screws, three from each side, from
the friction wheel assembly and remove the friction
wheel rubber from between the friction wheel
plates.
•
Attach the new friction wheel rubber to the friction
wheel assembly and tighten the six screws in
rotation and with equal force.
Belt
Cover
Self-Tapping
Screws
Access Plate
Hex
Lock Nuts
Self-Tapping
Screws
Frame
Cover
Hex Bolt
Lock Washer
Flat Washer
Friction
Wheel