ViewEra V191 User Manual
Page 14
13
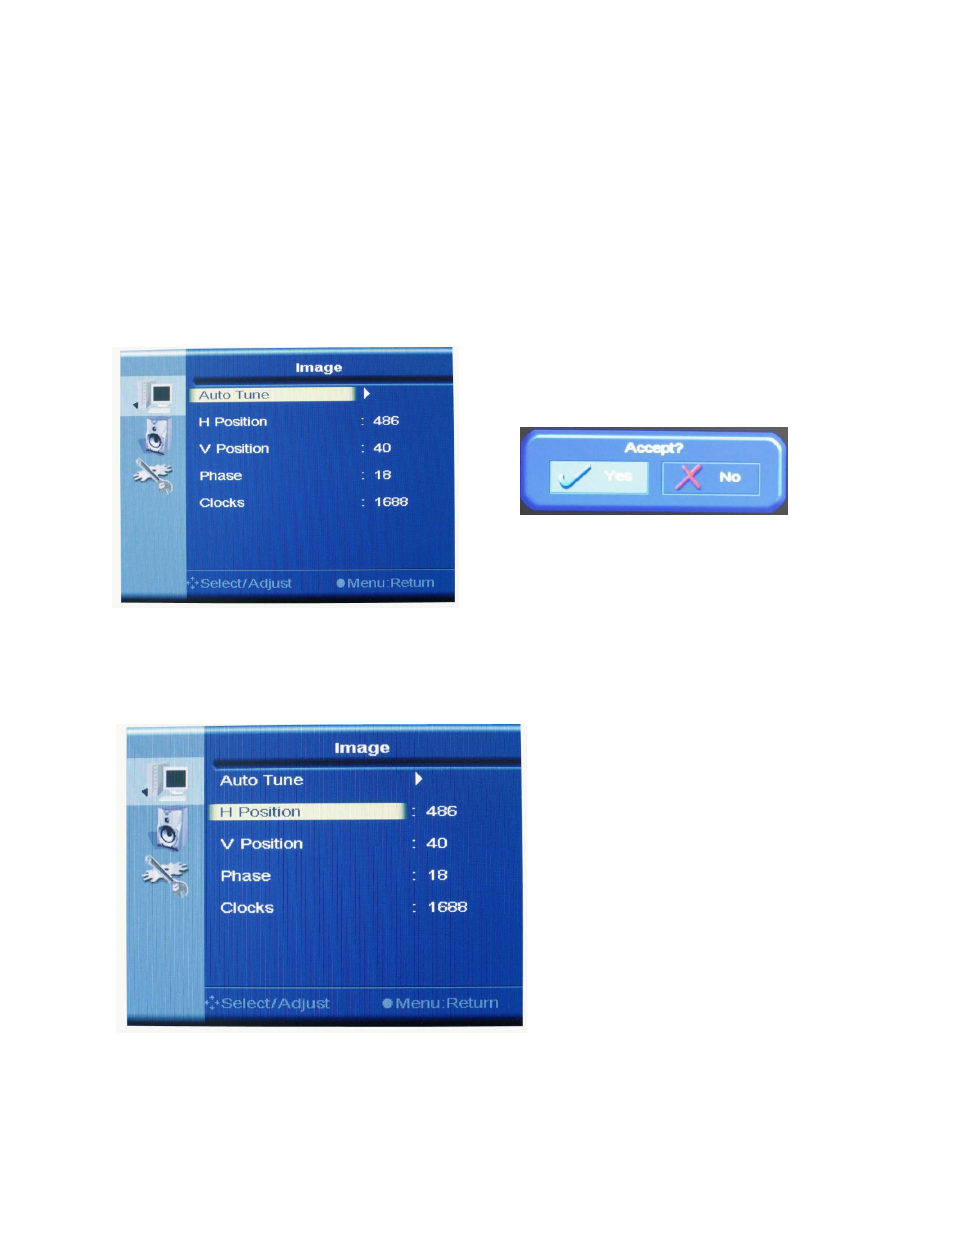
6) Image
Press
“
1
”
to get the OSD, press
“
1
”
then
“”
or
““
to move the highlight to Image menu, and then press
“
1
”
to enter Image sub-menu. Then press
“”
or
““
to move the highlight to Auto Tune, H Position, V
Position, Phase or Clocks.
6.1) Auto Tune: Press
“”
or
““
to move the highlight to Auto Tune and press
“
1
”
to automatically tune the
image position, pixel clock and phase to optimum, and then press
“”
or
““
to move the highlight to
“
Yes
”
and press
“
1
”
to confirm the adjustment and back to Image sub-menu.
6.2) H Position
a. Press
“”
or
““
to move the highlight to H Position and press
“
1
”
to enter.