R2200, Final assembly, Step 7 • console – Vision Fitness 2200 HRC User Manual
Page 7: Step 8 • operation test, Heart rate control console
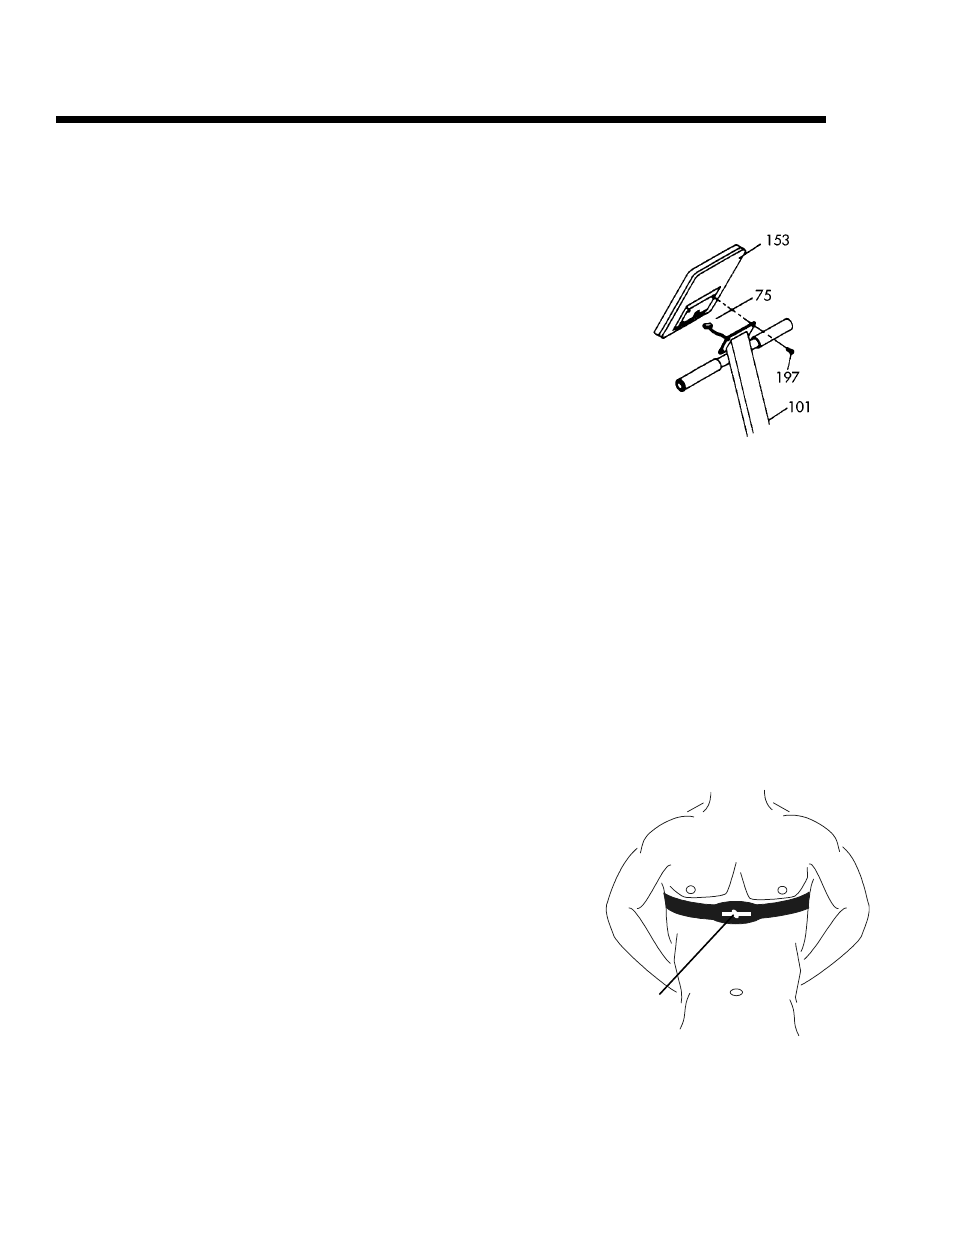
Step 7 • Console
1:
Plug the Console Cable (75) into the Console (153). The cable
Connectors are slotted and will only fit properly one way. DO
NOT FORCE the connection.
2:
Mount the Console (153) to the Console Mast (101) using the
four Console Attachment Bolts (197). Make sure you DO NOT
PINCH the Console Cable between the Console and the Console
Mast.
3:
Plug the Power Supply Cord into the receptacle located at the
base of the Fitness Cycle below the Seat rail. Plug the Power
Supply (107) into an electrical outlet and begin testing
procedures.
Step 8 • Operation Test
Run this simple test prior to using.
1:
Choose Intervals program, Level 8.
2:
Choose Time of “00:00”, and press Start.
3:
Your machine will now operate indefinitely. After several hours
of operation, check for proper functioning of:
A: Resistance Change -- change load one level at a time
using the up and down arrows. Listen for motor noise
(“whirr”) following each change in load, or pedal to feel
load change.
B: Check for display in RPMs while pedaling.
C: Check that all LEDs will light.
Heart Rate Control Console
This console is manufactured with an internal wireless
telemetric receiver that will receive heart rate signals sent to it
by a transmitter that is worn around your chest. This wireless
technology is accurate, continuous, and convenient. You should
be positioned on the Fitness Cycle seat for the system to operate.
1:
On the back side of your transmitter are two rubber strips
several inches long. These rubber strips are the electrodes that
will pick up tthe signals of your heart beat. It is very important
to moisten these strips with several drops of water prior to
placing the belt against your chest. This moisture will allow the
signals to be conducted to the transmitting hardware. If you
ever use the bike and the display does not show a heart rate
value, remoisten the electrodes.
2:
You will get the best results if you wear the transmitter directly
against your skin. Once these electrodes are moistened, center
the transmitter just below the breast or pectoral muscles with
the Vision Fitness logo centered on the chest and facing out.
Adjust the length of the elastic belt so that the transmitter
presses firmly against your skin, but not so tight as to be
uncomfortable. The transmitter will begin sending a signal as
soon as it is worn.
3:
Check for heart rate feedback by testing the console in Heart
Rate mode. Ride the Fitness Cycle at the full range of seat
adjustments to confirm that the console is picking up the
signal from the transmitter.
R2200
Final Assembly
LOGO