Maintenance – Viper FANG 20-EU User Manual
Page 19
18
SCRUBBERS FANG20-EU / FANG20T-EU 82089E(1)2009-04A
ENGLISH
USER MANUAL
DAILY MAINTENANCE
Remove pad driver / brush and clean with approved cleaner.
Drain recovery and solution tanks completely and rinse out with clean water. Visually check the recovery tank for debris and cl-
ean out as necessary.
Raise squeegee assembly off floor and wipe it down with a damp towel. Be sure to store the squeegee in the up position.
Remove the float shut-off assembly and rinse it out with clean water.
Clean machine with an approved cleaner and a damp towel.
Recharge batteries.
1.
2.
3.
4.
5.
6.
Check fluid level in batteries.
Check batteries for loose or corroded cables.
Keep battery tops clean from corrosion.
1.
2.
3.
MAINTENANCE
WEEKLY MAINTENANCE
MONTHLY MAINTENANCE
Check machine for leaks and loose fasteners.
Lubricate all grease points and pivot points with silicon spray and approved grease.
Place machine over a floor drain. Flush solution system by pouring 10 liters of hot water and approved alkaline detergent into
the solution tank and running machine (with solution control on) for 45 seconds. Turn machine off and let it sit overnight. Then
next day, drain the remaining solution and rinse the solution tank out with clean water.
1.
2.
3.
VACUUM SYSTEM MOTOR FILTER CLEANING
1.
Drive the machine on a level floor.
2.
Turn the ignition key (28) to “0”.
3.
Open the recovery water tank.
4.
If necessary, drain the water from the tank in order to make the filter visible.
5.
Check that the pre-filter is clean. If necessary clean it with water and compressed air, then install it.
6.
Perform steps 1, 2 and 3 in the reverse order.
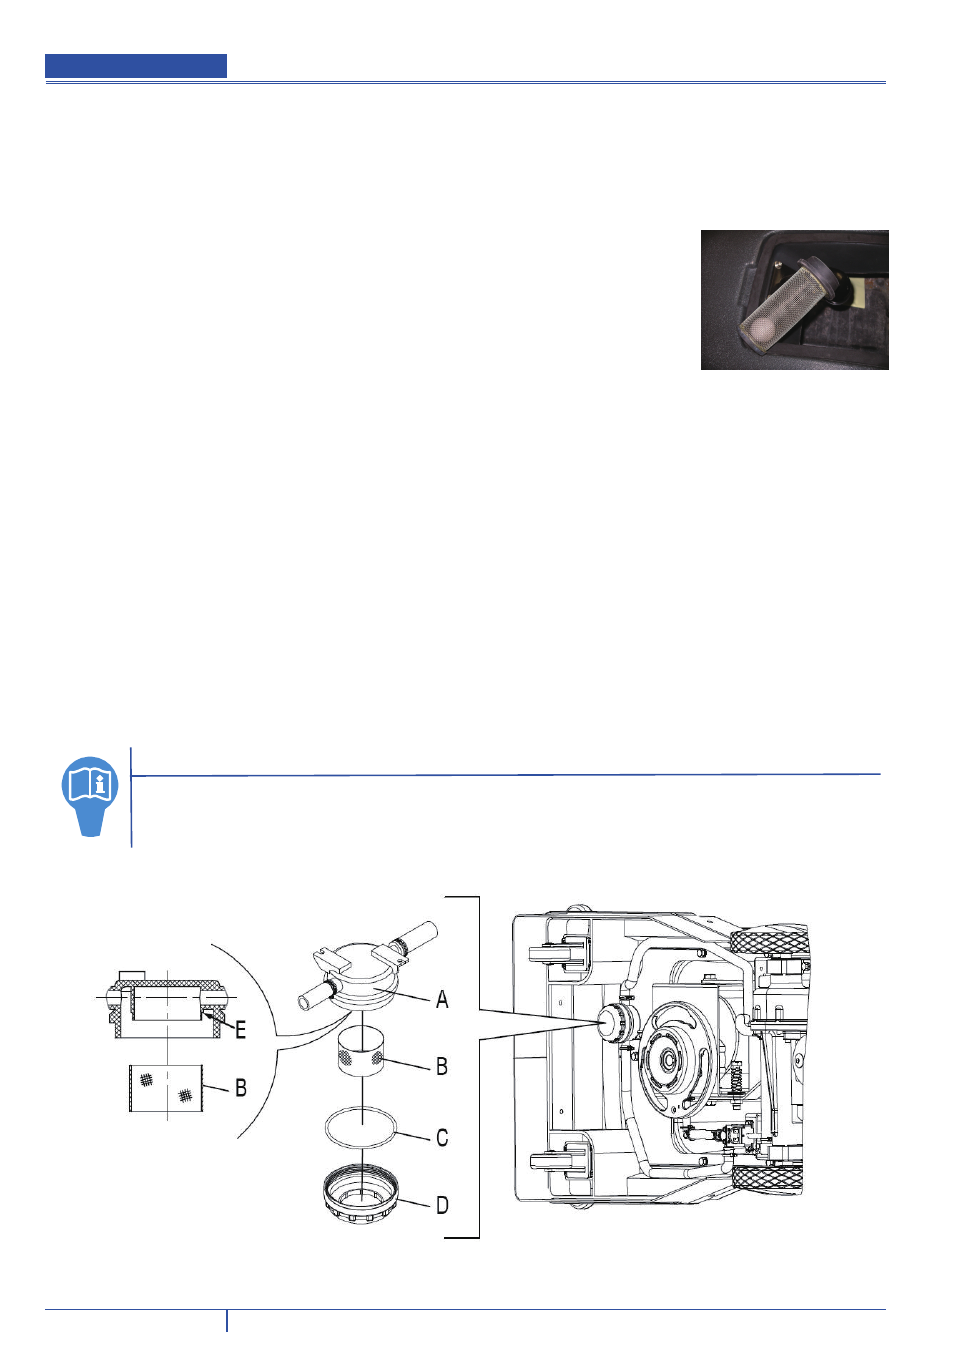
SOLUTION/CLEAN WATER FILTER CLEANING
1.
Drive the machine on a level floor.
2.
Turn the ignition key (28) to “0”.
3.
Remove the transparent cover (D), then remove the filter strainer (B). Clean and install them on the support (A).
NOTE
The filter strainer (B) must be correctly positioned on the housing (E) of the support (A).