Troy-Bilt 2-Cycle Gasoline Trimmer/Brushcutter TB90BC User Manual
Page 4
4
On some units, the J-handle may be pre-installed. In this case,
loosen the screws and go to step 5.
INSTALL AND ADJUST THE J-HANDLE
1.
Place the J-handle between the top and middle clamp
pieces (Fig. 1).
(4) Screws
Top Clamp
J-Handle
Middle Clamp
Bottom Clamp
Nuts
2.
While holding the three pieces together, install the four (4)
screws through the top clamp and into middle clamp.
NOTE: The holes in the top and middle clamp will line up only
when assembled correctly.
3.
Place the clamps and the J-handle over the shaft housing
and onto the bottom clamp.
Fig. 1
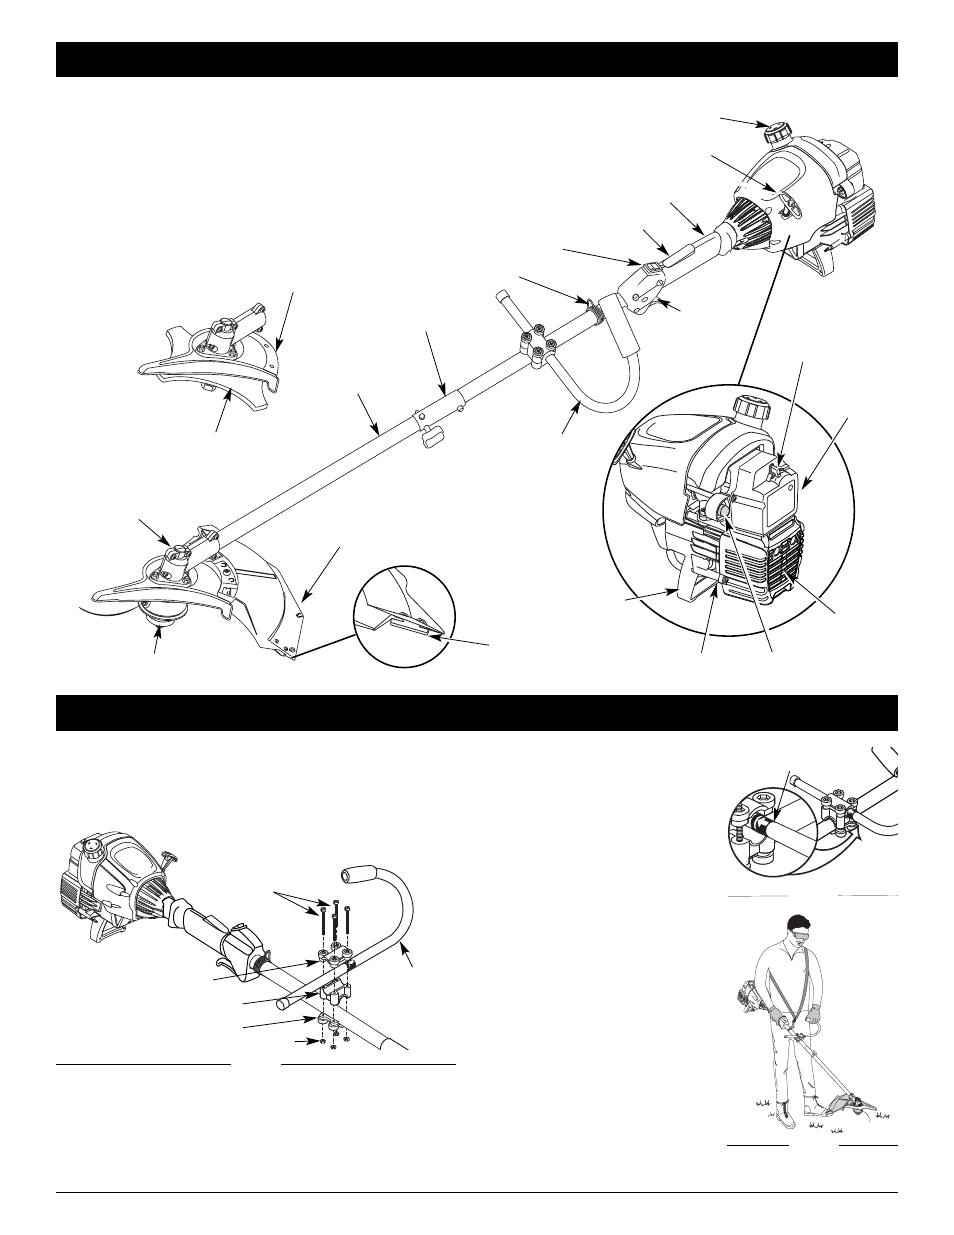
KNOW YOUR UNIT
Cutting Attachment
Shield
Fuel Cap
Throttle
Control
Throttle Lock-Out
J-Handle
Cutting Attachment
Gear Housing
Shaft Grip
Primer Bulb
Blue Choke
Lever
Spark Plug
Engine Stand
On/Off Stop Control
Shaft
Housing
Starter Rope Grip
Blade Shield /
Shield Mount
Brush
Blade
Line Cutting
Blade
Muffler
Shoulder Strap Clip
EZ-Link™
Air Filter/
Muffler
Cover
ASSEMBLY INSTRUCTIONS
4.
Hold each hex nut in the
bottom clamp recess with a
finger. Start screws with a
large Phillips screwdriver. Do
not tighten until you make the
handle adjustment.
5.
Slide the J-handle in or out until
the arrow/white line on the decal
touches the clamp assembly (Fig.
2). You must first loosen the
screws if the handle is pre-
installed.
6.
While holding the unit in the
operating position (Fig. 3),
position the J-handle to the
location that provides you the
best grip.
7.
Tighten the clamp screws
evenly, until the J-handle is
secure.
Fig. 2
Fig. 3
Decal
APPLICATIONS
As a trimmer:
• Cutting grass and light weeds
• Edging
• Decorative trimming around trees, fences, etc.
NOTE: The below illustration may differ slightly from your unit.
For example, the picture shows a straight shaft. Your unit may
have a curved shaft.