TOA Electronics SLDVT-40 User Manual
Page 6
6
NOTE: DIAGRAMS & ILLUSTRATIONS ARE NOT TO SCALE.
Front Glass enclosure panel, removal
and installation
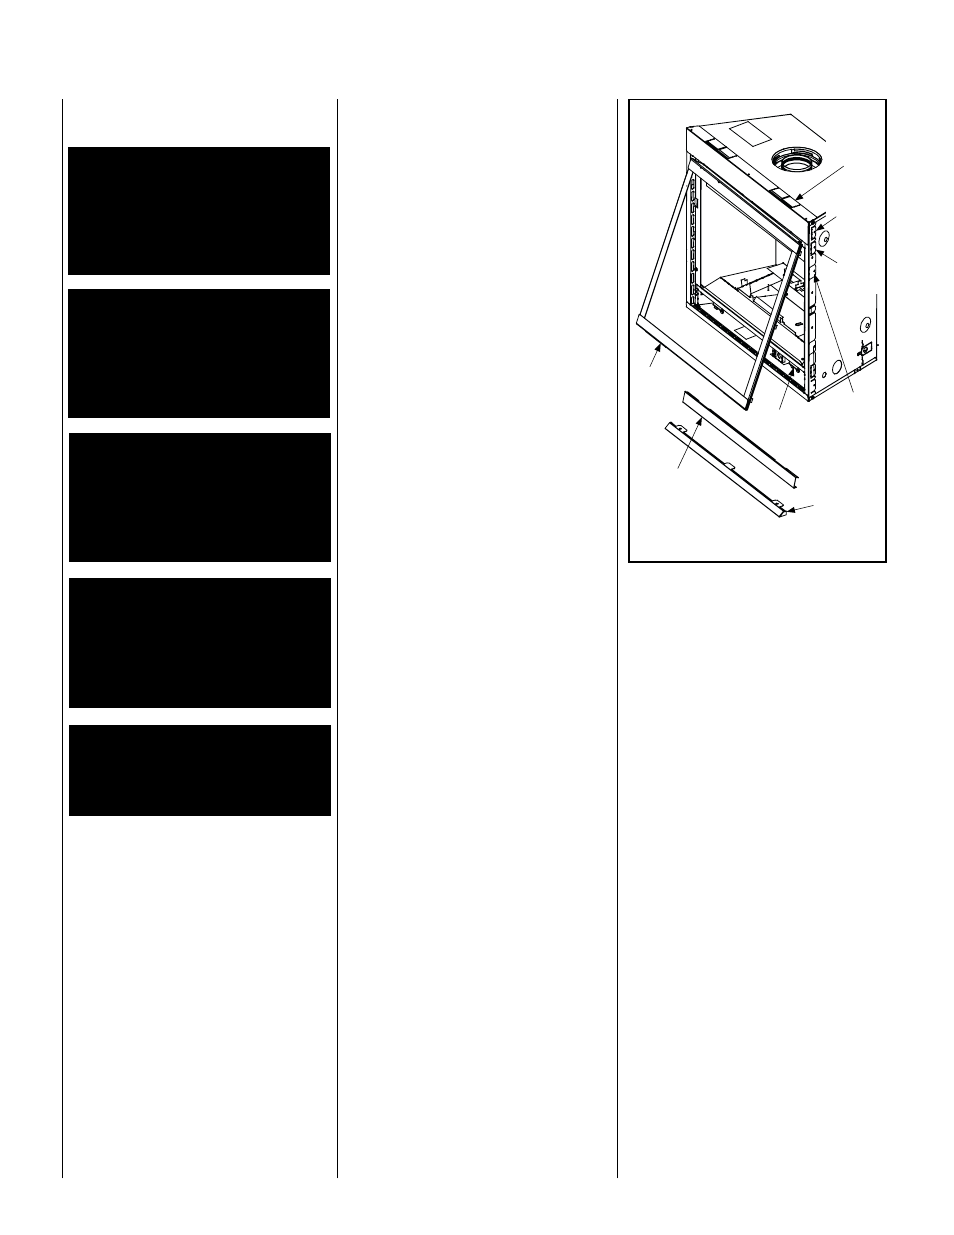
Figure 5
- instaLLinG GLass door
WarninG: do not operate appli-
ance with the glass front removed,
cracked or broken. replacement
of the glass should be done by
a licensed or qualified service
technician.
WarninG: do not attempt to
substitute the materials used on
this door, or replace cracked or
broken glass with any materials
other than those provided by the
appliance manufacturer.
WarninG: Handle this glass
with extreme care! tempered
glass is susceptible to damage
– do not scratch or handle roughly
while reinstalling the glass door
frame.
WarninG: the glass door of this
appliance must only be replaced as
a complete unit as provided by the
manufacturer. do not attempt to
replace broken, cracked or chipped
glass separately.
WarninG: do not attempt to
touch the front enclosure glass
with your hands while the fireplace
is in use.
Conrol
Compartment
Panel
Hood
Glass
Door
Header
Spacing
Guides
Flush
Nailing
Flange
1/2”
Nailing
Flange
5/8”
Nailing
Flange
Glass Door
Spring Latch
removing Glass enclosure panels
(see Figure 5)
1. To access the glass door securing latches,
first open the lower control compartment door
(Figure 5 ) by lifting and pulling the bottom
panel forward.
2. Pull the latches forward and down to release
them from the door channel.
3. Pull the bottom of the door out a few inches
and grasp it on the right and left. Gently lift to
release the door from its channel above the
door. Pull the door forward.
4. Retrieve the glass door. Visually inspect the
gasket on the backside of the frame. Gasket
surface must be clean, free of irregularities
and seated firmly.
5. Position the door in front of the firebox
opening with the bottom of the door held away
from the fireplace (Figure 5 ). Hook the top
flange of the door frame over the top of the
firebox frame.
6. Let the bottom of the door frame swing
gently in towards the fireplace ensuring that the
gasket seats evenly as the door frame draws
shut. Fasten the two latches located underneath
the firebox floor to the door's vee-flange. Close
both the latches securely.
7. If desired, install the optional hood. Note
the location of the three clips inside the top air
channel above the door. The clips are equally
spaced on the top surface of the air channel
opening. Use a screwdriver to open the clips
slightly if needed. Engage the back edge of the
eyebrow into the clips to secure.