Installation 7, Unit diagram capacity selection guide 2 – Trion Supreme Series User Manual
Page 4
Installation
7
Air Bear Supreme 2000 (20” x 25” x 5”)
Air Bear Supreme 1400 (16” x 25” x 5”)
Air Bear Supreme 1400 (20” x 20” x 5”)
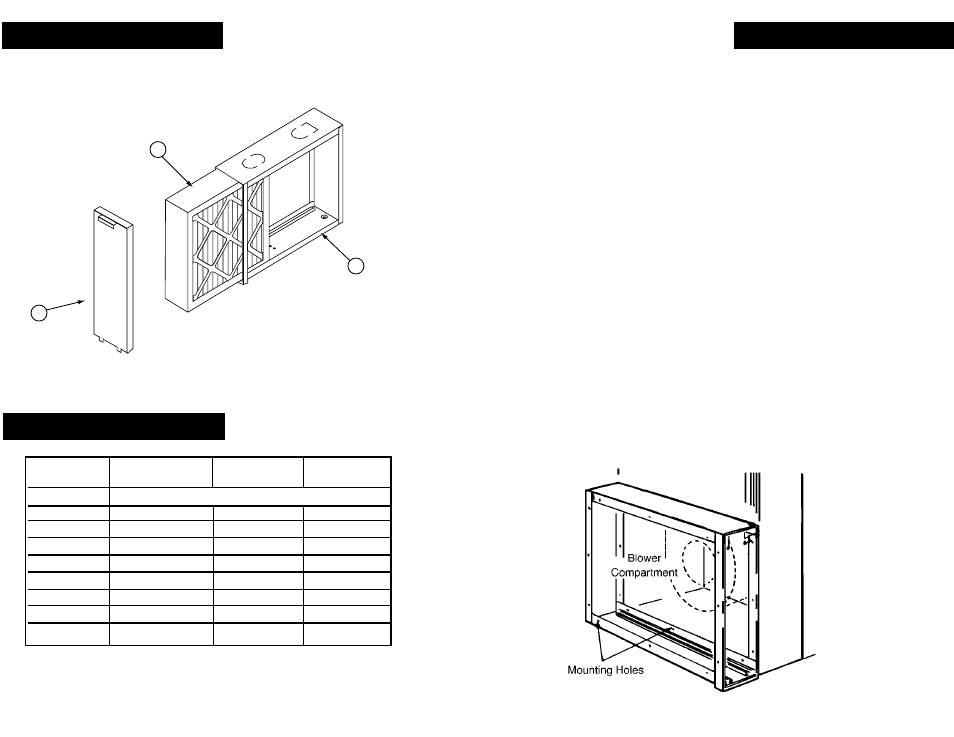
1. Cabinet
2. Filter Cartridge
3. Access Door
1
2
3
Model
Air flow (CFM)
600
800
1000
1200
1400
1600
1800
2000
Air Bear Supreme
1400 (20” x 20”)
.04
.08
.12
.18
.24
.
.
.
Air Bear Supreme
1400 (16” x 25”)
.04
.08
.12
.18
.24
.
.
.
Air Bear Supreme
2000 (20” x 25”)
.03
.05
.07
.10
.14
.18
.22
.27
Resistance (Inches W.G.)
Unit Diagram
Capacity Selection Guide
2
Physical Installation
The air cleaner cannot be installed with the access door facing down. The
section entitled Typical Mounting Positions (pg.4) shows examples of proper
air cleaner mounting with a variety of furnace installations.
Prior to Installing this Product
1. Read rules and instructions carefully for safe operation. Failure to follow
them could damage the product or cause a hazardous condition.
2. Check the ratings given on the product to make sure it is suitable for
your application.
3. Remove the old furnace filter and discard.
4. The air cleaner cannot remove existing dirt from the blower and ducts.
Clean the area thoroughly before beginning installation.
NOTE:
The following is a typical installation of the air cleaner on a highboy furnace.
You may have to alter the installation to fit your specific application.
5. Locate the cabinet in the cold air return duct such that all of the return
air flows through the unit. If the furnace and air cleaner openings are
different, use a transition.
6. Mounting holes are provided in the air cleaner cabinet for ductwork
attachment. The .140” diameter holes are sized for #8 sheet metal
screws, or 1/8” rivets. If the adjoining ductwork is flanged, install the
screws with the screw heads inside the cabinet, to prevent damage to
the filter cartridge during removal and installation.
7. Remove the plastic bag from the filter cartridge and replace filter
cartridge in cabinet.
8. After the unit has been secured, seal seams air tight with duct tape or
caulking. Reinstall access door to ensure a tight seal.