Before operation (continued), Danger – Troy-Bilt 13101 - GTX 16 User Manual
Page 15
Before Operation (continued)
15
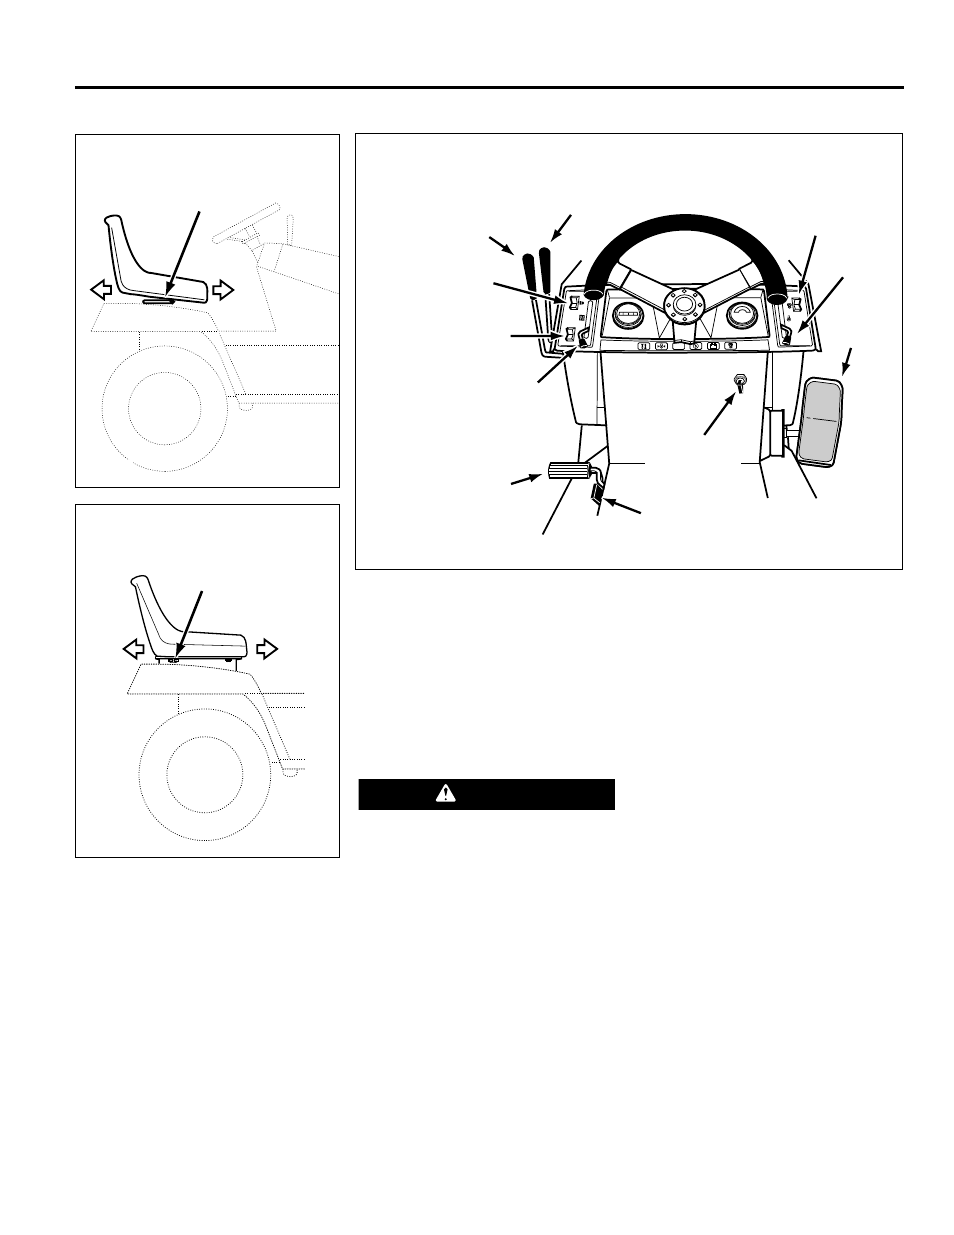
Loosen adjustment knobs (ZZ),
slide seat forward or backward.
ZZ
Fig. 5-3
4. Visually Check
Check for and repair loose or missing
screws, nuts, and damaged parts.
5. Check Battery
To connect the battery initially,
remove the red (+) terminal cover
from the (+) positive terminal and
connect the red battery cable to this
terminal. Tighten the hardware before
sliding the boot over the terminal.
Auxilliary
Hydraulic Lever
(Model 13076 Only)
(L)
Brake/Neutral
Pedal (F)
Attachment Lift
Lever (K)
Cruise Control Switch
(Models 13074 & 13076)
(O)
Attachment/PTO Drive
Switch (X)
Throttle (J)
Travel
Pedal (M)
Parking Brake Lever (N)
Ignition/Starter
Switch (H)
Choke Lever (G)
Light
Switch (E)
Fig. 5-4
Next, remove the black (-) terminal
cover from the batery and connect
the black (-) battery cable. Tighten
the hardware. If cables are corroded,
clean them. See “Battery”, page 22.
BATTERIES PRODUCE EXPLOSIVE
GASSES. KEEP OPEN FLAMES AND
SPARKS AWAY. DO NOT SET TOOLS
ACROSS TERMINALS.
BATTERY ELECTROLYTE CAN CAUSE
SEVERE BURNS. EYE CONTACT CAN
CAUSE BLINDNESS. ALWAYS WEAR EYE
PROTECTION AND RUBBER GLOVES
WHEN WORKING NEAR BATTERY.
NEVER WEAR JEWELRY.
IF ELECTROLYTE CONTACTS SKIN OR
EYES, RINSE IMMEDIATELY WITH
WATER FOR AT LEAST 15 MINUTES.
CALL PHYSICIAN IMMEDIATELY.
DANGER
6. Check Tire Pressure
Front – 12 to 14 PSI (82 to 96 kPa)
Rear – 8 to 10 PSI (55 to 68 kPa)
7. Adjust Seat
Models 13074 & 13076 - To adjust
seat, lift lever (Z, Fig. 5-2) and slide
seat forward or backward. Release
lever.
Model 13101 - To adjust seat,loosen
adjustment knobs (ZZ, Fig. 5-3) and
slide seat forward or backward.
Tighten adjustment knobs.
8. Perform Electric Clutch
Break-in Procedure
Perform this step before initial use
and after extended storage.Before
operating unit, start engine as
instructed on page 16. With the
engine running at full speed, engage
and disengage attachment/PTO drive
switch (X, Fig. 5-4) 10 to 15 times.
Z
Lift seat adjustment lever (Z) and
slide seat forward or backward.
Fig. 5-2
Models
13074 & 13076
Model 13101