2 parts of the cd-d4000, 1 power switch, 2 display – Tascam CD-D4000 User Manual
Page 5: 3 mode key, 4 enter key, 5 master drive, 6 slave drive, 1 - introduction
1 - Introduction
TASCAM CD-D4000
5
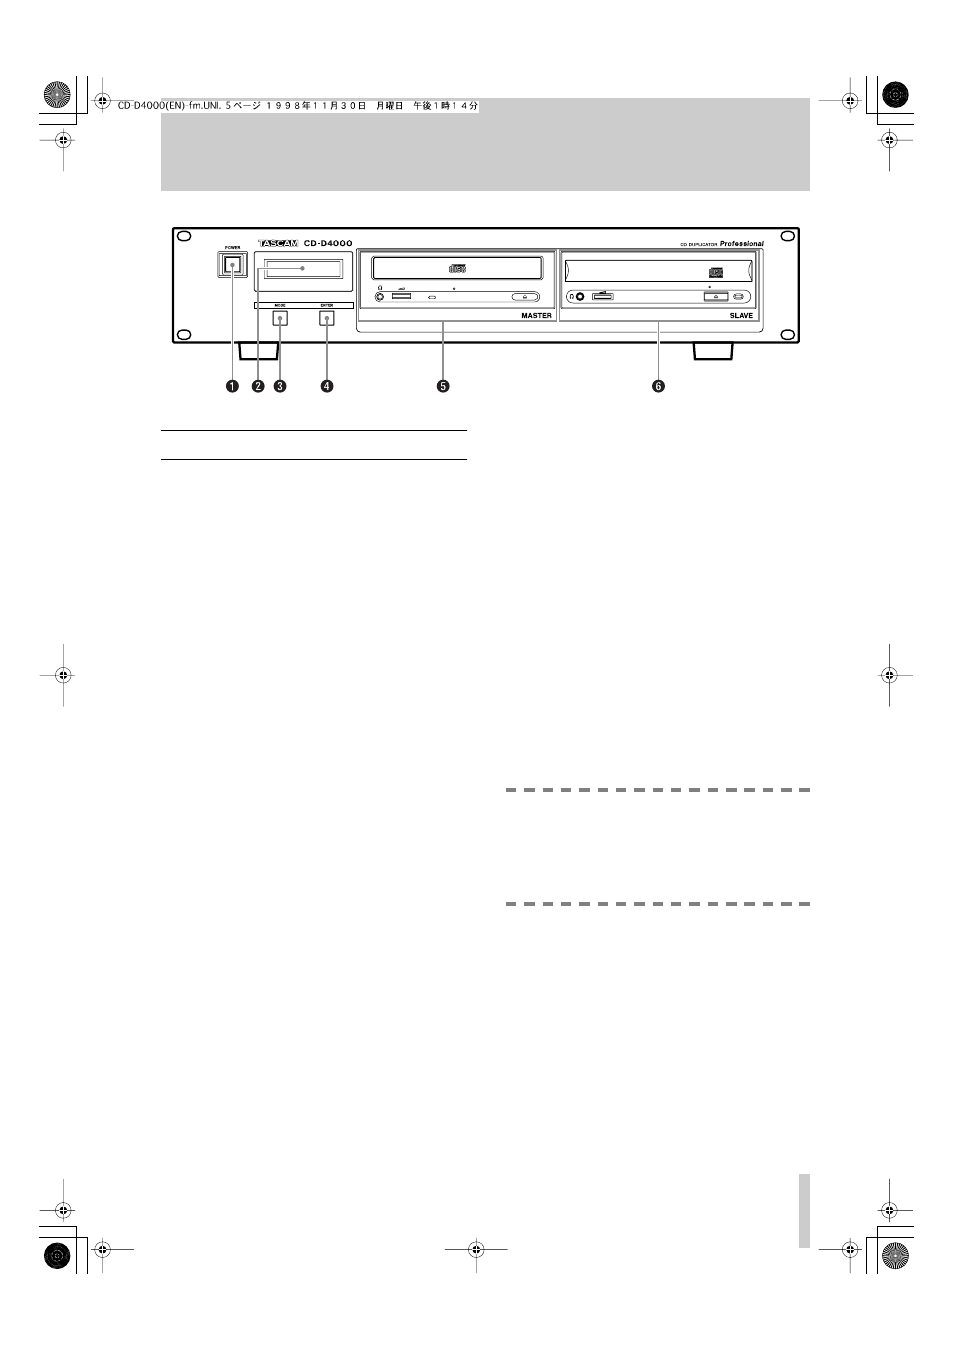
1.2 Parts of the CD-D4000
The following refer to front panel items only. The
only rear panel feature is the power cord, which
should be plugged into a power supply that matches
the voltage shown on the rear panel label.
1
POWER switch
Press this switch once to power on the unit, and again
to turn it off.
PLAUGGABLE EQUIPMENT, that the socket-
outlet shall be installed near the equipment and shall
be easily accessible.
2
Display
The 2 x 16 LCD display displays the menus and sub-
menus available, and also provides information on
the status of the current operation, as well as display-
ing error messages, etc.
3
MODE key
The
MODE
key is used to cycle through the different
menus and options available to put the unit into the
different modes, as explained below.
4
ENTER key
The
ENTER
key is used to confirm the selection of
menu items and options. It also acts as a “start” key
to start operations.
5
MASTER drive
The
MASTER
drive is used to hold the source CD.
This may be a pre-recorded audio CD or CD-ROM
which you have permission to copy, a CD-R or a CD-
RW disc.
The eject button is used to eject the master disc when
no operation is in progress. The indicator on this
drive shows when the disc is being accessed.
In the “Play audio” mode (see 2.5, "Play audio
track"), a pre-recorded CD may be inserted into this
drive, and played back, track by track. The head-
phone jack and volume controls of this drive are
operational in this mode only.
6
SLAVE drive
The
SLAVE
drive holds the destination CD. This
must be a CD-R disc. The CD-D4000 cannot record
on CD-RW discs (but can use them in the
MASTER
drive as source discs).
The eject button is used to eject the slave disc when
no operation is in progress. The indicator on this
drive shows when the disc is being accessed for read-
ing or writing.
In the “Play audio” mode (see 2.5, "Play audio
track"), an audio CD may be inserted into this drive,
and played back. The headphone jack and volume
controls of this drive are operational in this mode
only.
NOTE
If a disc is in a drive and cannot be removed
by using the eject button, you can insert a thin
stiff wire (such as the end of a paperclip) into
the hole on the front panel of the drive (under
the tray). This will open the tray.