2 ladder modification (optional), 3 ladder assembly, 3 – installation – Tripp Lite SmartRack SRCABLELADDER User Manual
Page 4
4
3-2 Ladder Modification (Optional)
Warning: When using tools to cut or drill metal, use eye protection and follow all other safety precautions recommended by the tool
manufacturer and required by applicable safety regulations. Use caution and wear safety gloves when handling metal parts that have
been cut to length. Sharp edges can cause personal injury and property damage.
Note: Do not modify the SRCABLELADDER accessory unless you have followed the instructions in Section 3-1 Planning and determined that
modification is required. If modification is not required, proceed to Section 3-3 Ladder Assembly.
Measure and mark the cable ladder section that will be cut.
Use a hacksaw or other metal-cutting tool to cut through the ladder section. Make sure your cut is perpendicular to the length of the ladder
and use a metal-cutting tool that will not bend or crush the ladder section.
(Optional) After cutting, use a drill with a 3/8-inch bit to drill new pin holes in end of the ladder section. Compare the modified end of the
ladder section with the unmodified end to determine where holes should be drilled. Make sure that the hole location matches your planning
and measurements. You may omit this step, but drilling the pin holes and installing the pins will make the SRCABLELADDER accessory
more stable.
1
2
3
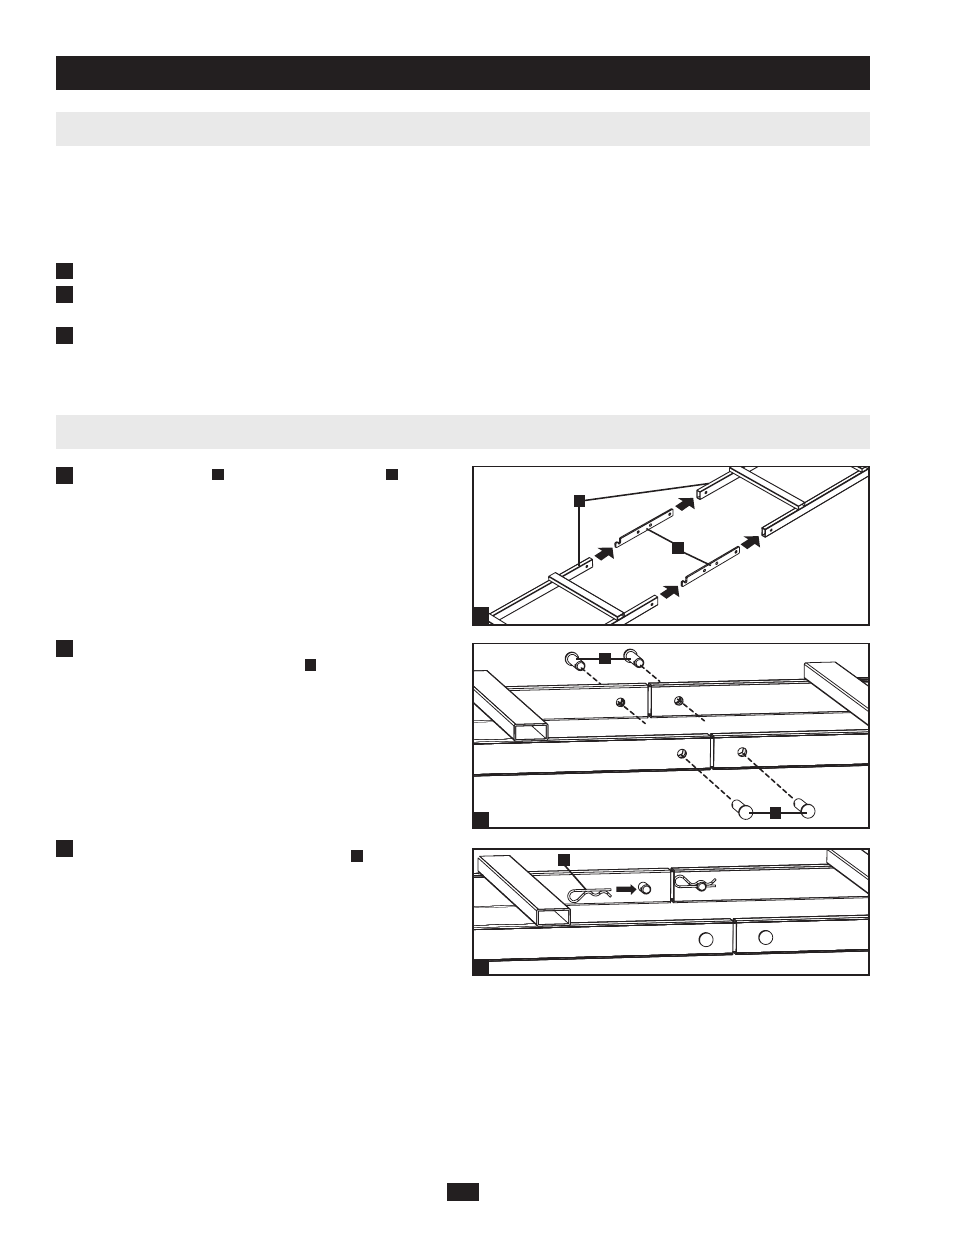
3-3 Ladder Assembly
Join the ladder sections
A
with two assembly brackets
B
by
inserting the brackets in the ends of the ladder sections.
Align the pin holes in the ladder sections with the pin holes in the
assembly brackets and insert clevis pins
C
into the pin holes
(4 total). Note: The ladder sections should be flush for a standard
installation.
After inserting the clevis pins, insert a cotter pin
D
through the
hole at the end of each clevis pin. (The straight section of the
cotter pin goes through the hole.)
Proceed to Section 3-4 Installation Across Aisle or Section 3-5
Installation Within Row, depending on your application.
1
2
3
1
2
3
A
B
C
C
D
3 – Installation
(continued)