Battery installation, How to set up your rain gauge table of contents – Taylor 2753 User Manual
Page 2
2
Welcome to the Taylor® Digital Wireless Rain Gauge and Thermometer. Simple, reliable,
accurate… it allows you to monitor indoor or outdoor temperatures as well as rain fall from
one room. While the base unit reads indoor conditions, the remote sensor wirelessly reports
outdoor weather conditions back to the base unit for an all-in-one weather display.
Plan your work day, play day, every day. Now that's smart!
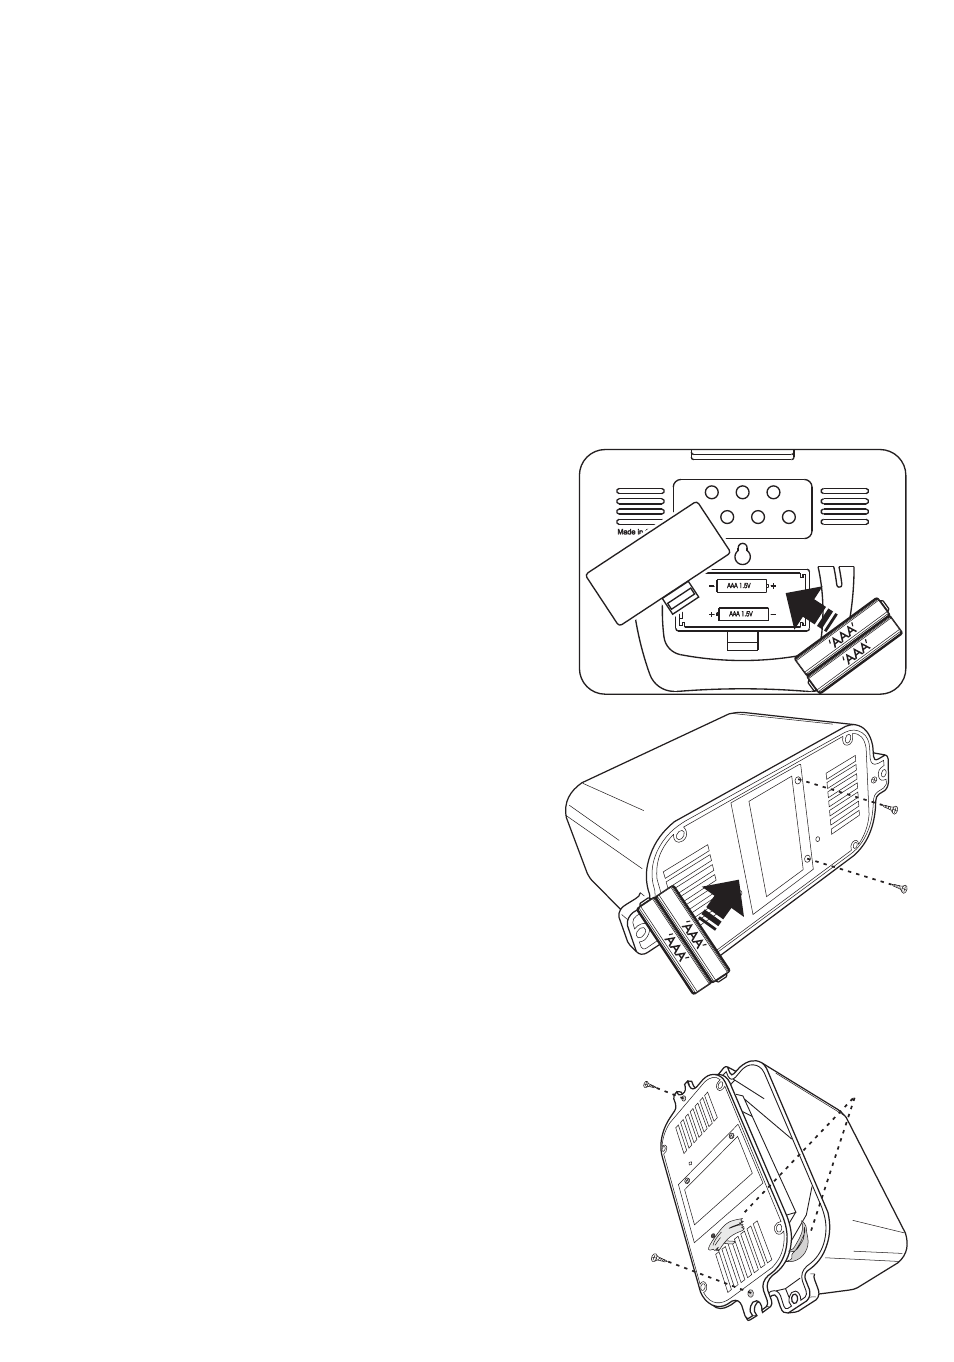
Base Unit:
The Base Display Unit is powered by 2 AAA batteries (not
included).
1. Remove the battery compartment cover located on
the back of the unit.
2. Install 2 AAA batteries.
3. Replace the battery compartment cover.
4. Remove any static cling label from the LCD screen.
Important: Install batteries in the base unit before
installing batteries in the rain cup sensor, or the units'
transmissions may not properly connect.
Rain collection cup sensor:
1. Remove the 2 screws from the battery compartment
cover on the bottom of the rain collection cup sensor
and remove the cover.
2. Install 2 AAA batteries (not included) into the battery
compartment.
3. Tip: Lithium batteries are recommended in extremely
cold or hot locations.
4. Replace the battery compartment cover and the
screws. Make sure the door is securely closed to
prevent water leakage.
Temperature Readings................................ 6
Temperature Trend Indicators..................... 6
Temperature Alerts....................................... 7
Low Battery Indicators.................................. 7
Trouble Shooting.......................................... 7-8
Precautions.................................................... 9
Specifications................................................ 8
Warranty Information................................... 9
Battery Installation....................................... 2
How to Set Up Your Rain Gauge............... 2-4
Where to Place Your Rain Gauge............. 3
How to Display Your Rain Gauge.............. 3
How to Read Your Rain Gauge................. 5
How to View Readings................................ 5
Rain Alert...................................................... 6
Rainfall History.............................................. 5
Battery Installation
HISTORY
RE-SYNC
UP
MODE
DOWN
ALERT
IN-OUT
TEMP
Base Unit
Remote
Rain
Collection
Cup
1. Remove any static cling labels from the LCD screen and any
tape from the base unit or rain collection cup.
2. Install 2 AAA batteries into the base unit (see Battery
Installation section).
3. Install 2 AAA batteries into the rain collector cup sensor (see
Battery Installation section).
4. Remove the 2 screws on the bottom of the rain cup sensor
and remove the rain cup cover.
5. Remove any tape or cardboard from the rain cup pendulum
to allow it to fill and empty when rainfall occurs.
6. Replace the rain cup cover and the 2 screws.
How to Set Up Your Rain Gauge
Table of Contents:
B
a
tt
e
ry
C
o
v
e
r
Tape or
Cardboard