Channel set-up, Manual channel set-up, Favourite channels – Technicolor - Thomson EFC031 User Manual
Page 6
Channel set-up
6
EN
Naming or renaming channels
The Select channel line is selected.
Display the number of the channel whose name you want to change using the PR+/PR- buttons.
The relevant channel appears. Select the Channel name option and press the
button to place the cursor on the first
character.
Using the
buttons, select a character from the list, which includes letters from the alphabet, numbers between 0 and
9, the characters +,. and space.
Go on to the next character or back to the previous character using the
buttons and start the procedure again.
Press OK to confirm. Names can have a maximum of six characters.
Press EXIT to close the menu.
Note:You may subsequently return to ORGANISER menu:
Display the OVERVIEW menu by pressing the MENU button.
Select the Installation option and press OK to confirm.
Select the Organiser option from the INSTALLATION menu and press OK to confirm.
Manual channel set-up
Follow the procedure given on this page if you find that some channels have not been stored during the initial set-up.This
can happen if you are setting up cable network channels. Setting up channels manually requires every setting for a particular
channel to be entered, one at a time.
Display the
OVERVIEW
menu by pressing the
MENU
button. Select the
Installation
option and press
OK
to confirm. Select the
Manual
instal.
option from the
INSTALLATION
menu and press
OK
to
confirm.
1.
Select the
Standard
option and then the relevant standard for your country using the
buttons.
Note: the following standards are available to choose from:
UK for the UK and Ireland, FR for France and Luxembourg, DK for Eastern Europe,
the Middle East and Asia,
EURO for Western Europe, Australia and New Zealand.
2.
Select the
Frequency
option. Use the
or
button to start the search in descending or ascending order.When a
channel is found pictures appear.
3.
If the picture is not clear you can adjust the setting.You do this by selecting the option
Fine tuning
and adjusting it
with the
buttons.
4.
If the channel is encrypted and you want to connect a decoder, select the
Decoder
option and check the box by
pressing the
OK
button.
5.
Then select the
Character set
option and choose the character set that will be used for Teletext on this channel using
the
buttons.The following character sets are available:
1 :Western Europe
2 : Eastern Europe
3 : Russian and Bulgarian
4 : Greek
5 : Arabic
6 : Ukrainian
7 : Belarussian
The character set selected determines how characters are displayed on Teletext screens.
6.
Select the
Store on number
option to assign a number to the channel. Enter the number using the numeric buttons.
Press the
OK
button to confirm.
Important: as soon as you change a setting in the
MANUAL INSTALLATION menu the channel number starts flashing under the
Store on number option. To confirm your change you must select the Store on number option and press
OK
. If you do not confirm the
change it will be cancelled when you change channel or put the television into standby mode.
Repeat this procedure to find other channels.
Favourite channels
With this menu you can choose the 6 channels you watch the most to access them more quickly in the future (see page 7).
Bring up the
OVERVIEW
screen by pressing the
MENU
button. Go to the Installation line and press
OK
to confirm.
In the INSTALLATION menu, go to the Favourites line and press
OK
to confirm.
Proceed from line to line by means of the
buttons and choose your 6 favourite channels.
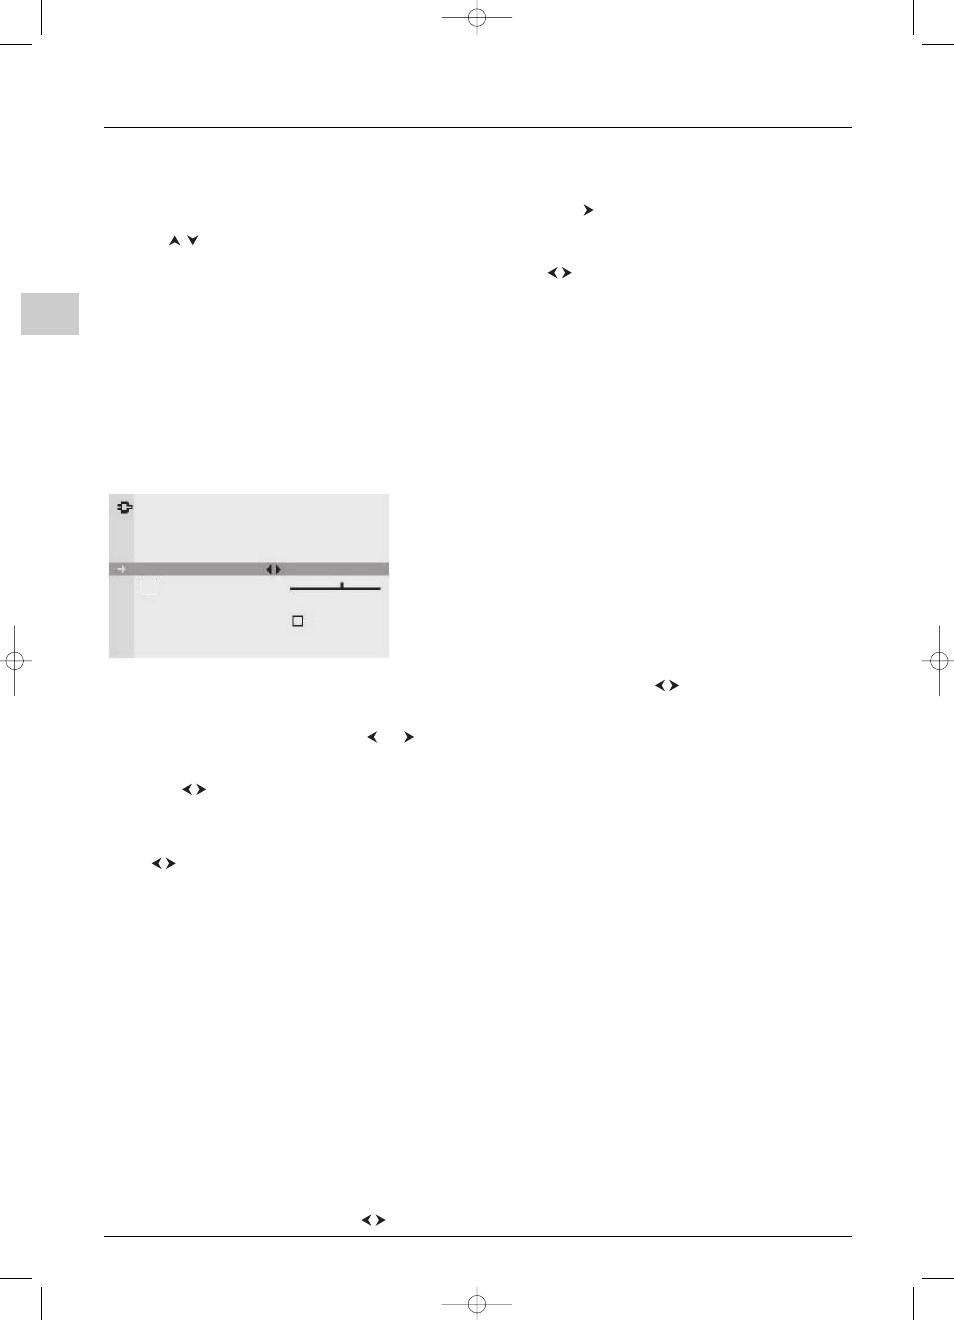
MANUAL INSTALLATION
Return
Standard
UK...
Frequency
150.75 MHz
Fine tuning
Store on number
05
Decoder
Teletext char. set
1...
06-EFC031-EN.qxd 4/07/05 18:45 Page 6