Index to parts and controls, Front panel – Toshiba RD-XS52SC User Manual
Page 12
12
Introduction
Index to Parts and Controls
See pages with arrows for details.
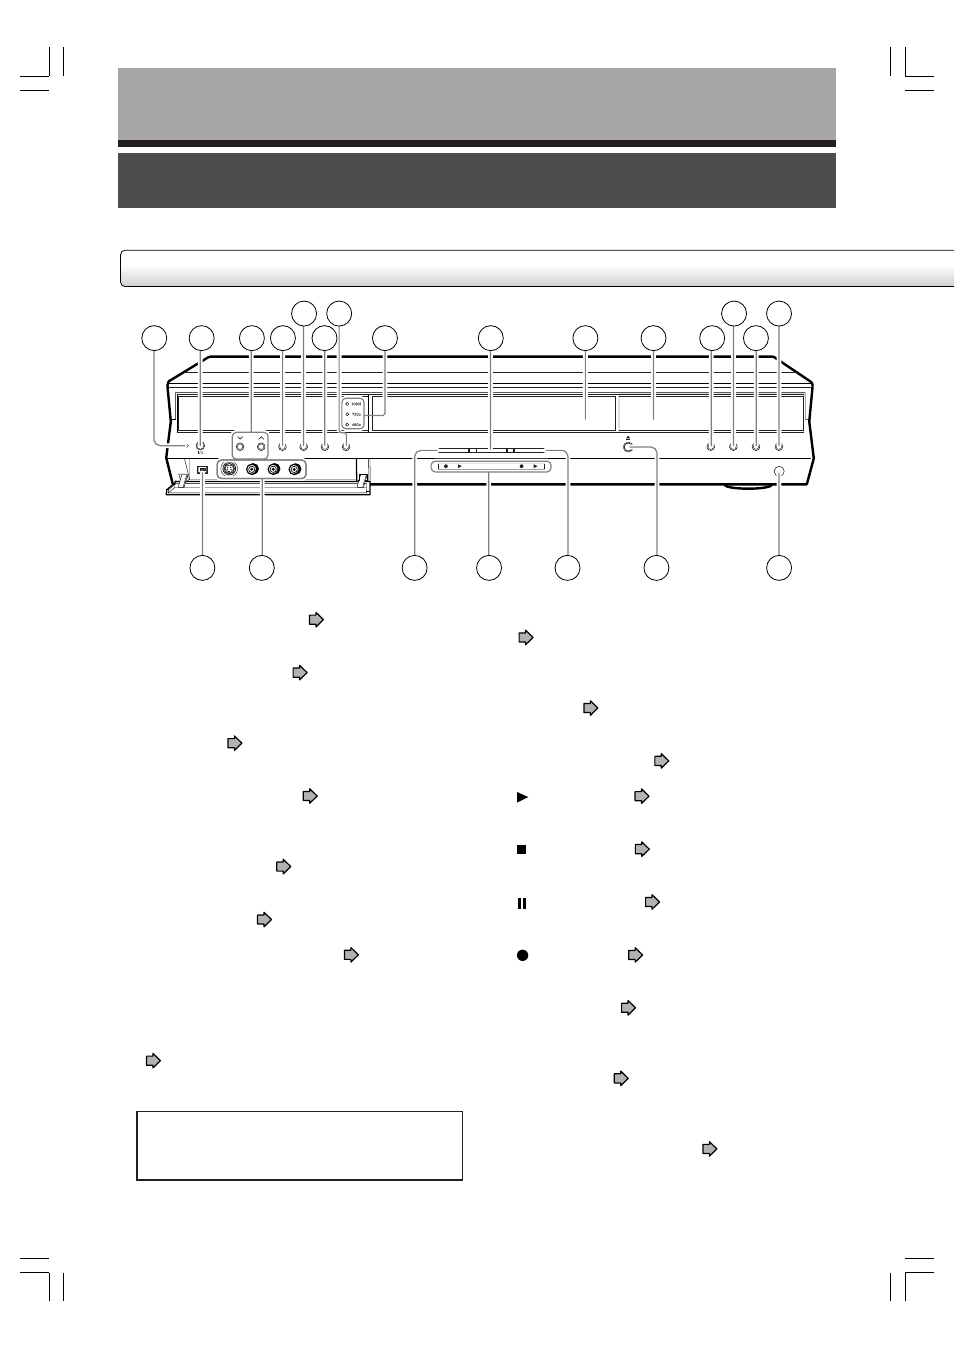
Front panel
HDD
ON / STANDBY
CH
INPUT SELECT REC MODE
DIMMER
PROG/HDMI
TIMESLIP
DVD
1
2
3 4
5
7
6
13
15
14
10
11
9
8
12
22
16
17
18
21
20
19
1 ON/STANDBY indicator
page 20, 21
Displays the operational state of the recorder.
2 ON/STANDBY button
page 20, 21
Turns the power on/restores the unit in the
standby mode.
3 CH buttons
page 20, 35
Selects the channel.
4 INPUT SELECT button
page 34
Pressing repeatedly selects between various input
sources.
5 REC MODE button
page 36
Selects the setting of picture and sound quality.
6 DIMMER button
page 19
7 PROGRESSIVE/HDMI button
page 26 in
“INSTALLATION GUIDE”
Selects a type of the output signals when a TV or
monitor is connected to the HDMI OUTPUT jack.
8 HDMI Up-conversion Output indicator
page 27 in “INSTALLATION GUIDE”
Indicates a type of the output signals setup on the
recorder.
* The above illustration displays the front panel with the cover open. See the following page on how to open or close the cover.
9 TIME SLIP button/TIMESLIP indicator
page 64, 65
Selects the time slip mode.
Illuminates in the time slip mode.
Ä Disc tray
page 20
Loads a disc into the disc drive.
Å Front panel display
page 18
Ç
(PLAY) button
page 62 ,64
Starts playback.
É (STOP) button
page 37, 58
Stops playback or recording.
Ñ (PAUSE) button
page 58, 64
Stops playback or recording momentarily.
Ö
(REC) button
page 36
Starts recording.
Ü DV IN terminal
page 136
Use this when recording from a digital video
device such as a digital video camera.
á INPUT2 jacks
page 39
Use this when recording from other input source
such as a VCR or a camcorder.
à HDD button/HDD indicator
page 34, 40
Press this to operate the HDD.
HDMI, the HDMI logo and High-Definition
Multimedia Interface are trademarks or
registered trademarks of HDMI Licensing LLC.
RD-XS52SU/SC_Ope_E_p012-019
04.9.3, 11:12
12