QSC Audio PL236 User Manual
Page 17
1 7
I N S T A L L A T I O N I N S T A L L A T I O N E I N B A U I N S T A L A C I Ó N
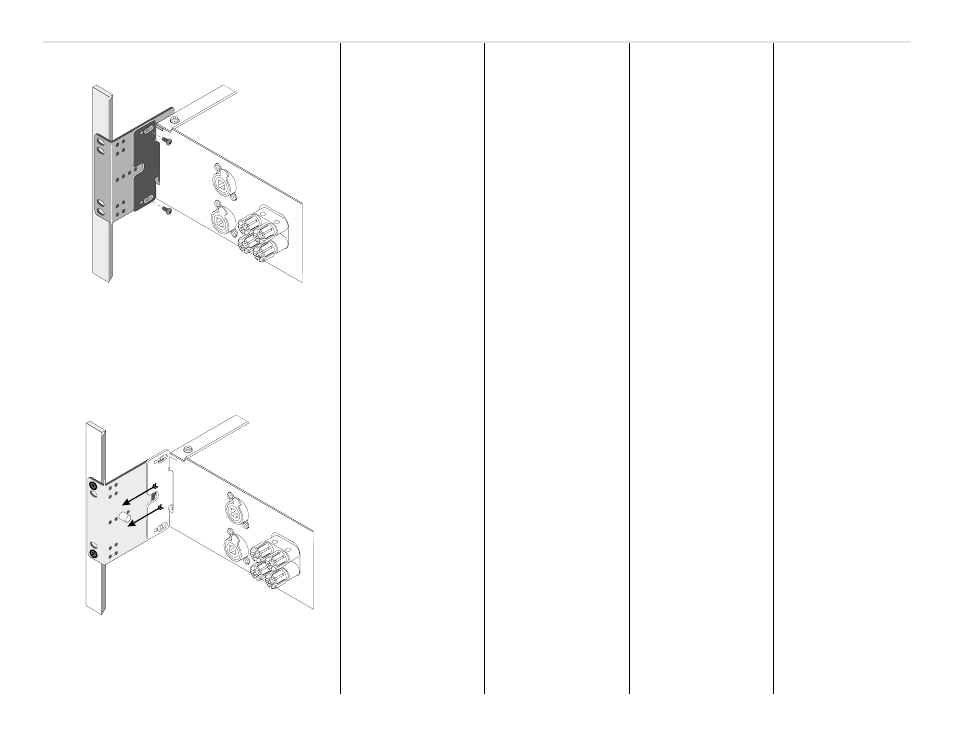
Rear rack mounting ear kit installation-
The rear rack mouting ear kit may be
intsalled in two different ways.
Method 1
: The amplifier is first
installed from the front of the rack
and then the ears are secured
directly to the amplifier with two
machine screws as shown, left. Then
the ears are secured to the rails
using ordinary rail hardware.
Method 2
: The amplifier is first
installed from the front of the rack.
Then, the accessory rear ears are
positioned on the rear rack rails and
secured. The pin installation position
can now be selected. Install the pin
so that it fits well into the slot
provided on the amplifier's rear
mounting tab.
Method 2: The amplifier can be installed and removed easily
from the front without removing any rear hardware.
Method 1:
The amplifier can be removed only by removing
front & rear screws.
17
- PLX2 (1 page)
- 1200 (22 pages)
- DCA 1644 (2 pages)
- 6.0 II (28 pages)
- M PL-6.0PFC (28 pages)
- SRA 1222 (40 pages)
- BASIS 922uz (2 pages)
- 3 Series (8 pages)
- PL-1.6HVX (36 pages)
- PLX 1104 (2 pages)
- USA 400 (24 pages)
- RMX 5050 (2 pages)
- CX602V (52 pages)
- PL236A (36 pages)
- ISA 750 (4 pages)
- DCA 3022 (40 pages)
- CX Series (32 pages)
- ISA 300Ti (56 pages)
- PL230 (12 pages)
- PL218A (35 pages)
- RMX 850 (38 pages)
- GX3 300-Watt 8-Ohm Power Amplifier (60 pages)
- MX3000a (2 pages)
- PLX 2402 (32 pages)
- ISA 300T (40 pages)
- ISA 280 (56 pages)
- CX168 (36 pages)
- PL340 (2 pages)
- RMX 4050HD (10 pages)
- PowerLight PL4.0 (2 pages)
- CX12 (2 pages)
- 3800 (2 pages)
- CX902 (2 pages)
- Amplifiers MX Series (1 page)
- Output Isolation Transformer IT-42 (2 pages)
- 914LZ (2 pages)
- PL224 (4 pages)
- BASIS 722az (2 pages)
- DCA Series (16 pages)
- SPA-3 (2 pages)
- PL325 (60 pages)
- PLX 1804 (16 pages)
- DriveRack 4800 (3 pages)
- RMX 1450 (2 pages)