Omnimount Stellar G363 User Manual
Page 3
6
Step 7
Rock table to check that it is level and stable. For unstable condition, unscrew
shortest Leveling Foot until table sits level.
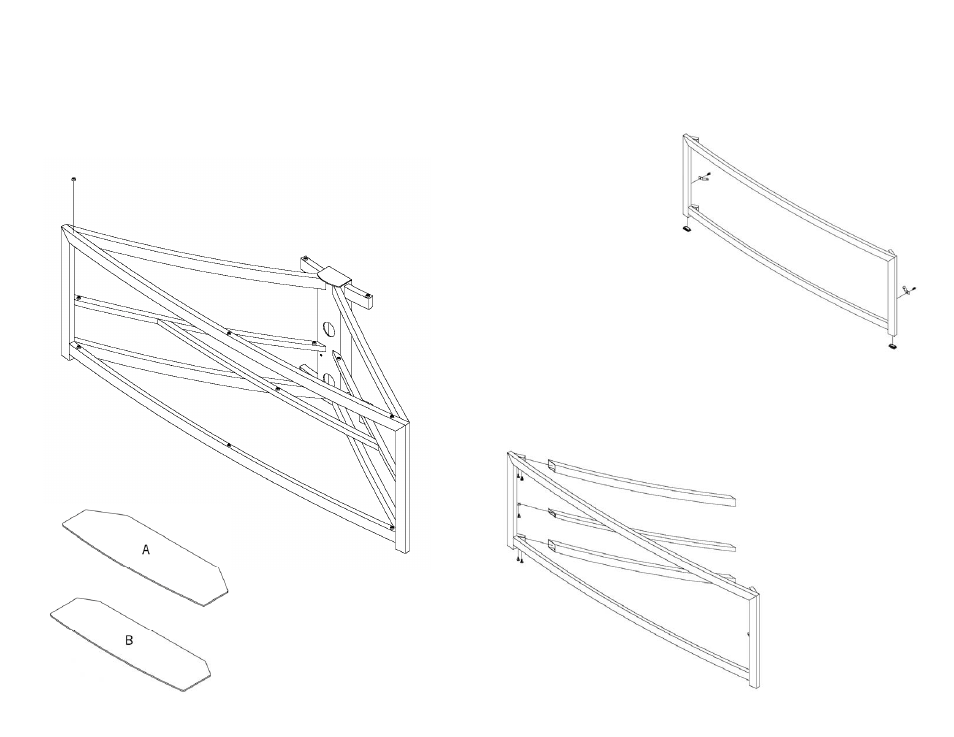
Peel Self Adhesive Pads (L) from backing paper, and apply to table assembly as
indicated by the black dots, as shown in Fig. 7.
Note: There should be 5 Adhesive pads applied to each shelf.
Step 8
Identify Glass Shelves by shape, as
shown in Fig. 8.
Fig. 7
Fig. 8
3
Step 1
Refer to Fig. 1.
Install End Caps (M) into bottom of Main Frame (C) using rubber mallet.
Determine desired location of middle shelf; high or low. Install Center Support
Brackets (K) to desired
shelf location with Hex
Screws (I), and Small Hex
Wrench (P).
Fig. 1
Step 2
Insert open end of Main Support Legs (E) and Center Support Legs (F) over brack-
ets on Main Frame, as shown in Fig. 2.
Note: The curve on the Support Legs should face inwards, and the mounting
holes should face towards the bottom of the Main Frame.
Loosely secure Support
Legs to Main Frame with
Hex Screws.
Fig. 2