Recording, Playback, Getting started – Olympus DP-10 User Manual
Page 2: First, set the time and date, Microphone sensitivity, You can also change the recording mode, Inserting batteries, Turning on the power
```
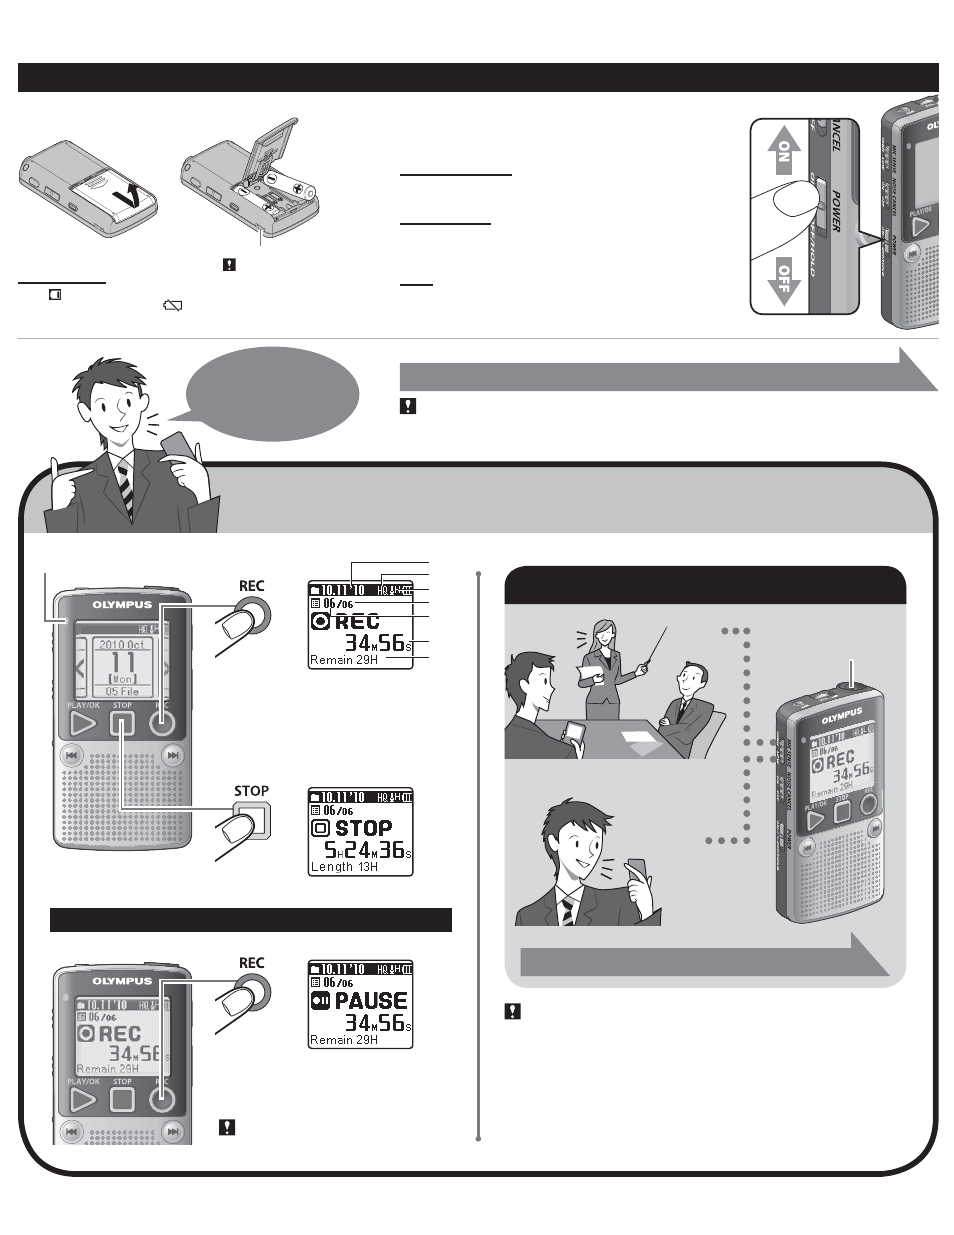
a Current date
b Recording mode indicator
c Microphone sensitivity indicator
d Total number of recorded fi les
for the date
e Current fi le number
f Elapsed recording time
g Remaining recording time
a
b
c
d
e
f
g
```
Getting started
1
Inserting batteries
2
Turning on the power
Slide the
POWER switch to the [ON] position.
Turning off the power:
While the recorder is in stop mode, slide the POWER switch to the
[OFF/HOLD] position.
Power save mode:
If the recorder is on and stops for 10 minutes or longer, the display
shuts off and it goes into power save mode. To exit power save mode,
press any button.
HOLD:
If you slide the POWER switch to the [OFF/HOLD] position, the
current conditions will be preserved, and all buttons and switches
will be disabled.
Strap hole
• Strap is not supplied.
Battery indicator:
When [
] appears on the display, replace the batteries as soon as possible.
When the batteries are too weak, [
] and [
Battery Low] appears on the
display and the recorder shuts down.
First, set the time and date.
“Setting time and date” (Verso)
“Changing the recording mode” (Verso)
Recording indicator light is lit while recording.
Pause
Microphone sensitivity
Turn the microphone in
the direction of the source
to be recorded.
High
Low
This is a highly sensitive mode which can record
surrounding noises. (
A
H
)
This is the standard
level of microphone
sensitivity. (
A
L
)
• To ensure successful recordings, we recommend that you test the record function and
volume before use.
• To ensure recording from the beginning, start recording after you see the recording
indicator light on.
• Recorder will not be able to record anymore when [Memory Full] or [Maximum File
Size is reached] appears. Delete any unnecessary fi les before recording any further.
• If the recorder is placed directly on a table when recording a conference, etc., the
vibrations of the table are likely to be recorded. To obtain a clear recording, place a
notebook or handkerchief between the recorder and the table to prevent the vibrations
from being recorded.
• When remaining recording time is less than 60 seconds, the recording indicator light
starts fl ashing. When the recording time is decreasing to 30 or 10 seconds, the light
fl ashes faster.
Recording
Recording
Recording
Recording
• When you use this recorder for the fi rst time after purchasing, or when you switch it on after removing the batteries for more than
30 minutes when exchanging batteries etc, the time will return to the default setting and the [Set Time & Date] will appear.
• If the time and date are not set, the fi le is saved using default time and date.
High
Low
Playback
Playback
You can
also change
the recording
mode!
If the recorder is in recording mode and the REC (
x)
button is pressed, recording pauses. If the REC (
x)
button is pressed again, recording resumes.
• The recorder will time out after 60 minutes
when left in [PAUSE].
Set the recording mode to match the surrounding conditions.