Connecting the a-933 —continued – Onkyo A-933 User Manual
Page 16
16
Connecting the A-933
—Continued
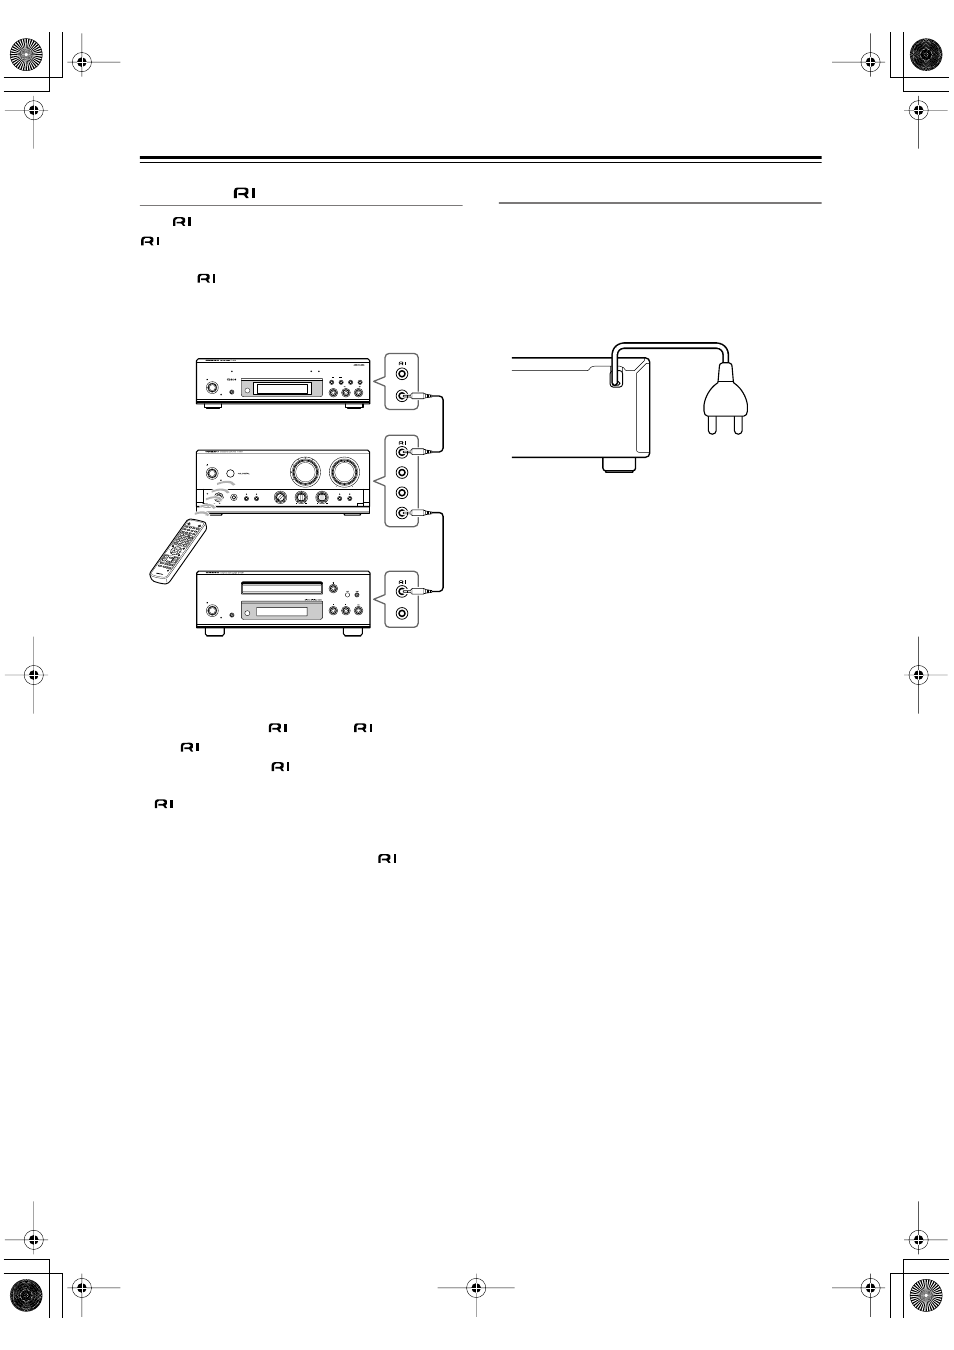
Connecting
Components
With
(Remote Interactive), you can control your
-compatible Onkyo CD player, Tuner, and so on
with the A-933’s remote controller.
• To use
, you must make an analog audio con-
nection between the A-933 and each audio compo-
nent.
Notes:
• Push each plug in all the way to make a good connec-
tion.
• Use only dedicated
cables for
connections.
(No
cables are supplied with the A-933.)
• The A-933 has four
jacks. They’re all the same,
so you can use any of them.
•
jacks should be connected to only Onkyo compo-
nents. Connecting them to another manufacturer’s
component may cause it to malfunction.
• Some components may not support all
functions.
See the manuals supplied with your other Onkyo
components for more information.
Connecting the Power Cord
• Before connecting the power cord, connect all your
speakers and audio components.
• Turning on the A-933 may cause a momentary power
surge, which might interfere with other electrical
equipment on the same circuit. If this is a problem,
plug the A-933 into a different branch circuit.
TAPE /C
DR
PRESET
VOLUM
E
VOLUM
E
CD
MD
PRESET
CLOCK
CALL
SLEEP
INPUT
ON
STANDB
Y
RC-613S
>10
4
2
3
FM
AM
CLEAR
7
8
9
10/0
5
6
1
GROUP
TIMER
ENTER
MEMORY
REPEAT
DISPLAY
RANDOM
P MODE
SCROLL
MUTING
TUNER
PHONO
C D
M D
TAPE /CDR
LINE
STANDBY/ON
ON(G)
STANDBY(R)
POWER
PHONES
TONE(R)
DIRECT(G)
MAIN IN
SUPER BASS
BASS
MAX
TREBLE
SPEAKERS
B
A
OFF
ON
STANDBY/ON
STANDBY
DISPLAY
STANDBY/ON
STANDBY
DISPLAY
ACCUCLOCK
TUNING
PRESET
FM MODE
CLEAR
BAND
CHARACTER
MEMORY
KEY MODE
TUNING / PRESET
Tuner (T-433) etc.
CD Player (C-733) etc.
A-933 (Preamp)
To wall outlet