Orion 100 EQ User Manual
Page 4
4
4. Next, tighten the wingnuts at the top of the tripod legs, so
the legs are securely fastened to the equatorial mount.
Use the wrench and your fingers to do this.
5. Orient the equatorial mount as it appears in Figure 1, at a
latitude of about 40°, i.e., so the pointer next to the latitude
scale is pointing to the line at “40”. To do this, loosen one
of the latitude adjusting T-bolts and then tighten the other
latitude adjusting T-bolt until the pointer and the “40” line
up. The declination (Dec.) and right ascension (R.A.) axes
many need re-positioning (rotation) as well. Be sure to
loosen the RA and Dec. lock levers before doing this.
Retighten them once the equatorial mount is properly ori-
ented.
6. Thread the counterweight shaft into the equatorial mount
at the base of the declination axis until tight. Make sure the
casting at the top of the bar is threaded clockwise as far as
it will go before attaching the shaft.
7. Remove the knurled “toe saver” retaining screw on the bot-
tom of the counterweight shaft and slide the counterweight
onto the shaft. Make sure the counterweight lock knob is
adequately loosened so the metal pin inside the counter-
weight is recessed enough to allow the counterweight
shaft to pass through the hole. Position the counterweight
about halfway up the shaft and tighten the lock knob.
Replace the toe saver on the end of the bar. The toe saver
prevents the counterweight from falling on your foot if the
lock knob happens to come loose.
8. Attach the two tube rings to the equatorial mount using the
mounting ring attachment knobs. Place a lock washer,
then a flat washer, on the shaft of each knob. With the
washers attached, push the knob up through the holes in
the top of the equatorial mount and rethread them into the
bottom of the tube rings. Tighten the knobs securely. Open
the tube rings by loosening the knurled ring clamps.
9. Lay the telescope optical tube in the tube rings. Position
the optical tube in the rings so that the 1/4"-20 mounting
block on the underside of the tube is centered relative to
the rings. Close the rings over the tube and tighten the
knurled ring clamps finger-tight to secure the telescope.
10. Attach the two slow-motion control cables to the R.A. and
Dec. worm gear shafts of the equatorial mount by position-
ing the small screw on the end of the cable over the
indented slot on the worm gear shaft. Then tighten the
screw. Use the short slow-motion control for the R.A. axis,
it will stick out sideways from the mount. The longer slow-
motion control moves the telescope on its Dec. axis and
goes just under the optical tube, towards the focus wheels.
Figure 3.
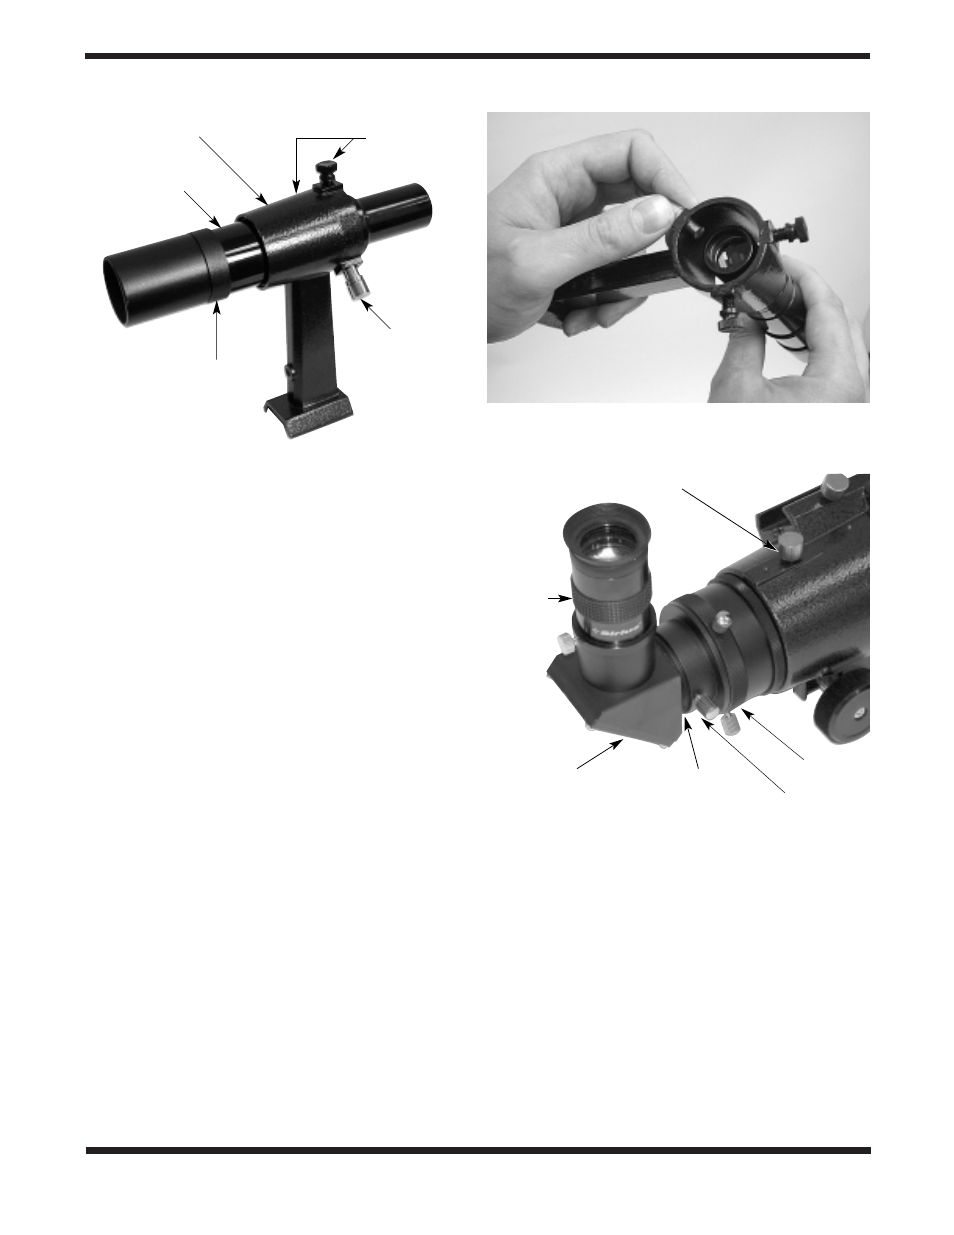
The Focuser of the AstroView 100
2" adapter
1.25" adapter
90° star diagonal
Focus lock thumbscrew
Eyepiece
Camera T-ring
attachment threads
Finder scope
Finder scope bracket
Nylon
thumbscrews
Focusing lock ring
Figure 2b.
Pull back on the tensioner and slide the finder scope
into its bracket until the O-ring is seated in the bracket ring
Figure 2a.
The 6x30 finder scope
Tensioner