Orion SKYLINE 52062 User Manual
Orion, Skyline, Deluxe glp to telescope bracket
Orion
®
SkyLine
™
Deluxe GLP
to Telescope Bracket
#52062
Congratulations on your purchase of a quality product from Orion.
This bracket will couple your SkyLine Green Laser Pointer to your
telescope (and may work with other, similar green laser pointers.)
When properly aligned with your telescope the laser pointer will
indicate where you are currently pointing without having to look
through a finder. This makes finding objects in your telescope
much easier. This also allows you to adjust your telescope from a
more natural, standing position. You will find aiming your telescope
with the SkyLine Green Laser Pointer is a more rewarding and fun
experience overall.
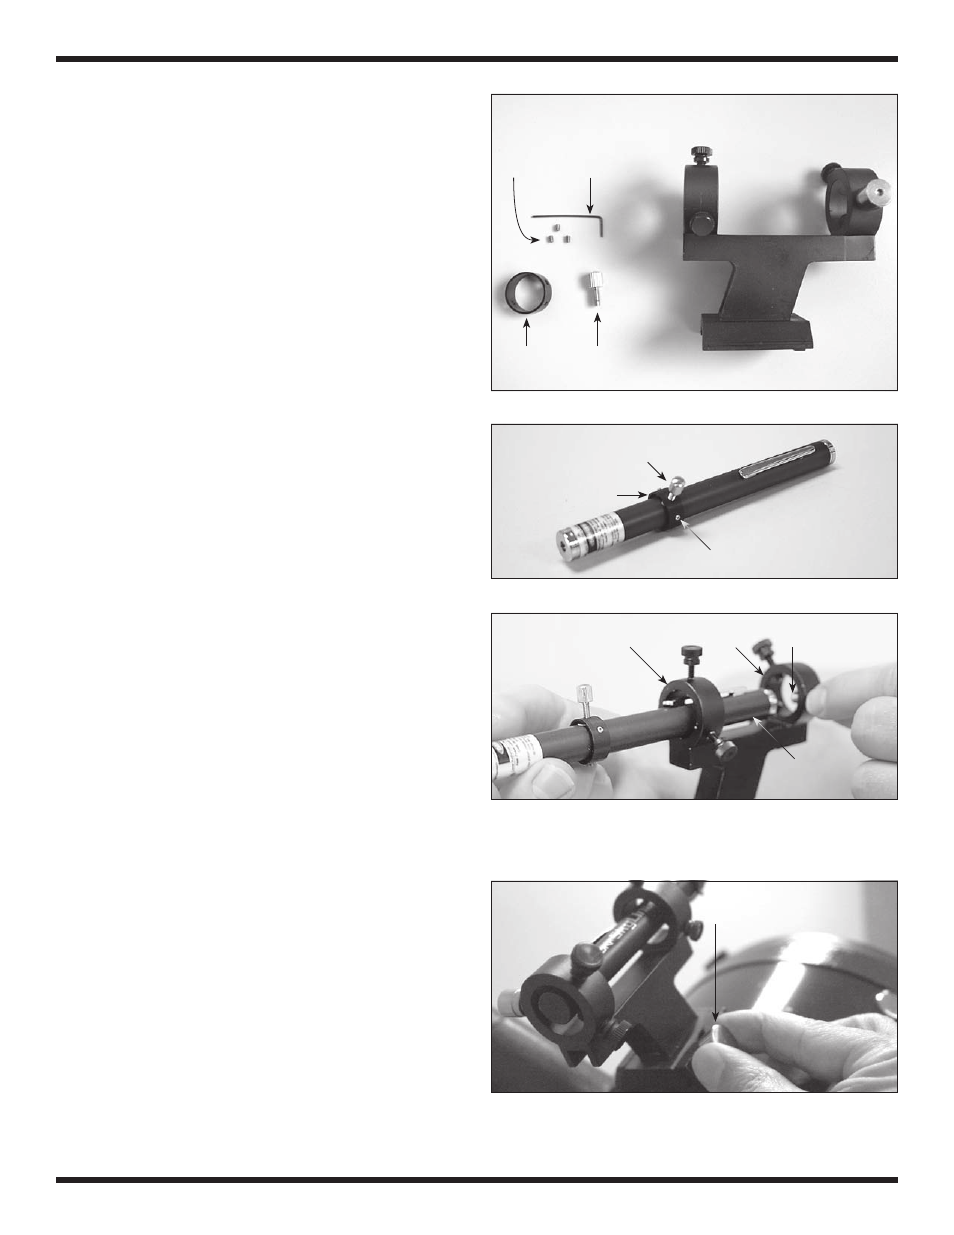
Parts List (Figure 1)
Bracket (with nylon thumbscrews installed)
On/off collar
3x very small setscrews
Knurled metal thumbscrew
Small hex key
Assembly
1. Install the three small setscrews and the knurled metal thumb-
screw into the on/off collar. Use the small hex key to install the
setscrews.
2. Now, slide the on/off collar onto your SkyLine green laser
pointer. You may need to loosen the setscrews and thumb-
screw to do this. Position the on/off collar so that the thumb-
screw is directly above the laser pointer’s on/off button. Tighten
the three setscrews equally with the small hex key to secure
the on/off collar in place (Figure 2).
3. Loosen the nylon thumbscrews on the bracket, and slide the
laser pointer into the bracket. The rear of the laser pointer
should first pass through the forward ring of the bracket. To
pass the laser through the rear ring, you must pull the spring
tensioner back with your fingers (Figure 3).
4. Tighten the nylon thumbscrews equally to secure the laser in
the bracket.
5. Attach the GLP Bracket to your telescope as you would any
finder bracket. Insert the base of the bracket into the dovetail
holder located adjacent to the focuser. (An optional Dovetail
Base is available through Orion Customer Service if your
telescope does not include one.) Lock the bracket into position
by tightening the knurled thumbscrew on the dovetail holder
(Figure 4).
Now that the laser and bracket are installed on your telescope,
the laser must be aligned so that it points to the center of the tele-
scope’s field of view.
Aligning the Laser Pointer
Aligning the laser pointer with a telescope is easy to do. It should
be done outdoors by aligning on a fixed target or a bright star.
Figure 2.
The SkyLine green laser pointer with on/off collar attached.
Figure 1.
Included parts.
Bracket (includes spring
tensioner and (5) nylon
thumbscrews
On/off collar
Very small
setscrews (3)
Knurled metal
thumbscrew
Small
hex key
Knurled metal
thumbscrew
On/off collar
Very small
setscrews (3)
Forward ring
of bracket
Rear ring
of bracket
Rear of
laser pointer
Spring
tensioner
Knurled
setscrew
Figure 3.
To insert the laser into the bracket, the rear of the laser
pointer should first pass through the forward ring of the bracket. To pass
the laser through the rear ring, you must pull the spring tensioner with
your fingers.
IN 344 Rev B 02/09
Figure 4.
Slide the dovetail foot of the Laser Bracket into the dovetail
holder of your telescope and secure it in place with the knurled setscrew
on the side.