Changing the setup menu, Audio setting (cont’d), Video setting – Sylvania DVR91DG User Manual
Page 69: Instructions continue on the next page, Settings for dolby digital (default : stream), Press [setup] to exit, Press [setup, Using [ k / l ], select “video”. press [ok, Using [ k / l ], select “progressive”. press [ok
69
EN
Changing the Setup menu
Recording
Playing
discs
Editing
Before
you
start
Connections
Getting
started
Others
Español
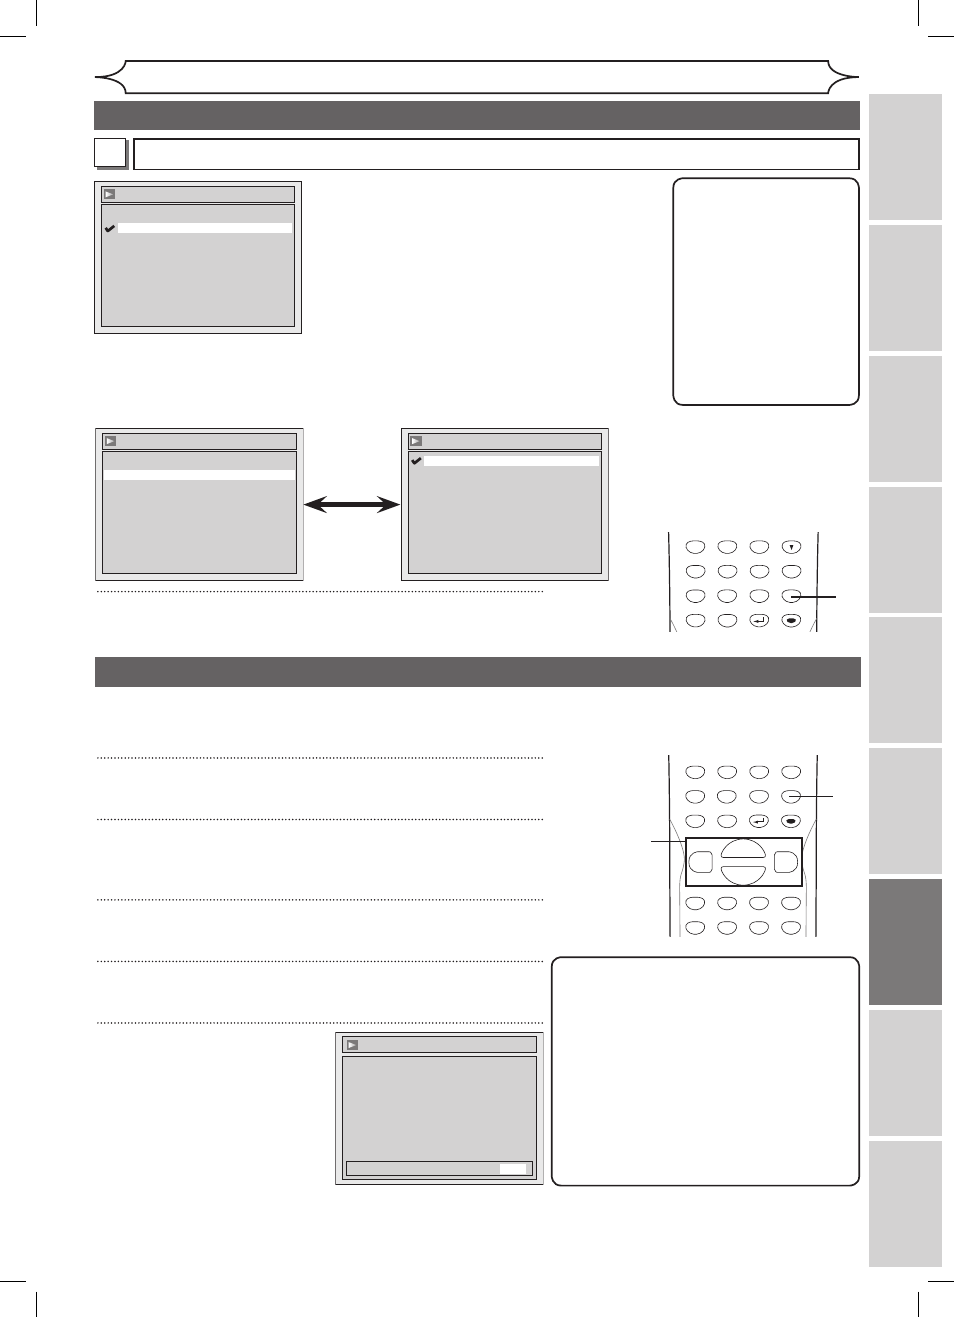
Settings for Dolby Digital (Default : Stream)
• Using [K / L], select a setting. Press [ENTER].
Your setting will be activated.
PCM
:Convert the Dolby Digital into PCM(2
channel).
When your amplifier/decoder is NOT
compatible with Dolby Digital, set to
“PCM”.
Stream :Outputs Dolby Digital signals.
When your amplifier/decoder is compatible
with Dolby Digital, set to “Stream”.
B
Note
When playing a DVD-
RW disc recorded in VR
mode
• If the audio source on
a disc is Dolby Digital
format, set “Dolby
Digital” to “PCM” so
that you can switch to
main (L), sub audio
(R), or a mix of both
(L/R) with your
amplifier/decoder.
Instructions continue on the next page.
Audio setting (cont’d)
Changing
the
Setup
menu
Digital Out - Dolby Digital
Stream
PCM
• Using [K / L], select a setting.
Press [ENTER].
Your setting will be activated.
Dynamic Range Control (Default : ON)
Set to ON to compress the range between soft and loud sounds.
4
Press [SETUP] to exit.
POWER
ZOOM
DISPLAY
SETUP
T
OP MENU MENU/LIST
REC SPEED
REC/OTR
PAUSE
SKIP
SKIP
PL
AY
CM SKIP
REPEAT
OPEN/CLOSE
TIMER
PROG.
FWD
REV
CLEAR
1
2
3
4
5
6
7
8
9
SPACE
0
A
H
G
ENTER
CH
RETURN
.@/:
ABC
DEF
GHI
JKL
MNO
PQRS
TUV
WXYZ
B
C
{
B
K
L
h
g
F
STOP
B
x1.3/0.8
4
Audio
Digital Out
Dynamic Range Control
ON
Audio - Dynamic Range Control
OFF
ON
Progressive (Default : OFF)
This unit is compatible with the Progressive Scan System. The feature provides you with the higher definition images
than the traditional output system does. To utilize this feature, you must set Progressive Scan mode to “ON”.
1
Press [SETUP].
2
Using [K / L], select “Playback”. Press [OK].
Your setting will be activated.
3
Using [K / L], select “Video”. Press [OK].
4
Using [K / L], select “Progressive”. Press [OK].
5
Using [K / L], select “ON”.
Press [OK].
Confirmation window will appear.
Note
• If your TV is compatible with Progressive
Scan (525p / 480p), you must use the
Component video cable (commercially
available) to connect this unit to the TV. (See
Method 2 on page 13.) If not, use the video
cable and set the Progressive Scan to
“OFF” or press and hold
[SETUP] for more
than 3 seconds during DVD playback.
• When selecting “No” or not pressing any
keys on the unit or remote control within 15
seconds at step 5, Progressive Scan remains
to be “OFF” (interlace scan.)
Video - Progressive
Activating progressive scan:
Check your TV has progressive scan
and connect with component video cable.
NOTE: If there is no picture or picture is
distorted after selecting “Yes”,
Wait about 15 seconds for auto recovery.
Activate?
Yes
No
Video setting
POWER
ZOOM
DISPLAY
SETUP
T
OP MENU MENU/LIST
REC SPEED
REC/OTR
PAUSE
SKIP
SKIP
PL
AY
CM SKIP
REPEAT
OPEN/CLOSE
TIMER
PROG.
FWD
REV
CLEAR
1
2
3
4
5
6
7
8
9
SPACE
0
A
H
G
ENTER
CH
RETURN
.@/:
ABC
DEF
GHI
JKL
MNO
PQRS
TUV
WXYZ
B
C
{
B
K
L
h
g
F
STOP
B
x1.3/0.8
1
2
3
4
5
DVR91DG_E7A01UD.indd 69
2006/02/15 17:26:54