Orion STARBLAST 9814 User Manual
Page 4
4
Table of Contents
Assembly . . . . . . . . . . . . . . . . . . . . . . . . . . .4
Getting Started . . . . . . . . . . . . . . . . . . . . . .4
Using Your Telescope . . . . . . . . . . . . . . . . . .6
Care and Maintenance . . . . . . . . . . . . . . . .9
Specifications . . . . . . . . . . . . . . . . . . . . . . .9
Appendix A: Aligning the Mirrors . . . . . . . . . . . . . 9
Appendix B: Cleaning the Optics . . . . . . . . . .11
Assembly
Assembly of the StarBlast is very easy. You just remove it from
its packaging, place the telescope on a table or other flat sur-
face and locate the following accessories:
1 EZ Finder II reflex sight (2)
1
17mm Explorer II eyepiece (1)
1 6mm Explorer II eyepiece (11)
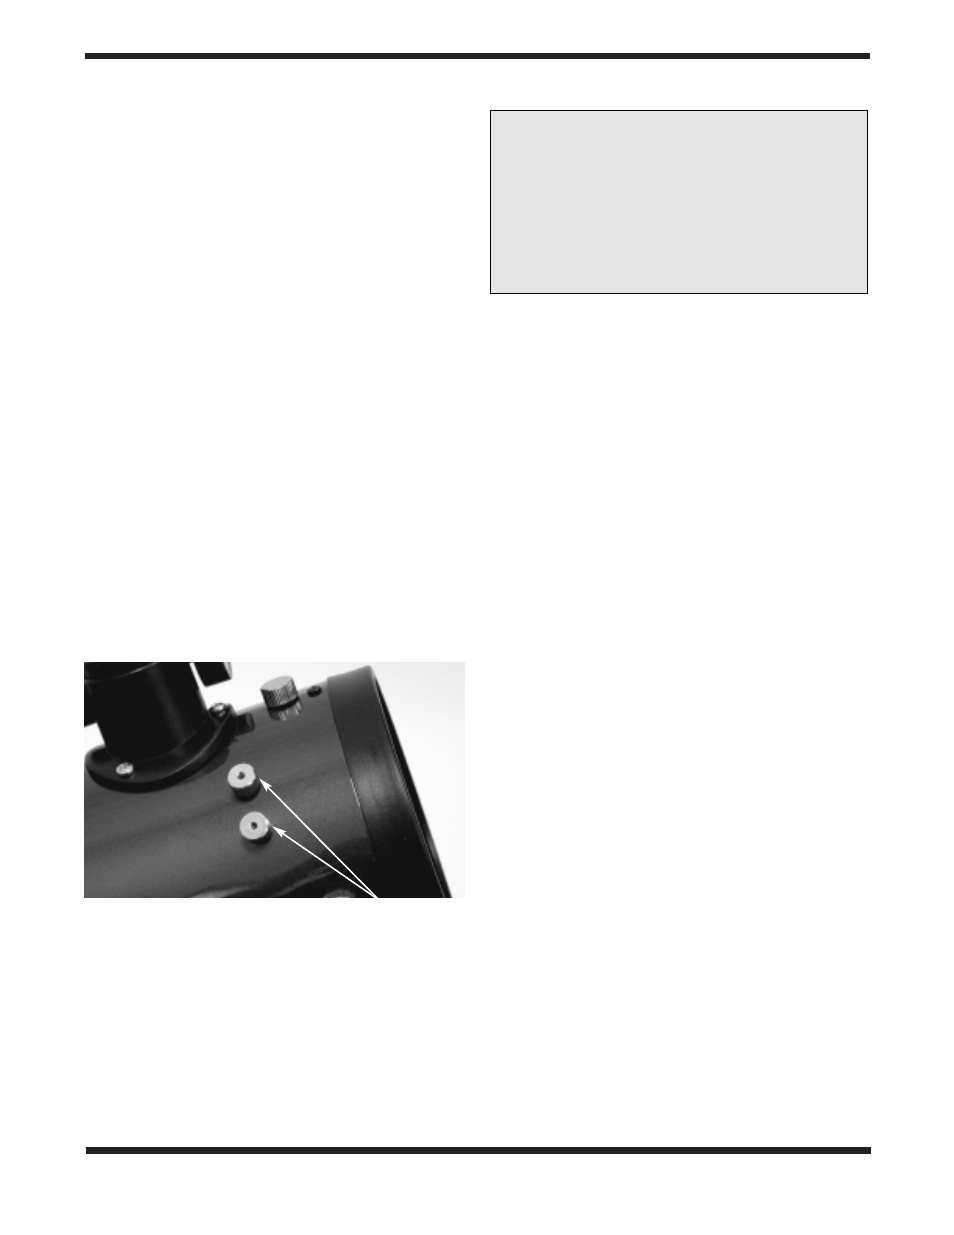
Attaching the EZ Finder II
Remove the two metal thumbnuts from the optical tube
(Figure 3). Place the bracket of the EZ Finder II (2) on the
tube so that the holes in the bracket slide over the two thread-
ed posts on the tube. The EZ Finder should be oriented so
that it appears as in Figure 1. Thread the thumbnuts back onto
the posts to secure the EZ Finder II in place.
Inserting the Eyepiece
Loosen the eyepiece securing thumbscrews (14). Insert the
chrome barrel of the 17mm Explorer II eyepiece (1) into the
focuser (4) and secure it with the thumbscrews.You can place
the 6mm Explorer II eyepiece (11) in the eyepiece rack (10)
for use later.
Your telescope is now fully assembled and should resemble
Figure 1. Remove the dust cap from the front of the telescope
when it is in use. Replace it when you are finished observing.
Getting Started
It’s best to get a feel for the basic functions of the StarBlast dur-
ing the day, before observing astronomical objects at night. This
way you won’t have to orient yourself in the dark! Find a spot
outdoors where you’ll have plenty of room to move the tele-
scope, and where you’ll have a clear view of some object or
vista that is at least 1/4 mile away. It is not critical that the tele-
scope be exactly level, but it should be placed on something
relatively flat to ensure smooth movement.
The StarBlast was designed specifically for visual observation of
astronomical objects in the night sky. Like all Newtonian reflec-
tor telescopes, it is not well suited for daytime terrestrial usage
because the image in the eyepiece is inverted (upside-down).
Placing the StarBlast
One of the great assets of the StarBlast is its extremely portable
size. Due to its overall short height, you will find that viewing
while sitting down on the ground next to the telescope is the
most comfortable. If you wish to raise the telescope off the
ground so that it can be used while standing or sitting in a chair,
then a platform, such as a milk crate or table, can be used.
Altitude and Azimuth (Aiming the Telescope)
The StarBlast altazimuth base (5) permits motion along two
axes: altitude (up/down) and azimuth (left/right). See Figure 4.
Moving the telescope up/down and right/left is the “natural” way
people aim objects which makes pointing the telescope intuitive
and easy.
Simply take hold of the telescope tube (Figure 5) and move it left
or right so that the base rotates. Move it up or down in the same
manner. Both motions can be made simultaneously and in a
continuous manner for easy aiming. This way you can point to
any position in the night sky, from horizon to horizon.
You may find it convenient to hold one hand near the carrying
handle (9) to steady it while moving and aiming the telescope.
If you find that it is too hard to put your eye up to the eyepiece
(1), you can rotate the tube by loosening the knob on the tube
clamp (5) and rotating the optical tube (3) until the focuser (4)
is in a convenient position.
When aiming the telescope in altitude, you may find that the
optical tube (3) is either too hard to move or does not stay in
place. Use the altitude adjustment tension knob (6) to
change the amount of tension between the tube clamp (5) and
the altazimuth base (8) to find the right level of tension to prop-
erly move and balance the telescope.
Figure 3.
The EZ Finder II securing thumbnuts.
WARNING:
Never look directly at the
Sun through your telescope or its finder
scope—even for an instant—without
a professionally made solar filter that
completely covers the front of the
instrument, or permanent eye damage
could result. Young children should use this
telescope only with adult supervision.