Assembly – RIDGID RD80770 User Manual
Page 12
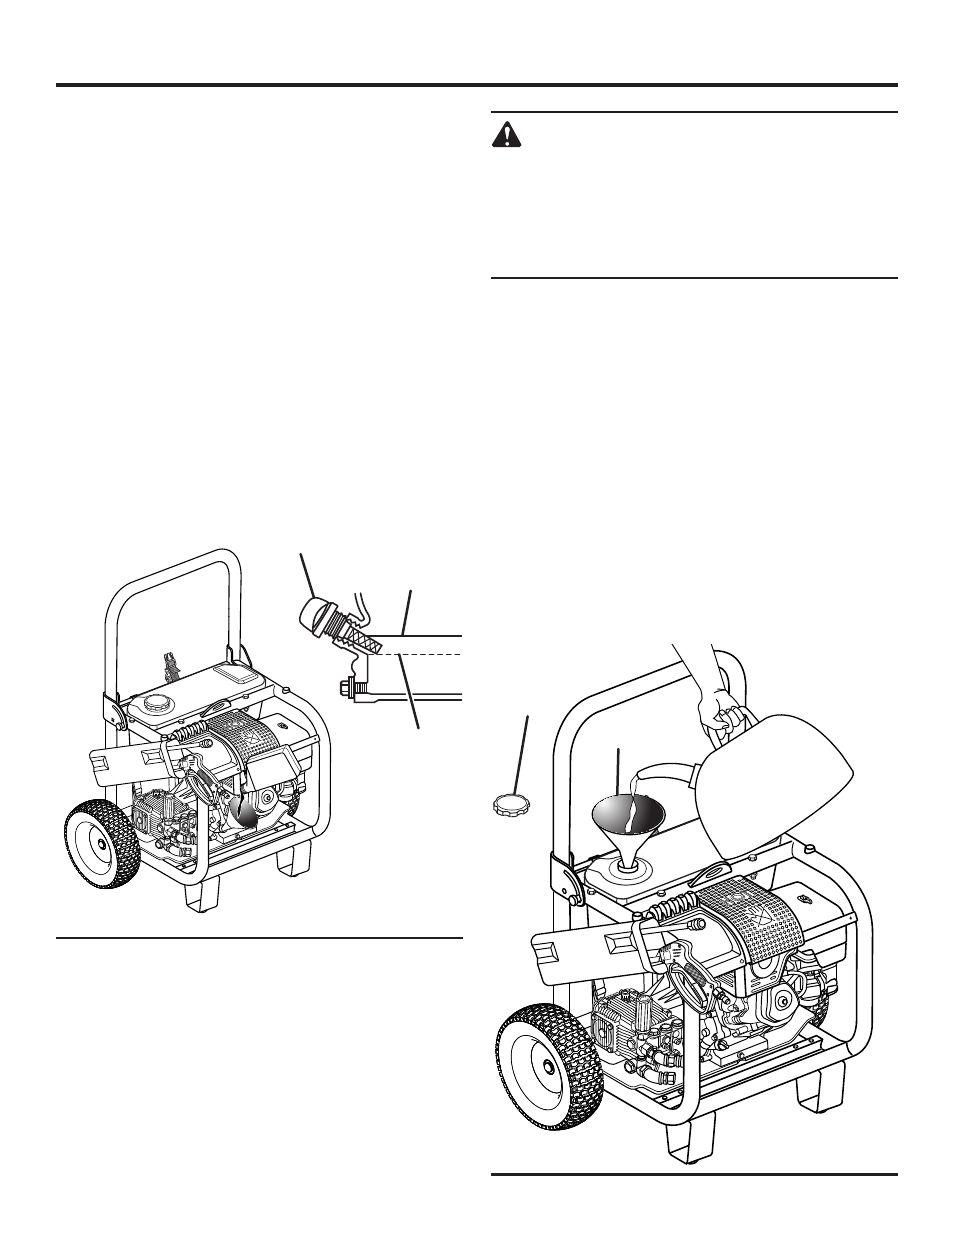
1
ADDING
LUBRICANT
TO THE ENGINE
See Figure 8.
NOTE: This machine has been shipped with approximately
oz. of
lubricant
in the engine from testing.
You must add
lubricant
to the engine before starting it the first time.
This engine comes with a feature that will shut off the en-
gine when a specific lubricant level is not maintained. The
engine will not restart until an appropriate lubricant level is
reached.
n
Place pressure washer on a flat,
level surface.
n
Unscrew the cap / dipstick by turning counterclockwise.
n
Using 4-stroke engine
lubricant
(10W30), fill to the upper
level of the
lubricant
filler neck (4-cycle engine
lubricant
provided).
n
Replace the cap / dipstick and securely tighten.
n
Clean up any spills before starting the engine.
NOTE: This engine has a total
lubricant
capacity of 3 oz.
(.95 liters). However, since a small amount of
lubricant
was
put in the machine at the factory, the entire bottle of
lubricant
may not be needed.
cap / dIpStIck
upper
leVel
lOwer
leVel
WARNING
Gasoline and its vapors are highly flammable and
explosive. To prevent serious personal injury and
property damage, handle gasoline with care. Keep
away from ignition sources, handle outdoors only,
do not smoke while adding fuel, and wipe up spills
immediately.
ADDING GASOLINE TO THE FUEL TANK
See Figure 9.
When adding gas to the pressure washer, make sure the unit
is sitting on a flat, level surface. If the engine is hot, let the
pressure washer cool before adding gas. ALWAYS fill the
fuel tank outdoors with the machine turned off.
NOTE: Use unleaded gas only. DO NOT mix
lubricant
with
gas.
n
Before removing the fuel cap, clean the area around it.
Remove the fuel cap.
n
Insert a clean funnel into the fuel tank then slowly pour
gasoline into the tank. Fill tank to approximately 1/ in.
below the top of the tank neck (this allows for fuel
expansion).
n
Replace fuel cap and tighten securely.
n
Clean up any spills before starting the engine.
fuel
cap
fuNNel
ASSEMBLY
Fig. 8
Fig. 9