Assembly – RIDGID RD80770 User Manual
Page 10
10
ASSEMBLY
Fig. 3
fraMe
SuppOrt
INSTALLING THE FRAME SUPPORTS
See Figure 3.
n
Locate the frame supports, hex bolts ( long and short),
and hex nuts.
n Raise the end of the pressure washer high enough to
acc
ess the frame bottom. Position blocks of wood under
the machine for support.
n
Align the hole on the frame support with holes on machine
frame.
n
Insert hex bolts through the hole in the machine frame
so that they pass through the frame support. Tighten the
bolts to the frame securely using hex nuts.
n
Repeat on other side.
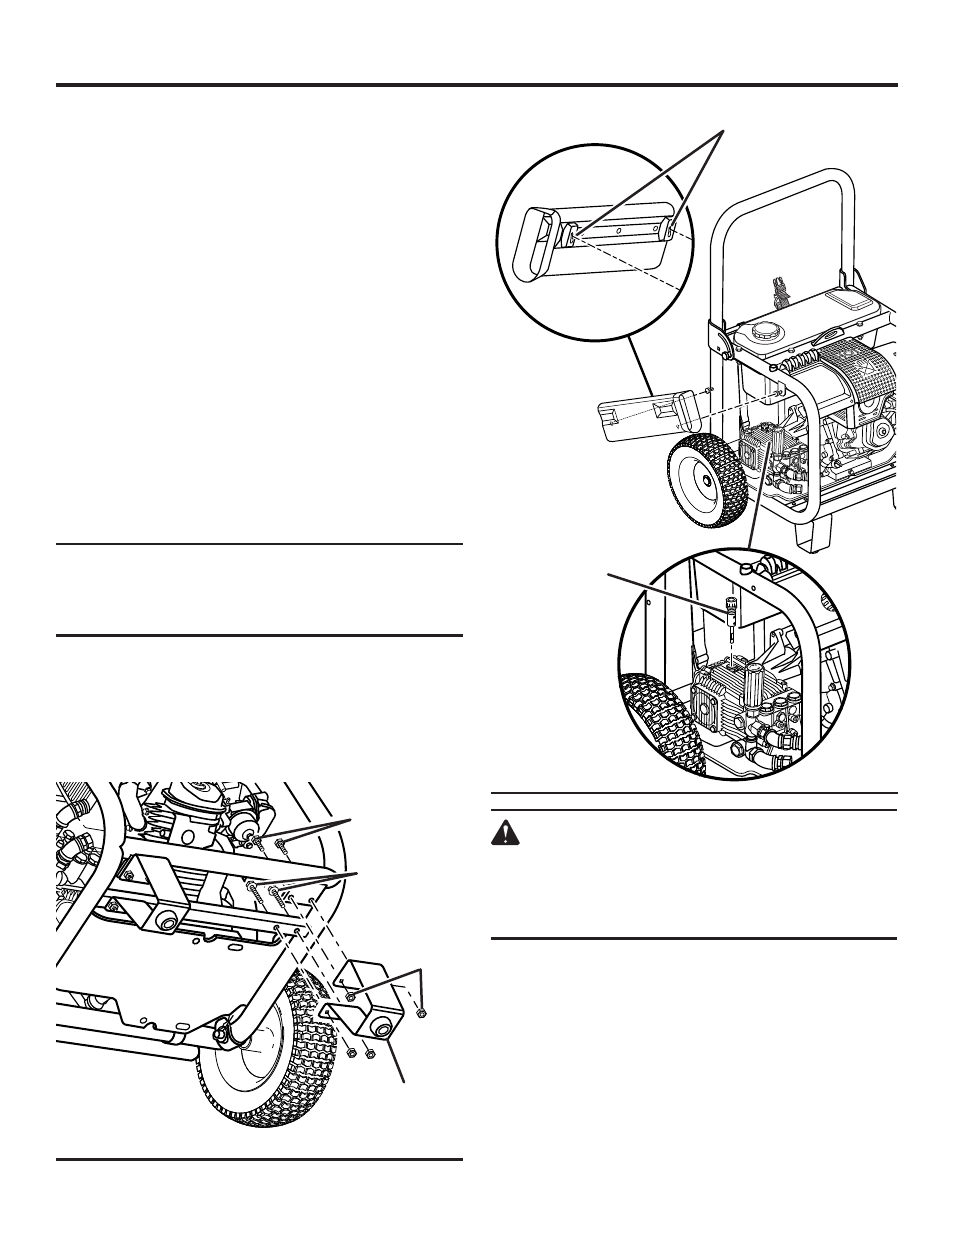
INSTALLING THE PUMP OIL CAP
See Figure 4.
Remove and discard the cap securing the plastic bag to the
oil pump. Remove the cap from the bag.
To install the pump oil cap:
Screw the pump oil cap into the hole covering the
lubricant
reservoir.
CAUTION:
Failure to install pump oil cap may result in
decreased pump life.
INSTALLING THE WAND STORAGE HOLSTER
See Figure 4.
Place key slots (on back of wand storage holster) over the
two bolts. Push the holster against the frame. When the bolts
are through the key slots, push the holster toward the floor.
Tighten the hex nuts.
heX NutS
heX bOltS
(ShOrt)
key SlOtS
heX bOltS
(lONG)
puMp
OIl cap
Fig. 4
WARNING:
Make sure the nozzle and hose connections are
secure before starting the machine. A non-secured
accessory could become a projectile if not properly
installed which could result in serious injury.
ASSEMBLING THE TRIGGER HANDLE
See Figure 5.
n
Place
the threaded end of the spray wand in the connec-
tor on the end of the trigger handle.
n
Turn the connector clockwise until it stops. This
secures
the spray wand in place.
n
When not in use, remove the spray wand from the trig-
ger handle by turning the connector counterclockwise.
Store the unassembled spray wand in the wand sto
rage
holster.