Filter assembly/replacement, Cord and hose storage – RIDGID WD4050 User Manual
Page 7
7
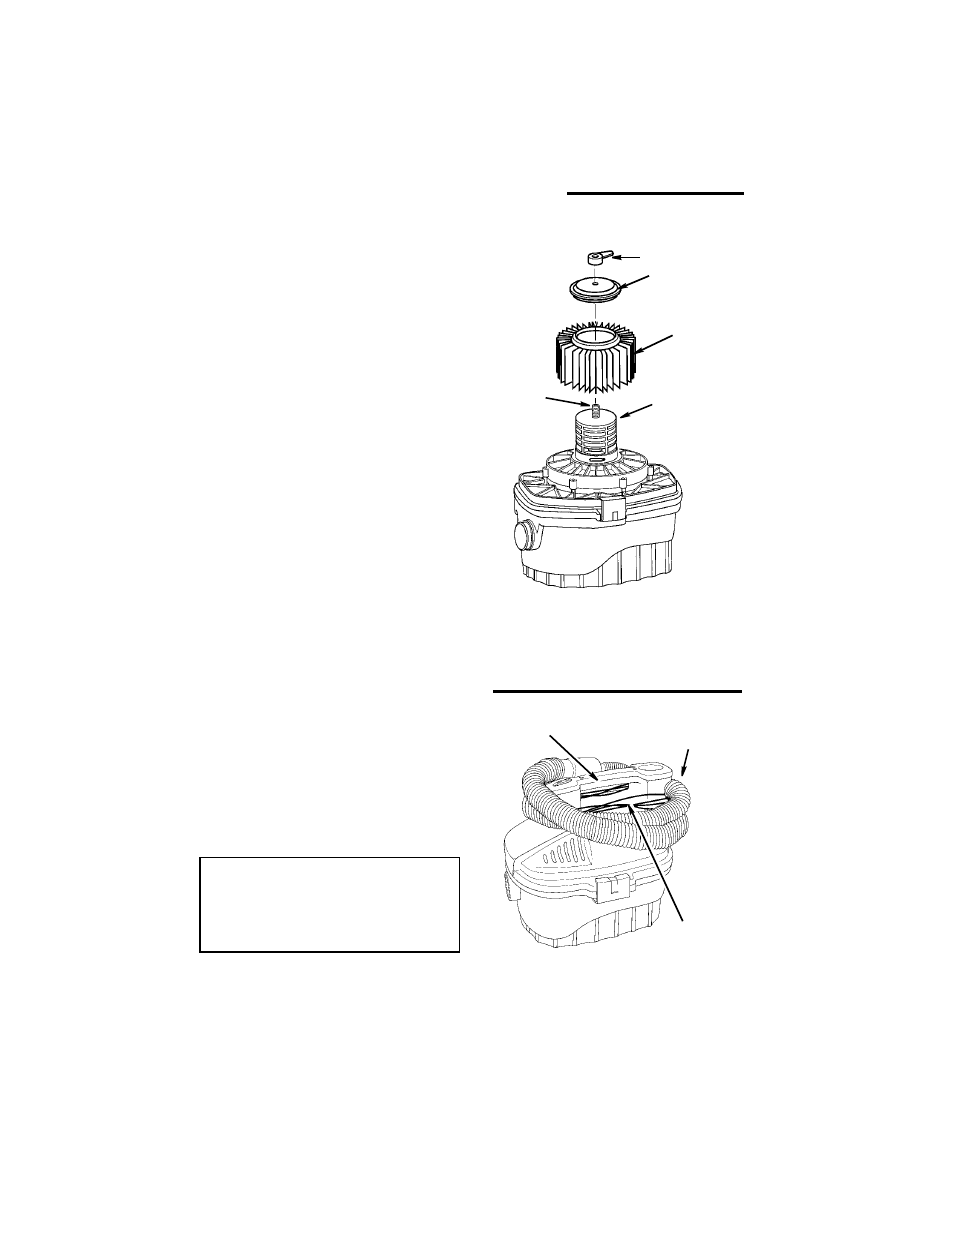
Filter Assembly/Replacement
1. Carefully slide the filter over the filter
cage, sliding filter down until it stops
against the lid.
2. Place the hole in the filter plate over
threaded screw of the filter cage.
3. Gently push on the filter plate to seat
the rubber ring of the filter inside the cir-
cular channel of the filter plate.
4. Place filter nut onto threaded screw and
tighten it down. Finger tighten only.
NOTE: Lever of filter nut should be away
from plate as shown.
IMPORTANT: Do not overtighten as this
may deform or crack the filter plate, filter
cage or filter.
5. To assemble the power head to the
drum, position power head over drum,
with drum latches lined up with recess
in drum. (The power head will only fit
on the drum one way).
6. Push down on the power head and lis-
ten for the drum latches to “snap” in
place.
7. Your vac is now ready to use. Read the
instructions on the following pages to
operate your vac safely.
Cord and Hose Storage
1. Your vac has a convenient area to store
your power cord and vac hose.
2. Wrap the power cord around the top of
the handle on the vac and attach the
end of the plug to the cord.
3. Wrap the hose around the vac as
shown and place the small swivel end
inside the larger one.
CAUTION: A partially unwrapped
cord may fall in coils near your feet.
You could trip. To reduce the risk of
this, always fully unwrap the cord
before plugging it in.
Filter Nut
Filter Plate
Filter Cage
Threaded
Screw
Filter
Handle
Power
Cord
Hose Storage
Area